background image

I . C .   N O T I C E   [ 7 0 ]

w w w . u n i d e n . c o m

I.C. Notice

RADIO EQUIPMENT

The term "IC:" before the radio certification number only signifies that Industry Canada technical specifications were 
met.

Operation is subject to the following two conditions: (1) this device may not cause interference, and (2) this device 
must accept any interference, including interference that may cause undesired operation of the device. "Privacy of 
communications may not be ensured when using this telephone".

I.
C
.

 N

O
T
I

C
E

Summary of Contents for UIP1868P

Page 1: ...UIP1868P OWNER S MANUAL ...

Page 2: ...the Ringer and Earpiece and Speaker Volume 34 Muting the Ringer 35 Muting the Microphone 36 Traveling Out of Range 36 Privacy Mode 37 Conferencing 37 Find Handset 38 Using One Touch Voice Mail Access 39 PHONEBOOK 40 Setting up the Phonebook 40 CALLER ID 48 Caller ID and CIDCW 48 MULTI HANDSET FEATURES 52 Multi Handset Features 52 Using DirectLink Mode 52 Using the Room Baby Monitor 54 Using the In...

Page 3: ... in this manual are used for explanation purposes Some illustrations in this manual may differ from the actual unit 5 8GHz Digital Expandable Corded Cordless Telephone System Dual Keypad and LCD Screen at Base Ten Multi Handset Expandability Hands Free Duplex Speakerphone in the Handset and Base Caller ID Call Waiting Deluxe Subscribe through Service provider 100 Programmable Memory Locations in t...

Page 4: ...standard digital transmissions The result is a more secure conversation with the clarity of digital sound extended range and minimal interference from other cordless phones IntegriSound Built in sound quality which provides life like conversations With DirectLink mode you can use two or more handsets as radio tranceivers walkie talkies Be sure to visit our web site www uniden com Uniden is a regis...

Page 5: ...e base has not been pressed No dial tone is present Talk Mode The handset is off the cradle and talk flash or speaker has been pressed or pick up the corded base handset and speaker on the base is pressed and enabling a dial tone VoIP Voice over Internet Protocol a method of sending voice signals over broadband Internet connections Station The main base or any registered handset T E R ...

Page 6: ...Handset Earpiece 7 LCD Display 8 soft Keys P 19 9 vol volume up down P 34 21 10 tone P 51 41 11 speaker P 30 12 intcom hold P 55 32 13 Headset Jack Cover 14 talk flash P 30 32 15 end P 32 16 cid P 49 17 P 51 41 18 phonebook P 40 19 Handset Microphone 20 Handset Charging Contacts 2 1 4 3 5 6 7 8 9 10 11 12 19 20 14 17 18 15 16 13 C O F U ...

Page 7: ...P 40 22 In use LED 23 New Message LED 24 call id P 49 25 Corded Base Handset 26 Base Speaker 30 do not disturb DND LED P 35 31 tone P 51 41 32 LCD Display 33 vol volume up down P 34 21 34 soft Keys P 19 38 exit P 21 39 mic microphone 40 P 51 41 41 VoIP1 port 42 WAN port 43 LAN port C O F U ...

Page 8: ...on these wires when the equipment is powered on The plug socket combination must be accessible at all times because it serves as the power disconnect To avoid electric shock do not connect the UIP1868P to any RJ 11 telephone wall jacks Use caution when connecting cables This could damage the UIP1868P or the telephone wiring in the building Do not work on the system or connect or disconnect cables ...

Page 9: ...ent you will need A broadband modem and a broadband Internet connection A computer with an Ethernet port or a local Ethernet switch or router One CAT 5 Ethernet cable The Packet8 10 digit activation code that was emailed to you when you created your account If you don t have this email go to www packet8 net and enter the email address and password used to create the account in the account sign in ...

Page 10: ...nd password in the UIP1868P If your broadband provider has given you a static IP address you will need to enter that information in the UIP1868P For more information on configuring your UIP1868P visit http www uniden com voip STEP 2 Connect Your UIP1868P Once your account is set up you can connect your UIP1868P 1 Use the coil cord to connect the corded handset to the base 2 Use the included Ethern...

Page 11: ... the LAN port instead 4 OPTIONAL If you have a second phone you want to use for line 1 connect it to VoIP1 CAUTION You can also connect a wireless access point to the LAN port if desired VoIP1 is not a separate line Any phone connected to VoIP1 will share VoIP line 1 with all the UIP1868P s cordless handsets note G E T T I N G S T A R T E D ...

Page 12: ...set and browsing to a web page from your PC If you have any difficulty see the Troubleshooting section Step 3 Activate your Packet8 Service Once you have connected your UIP1868P you can activate your Packet8 service You will need your 10 digit activation code that was sent to you by email when your Packet8 order shipped You can also obtain your activation code at www packet8 net by signing in at y...

Page 13: ...ors to the polarity label in the battery compartment connect the battery and listen for a click to insure connection 3 Make sure you have a good connection by slightly pulling on the battery wires If the connection is secure the battery jack will remain in place 4 Place the battery case cover back on the handset and slide it upwards until it clicks into place Use only the Uniden BT 446 rechargeabl...

Page 14: ...the charger with the keypad facing forward 3 Make sure that the charge LED illuminates If the LED does not illuminate check to see that the AC adapter is plugged in and the handset makes good contact with the base charging contacts 4 Charge the handset battery pack for at least 15 20 hours before using your new cordless handset for the first time For maximum range Keep the antenna free of obstruct...

Page 15: ...ercom call without interfering with incoming calls It is possible to have a 4 way conference among the base two handsets and one outside line All of the handsets ring when a call is received Backwards Forwards Compatibility Your phone is compatible with other Uniden 5 8GHz Digital Expandable Handsets Compatible models include the TCX805 ELX500 TCX400 and TCX440 Please check www uniden com for an u...

Page 16: ...low 1 Make sure the main base is in standby mode 2 On the base press the MENU soft key and then select HS Registration 3 On the handset press and hold for two seconds To cancel registration press the CANCEL soft key on the base 4 While the handset is registering Handset Registering will appear in the Handset LCD When Registration Complete is displayed the handset has been registered to the base If...

Page 17: ...e code is not necessary In the rare situation that you suspect another cordless telephone is using the same security code you can change the code by de registering and re registering all handsets 1 On the handset press the MENU soft key Select Deregister HS in the menu and press the OK soft key Deregister HS appears 2 Press volume up down to select Yes and then the OK soft key When de registration...

Page 18: ... the beltclip to release the tabs from the holes Headset Installation Your cordless handset may be used with an optional headset To use this feature insert the headset plug into the headset jack Your phone is ready for hands free conversations Headsets may be purchased by calling the Uniden Parts Department or visiting the web site See back cover page G E T T I N G S T A R T E D ...

Page 19: ...ed off Talk The Mute icon appears when you mute the handset or base Talk The Speaker icon appears when the handset speaker phone is used handset only Talk The Privacy icon appears when the Privacy Mode is turned on 570 CPFUGV 0GY 4 07 Ringer off icon when the ringer is off day of the week and time battery icon Handset ID and Banner Number of new Caller ID calls received If there are no new Caller ...

Page 20: ...arging The function of each soft key is determined by the icon that appears directly above it For example when the handset is in standby mode pressing soft key 1 will redial the last number When the handset is in talk mode pressing soft key 1 will mute the microphone Complete information on the features controlled by the soft keys can be found under each feature In standby mode Handset Base In tal...

Page 21: ...et from the factory match the features that most people use You may not need to change them However there are a number of options you must set and entries you must make in memory to take full advantage of all the phone features The table below lists the default settings Function Handset Base Function Handset Base Edit Voice Mail None Contrast level 5 Ringer Tones Flicker Key Touch Tone On Distinct...

Page 22: ...y to make a selection Press the BACK soft key to return to the previous screen Press end on the handset or exit on the base to exit the menu If you do not press a key within 30 seconds the phone will time out and exit the menu mode When setting Day and Time the time out period is extended to two minutes KTGEV KPM QFG 4QQO QPKVQT CPFUGV 5GVWR 1 Handset 4QQO QPKVQT CUG 5GVWR NQDCN 5GVWR 1 Base G E T...

Page 23: ...et Home Hm Swt Hm Lorri Song 6 Lorri Song When the Irish Eyes Are Smiling Irish Eyes Aura Lee Let Me Call You Sweet Heart Sweetheart Star Spangled Banner Star Spngl Old MacDonald Old MacDld You must set a separate ringer tone on each handset 1 Press the MENU soft key Select the Handset Setup menu and then the Ringer Tones submenu 2 Press volume up down to move the pointer You will hear the ringer ...

Page 24: ...isables distinctive ringing all incoming calls will have a normal ring tone Switching to Distinctive On activates all programmed distinctive ring memory locations 1 Press the MENU soft key Select the Handset Setup menu and then the Distinctive Ring submenu 2 Press volume up down to select On or Off 3 Press the OK soft key You will hear a confirmation tone Setting AutoTalk Handset Only Autotalk all...

Page 25: ... True Banner lets you customize the name your handset displays The name will be displayed on the LCD screen during Standby Mode Intercom Intercom Hold Room Monitor and Copy Phonebook operation The banner name will be displayed on the receiving handset as well 1 Press the MENU soft key Select the Handset Setup menu and then the Banner submenu 2 Use the number keypad 0 9 tone or the DELETE soft key ...

Page 26: ...glish Français French or Español Spanish 3 Press the OK soft key You will hear a confirmation tone Adjusting the LCD Contrast Contrast adjusts the handset LCD brightness Choose one of the ten levels for optimum viewing 1 Press the MENU soft key Select the Handset Setup menu or the Base Setup menu and then the Contrast submenu 2 Press volume up down to adjust the contrast of the LCD ten levels CPIW...

Page 27: ...tone Setting the Animation Screen Handset Only The Animation Screen displays animation on the handset LCD The animations will be displayed on the LCD screen during a call ringer volume setting paging operation when you hang up and so on 1 Press the MENU soft key Select the Handset Setup menu and then the Animation Screen submenu 2 Press volume up down to select On or Off 3 Press the OK soft key Yo...

Page 28: ...Confirmation Done Making a Call Find Paging Handset Deleting Deleted Also the animation display changes depending on the ringer volume setting Out of Range Unavailable Low Battery 9GNEQOG 2NGCUG 9CKV QPG PF 4 07 2CIKPI GNGVGF 6CNM 76 24 8 4KPIGT 8QNWOG 4 07 4KPIGT 8QNWOG 4 07 4KPIGT 8QNWOG 4 07 1WV 1H 4CPIG 7PCXCKNCDNG QY CVVGT G E T T I N G S T A R T E D ...

Page 29: ...enu and then select Day Time 2 Press volume up down to select the day of the week and then the soft key 3 Press volume up down to set hour and then press the soft key 4 Press volume up down to set minute and then press the soft key 5 Press volume up down to choose AM or PM and then press the SAVE soft key You will hear a confirmation tone C 6KOG 10 5 8 The Dial Mode setting is pre configured to su...

Page 30: ...umber in the Area Code option your local area code does not appear in the Caller ID message For calls received from outside your local area code you will see a full 10 digit number 1 With the phone in Standby mode press the MENU soft key Select the Global Setup menu and then the Area Code submenu 2 Press the number keypad 0 9 to enter a 3 digit area code 9 9 1P 9 1P 9 1P 9 1HH 6 1 TGC QFG 㨫AA 6 1 ...

Page 31: ...ove the handset from the cradle 2 Press talk flash 3 Listen for the dial tone 4 Dial the number OR 1 Remove the handset from the cradle 2 Dial the number If pause is required press the PAUSE soft key P appears in the display which represents a pause 3 Press talk flash From the Handset Speakerphone If the line is in use by another station Line In Use appears in the display of all other stations The...

Page 32: ...m the handset 1 Remove the handset from the cradle If AutoTalk is on the phone will automatically answer the call when you pick it up 2 Press talk flash OR If the handset is off the cradle press talk flash If AnyKey answer is turned on you can also press any key To set Autotalk see page 23 or to set Anykey Answer see page 24 The base microphone is located under the base Position yourself as near t...

Page 33: ...tch from a speakerphone call to a normall call press speaker again Call Waiting If a call waiting tone sounds while you are on a call press talk flash on the handset or flash on the base to accept the waiting call There is a short pause and then you will hear the new caller To return to the original caller press talk flash on the handset or flash on the base again Placing a Call on Hold 1 During a...

Page 34: ...e base The selected number is dialed 4 To hang up press end or return the corded base handset to the base or press speaker on the base For the base you can also redial the last number dialed with the phone in talk mode Press the REDIAL soft key 4GFKCN 6 6 6 5614 4GFKCN 5614 4GFKCN 5614 vol or vol vol or vol You can place a call on hold for five minutes When five minutes has passed the call is disc...

Page 35: ...on a normal call The new volume setting remains in effect after the telephone call has ended Speaker Volume The handset speakerphone provides six volume levels the base speakerhone provides ten volume levels To adjust the volume press the volume up to increase the volume or volume down to decrease the volume while you are on a speakerphone call The new volume setting remains in effect after the te...

Page 36: ...feature press do not disturb again You can also mute the ringer tone while the phone is ringing by pressing do not disturb on the base Temporarily Muting the Ringer To mute the ringer tone temporarily on a single station press the MUTE soft key on that station while the phone is ringing The mute will last for the current incoming call only The ringer tone will return to the previous setting on the...

Page 37: ...appears On the base During a call press mute to mute the base microphone Mute On and appear in the display To cancel muting press mute again or press speaker Mute Off appears Traveling Out of Range During a call as you begin to move your handset too far from your base noise may increase If you pass the range limits of the base you will hear a beep and see Out of Range on the display and then the h...

Page 38: ...hen you hange up To exit Privacy Mode and stay on the call press the PRIVACY soft key again when the Privacy Mode is on Privacy Mode Off appears Conferencing If you have more than one handset up to four people can participate in a conference call 3 Way Conferencing Outside line Handset Base or Handset 4 Way Conferencing Outside line Handset Handset Base Joining a Conference Call You can easily joi...

Page 39: ...call 2 To hang up press end or return the handset to the cradle The other station will still be connected to the call Find Handset To locate a handset press find handset on the base when the phone is in standby mode All registered handsets beep for 60 seconds and Paging appears on the handset display To cancel paging press any key on the handset or find handset on the base If the battery pack is c...

Page 40: ...essages the New Message LED will flash To retrieve your messages simply press the soft key If you have not entered the access number or it has been deleted when you press the the soft key No Number Stored To store number press MENU appears and you will hear a beep The phone returns to standby mode Resetting the New Message LED If the LED remains on after you ve retrieved your messages you may need...

Page 41: ...new phonebook entry The memory locations in the handset are not limited to phone numbers You can also store a group of numbers up to 20 digits that you need to enter once your call connects Storing and Editing Phone Numbers Names Distinctive Rings and Speed Dial 1 When the phone is in standby mode press phonebook The following items appear 1st line The number of the phonebook locations used 2nd li...

Page 42: ... case letters next and finally the number corresponding to the key For example to enter Movies 1 Press 6 once and then press to move the cursor to the right 2 Press 6 six times 3 Press 8 six times 4 Press 4 six times 5 Press 3 five times 6 Press 7 eight times If you make a mistake while entering a name Use tone or to move the cursor to the incorrect character Number of times key is pressed P H ...

Page 43: ...a distinctive ring for this entry choose No Selectn 7 Speed Dial appears Use volume up down to select a Speed dial number 10 number SPD1 SPD0 If you don t want a speed dial number for this entry choose No Selectn 8 Press the OK soft key You will hear a confirmation tone and Done appears in the display 5VQTG FKV 0Q 㨫 6 2 75 1 KUVKPEVKXG 4KPI 0Q 5GNGEVP NKEMGT 6 1 5RGGF KCN 0Q 5GNGEVP 52 ORV 6 1 QXK...

Page 44: ... follow the steps 3 8 in Storing and Editing Phone Numbers Names Distinctive Rings and Speed Dial on page 40 Storing a Redial Record Handset only 1 With the phone in standby mode press the REDIAL soft key 2 Use volume up down to select the number to be stored 3 Press STORE Store Edit Name appears 4 To complete the setting follow the steps 3 8 in Storing and Editing Phone Numbers Names Distinctive ...

Page 45: ...e letters on the number keys to select the first letter of the desired name Press a number key 2 9 and 0 once for the first letter twice for the second letter and so on The first location that begins with the letter you entered appears For example to search for an entry starting with M press 6 once Press volume up down until the phonebook entry is displayed 3 To finish the viewing operation From t...

Page 46: ...ss speaker on the base or return the corded handset to the base From Talk Mode 1 Press talk flash or speaker on the handset or press speaker or pick up the corded handset from the base 2 Select the phonebook location to dial see Viewing the Phonebook on page 44 3 Press the DIAL soft key 4 To hang up press end on the handset or press speaker on the base or return the corded handset to the base Spee...

Page 47: ...IT soft key To delete the entry press the DELETE soft key 4 If you are deleting the entry press volume up down to select Yes and then press the OK soft key you will hear a confirmation tone and Deleted appears in the display If you are editing the entry follow the steps 3 to 8 under Storing and Editing Phone Numbers Names Distinctive Rings and Speed Dial on page 40 to complete the editing operatio...

Page 48: ...the OK soft key If you select All Memory Are you sure appears on the display screen Press volume up down to select Yes and then press the OK soft key If you select One Memory select the phonebook entry you want to export and then press the COPY soft key 5 Copying and name of the receiving station appear in the display When the transfer is completed Done appears on 6Q YJKEJ WPKV CPFUGV CPFUGV 6 1 Q...

Page 49: ... message to store the new message When the Caller ID message is received the display shows the caller s phone number along with the date and time The incoming call information is stored in the Caller ID record If the Caller ID service includes the caller s name the name will appear in the display up to 15 characters 2 CPG 5OKVJ 6 5614 The date and time received Caller s name Caller s phone number ...

Page 50: ...ary screen appears The screen shows the number of new messages and total messages 2 To view the Caller ID messages in historical order use volume down to scroll through the messages starting with the most recent message or volume up to scroll through the messages starting with the oldest message To jump to Caller ID messages beginning with a particular letter press the number CNNGT 0GY 6QVCN 6 The...

Page 51: ...he Caller ID information you want to delete see Viewing the Caller ID List on page 49 2 Press the DELETE soft key Delete Caller ID appears 3 Press volume up down to select Yes and then press the OK soft key 4 You will hear a confirmation tone Deleting all Caller ID names numbers 1 When the phone is in standby mode press cid or call id 2 Press the DELETE soft key Delete All appears GNGVG CNNGT GU 0...

Page 52: ... speaker on the base or pick up the corded handset The displayed phone number dials automatically Talk mode 1 Press talk flash or speaker on the handset or speaker on the base or pick up the corded handset 2 Select the Caller ID message you want to dial see Viewing the Caller ID List on page 49 3 Press the DIAL soft key The displayed phone number will be dialed 2 CPG 5OKVJ 6 5614 When a long dista...

Page 53: ...st set both handsets to DirectLink Mode to make a directlink call To use this feature you must enter the handsets into DirectLink mode first 1 Press the MENU soft key and select DirectLink Mode menu To enter DirectLink mode press ENTER appears 2 Press the ENTER soft key to enter DirectLink mode You will hear a confirmation tone and DirectLink Mode Complete appears 6Q GPVGT KTGEV KPM OQFG RTGUU 06 ...

Page 54: ...ress talk flash the ANSWER soft key or if Any Key Answer is on press any number key tone or 4 When you finish your conversation press end or the END soft key on either handset To cancel DIrectLink mode and return to standby return the handset to the cradle or press the CANCEL soft key and then OK soft key 570 CPFUGV KTGEV KPM QFG 0 KTGEV KPM 6Q KTGEV KPM C JCPFUGV RTGUU KTGEV KPM CPFUGV 0 MULTI HA...

Page 55: ... you want to monitor by using volume up down 3 Press the OK soft key RoomMonitor appears and you hear sounds in the room where the handset or the base is installed 4 To turn off the Room Monitor press the END soft key or end Monitor using handset or base unit 4QQO QPKVQT 㨬㨭 CPFUGV 0 This feature only works when the handset s is within the range of the base If the party is out of range Unavailable ...

Page 56: ...he phone in standby mode press intercom hold on the base 2 Use vol or vol to select the station you want to page and then press the OK soft key If you select All all other handsets will be paged An intercom tone sounds If any of the following things occurs the intercom operation will be canceled and the phone will return to standby You press the CANCEL soft key The called station is busy or out of...

Page 57: ...t press the END soft key or return the handset to the cradle From the Base press the END soft key or return the corded handset to the base Transferring a Call You can transfer a call between two stations From a handset 1 During a call press intcom hold on the handset The call will be put on hold 2 Use vol or vol to select the station you want to transfer the call to and then press the OK soft key ...

Page 58: ...page from a handset 1 Pick up the handset from the cradle If AutoTalk is enabled the handset automatically answers when you pick it up 2 Press talk flash intcom hold or the ANSWER soft key To answer a page from the base Pick up the corded base handset To answer with the base speakerphone press intcom hold speaker or the ANSWER soft key Accepting the call transfer After answering the page if you wa...

Page 59: ...e Contact Packet8 customer service at 1 888 898 8733 or visit www packet8 net support If you can questions about using your VoIP service features Contact Packet8 customer service at 1 888 898 8733 or visit www packet8 net support If you have questions on how to use your phone add extra handsets program the phonebook etc Contact Uniden customer service at 800 554 7331 Monday Friday 8 am to 5 pm CST...

Page 60: ...on or not recognized by the Call Agent NA LAN The UIP1868P detects a valid link on its LAN port The UIP1868P cannot detect a valid link The UIP1868P is receiving data on its LAN port WAN The UIP1868P detects a valid link on its WAN port The UIP1868P cannot detect a valid link The UIP1868P is receiving data on its WAN port PWR Power Status LAN Status WAN Status Call Agent Status Line 1 Status CA LA...

Page 61: ...uration file Hard Reset A hard reset restores the UIP1868P to factory defaults All configuration changes will be lost A Unplug the UIP1868P s AC adapter B Insert a pin or bent out paper clip into the RESET hole on the rear of the UIP1868P and push the reset button C While holding the reset button pushed in reconnect the UIP1868P s AC adapter D Hold the reset button for ten seconds and then release...

Page 62: ...local area reset does not restore connectivity see Common Issues below Logging into the UIP1868P If you need to configure the UIP1868P s router features or check settings while troubleshooting you can log into the UIP1868P directly from your web browser A Make sure your computer is directly connected to the UIP1868P s LAN port B Open an Internet Explorer browser window C In the address line of the...

Page 63: ...the UIP1868P s WAN port 2 Securely connected to your modem s LAN port 3 Free of any frays loose connectors or other visible defects The UIP1868P doesn t have a valid IP address Login to the UIP1868P and check the WAN Status screen 1 Making sure the UIP1868P is configured for DHCP or PPPoE if your ISP uses DHCP or PPPoE OR 1 Making sure the first three parts of the UIP1868P s IP address match you I...

Page 64: ...and subnet mask are on a different network than the UIP1868P s 1 Making sure the first three parts of your computer s IP address match the UIP1868P s IP address and the fourth part is different 2 Making sure your computer s subnet mask exactly matches the subnet mask of the UIP1868P The UIP1868P is not the default gateway for your computer 1 Making sure your computer s default gateway address is s...

Page 65: ...eless microphones alarm systems intercoms room monitors fluorescent lights and electrical appliances Move to another location or turn off the source of interference Caller ID does not display The handset was picked up before the second ring The call was placed through a switchboard Contact your service provider to verify the Caller ID settings You cannot register the handset at the base Charge the...

Page 66: ...rts Department for a replacement battery Warning To avoid the risk of personal injury or property damage from fire or electrical shock only use the Uniden battery model and Uniden adapter model specifically designated for this product Caution Use only the specified Uniden battery pack BT 446 Do not remove the batteries from the handset to charge them Never throw the battery into a fire disassemble...

Page 67: ...adle Cleaning the battery charging contacts To maintain a good charge clean the charging contacts on the handset once a month Dampen a cloth with plain water Gently rub the damp cloth over the charging contacts until all visible dirt is removed Dry the contacts thoroughly before returning the handset to the charging cradle Caution Do not use paint thinner benzene alcohol or other chemical products...

Page 68: ...ge to the phone use only Uniden AD 1002 and BT 446 and AD 0005 with your phone If the handset is left off of the base the actual Talk mode duration will be reduced respective to the amount of time the handset is off the base Recharge your phone on a regular basis by returning the handset to the charger after each phone call When the operating time becomes short even after the battery is recharged ...

Page 69: ... cover off and the battery pack disconnected for at least 3 days 4 Once the handset is completely dry reconnect the battery pack and the battery cover 5 Recharge the handset s battery pack for 20 hours before using again Base 1 Disconnect the AC adapter from the base unit cutting off electrical power 2 Disconnect the telephone cord from the base unit 3 Let dry for at least 3 days IMPORTANT You mus...

Page 70: ...uct has been tested and found to comply with the FCC s exposure criteria For body worn operation the FCC RF exposure guidelines were also met when used with the Uniden accessories supplied or designed for this product Use of other accessories may not ensure compliance with FCC RF exposure guidelines and should be avoided One Year Limited Warranty Important Evidence of original purchase is required...

Page 71: ... specifications were met Operation is subject to the following two conditions 1 this device may not cause interference and 2 this device must accept any interference including interference that may cause undesired operation of the device Privacy of communications may not be ensured when using this telephone I C N O T I C E ...

Page 72: ...ck 28 Conferencing 37 Contrast 25 Copying phonebook 47 G General information 67 H Headset installation 17 Hold 32 I I C notice 70 Intercom 55 K Key touch tone 26 L Language 25 Liquid damage 68 M Making a call 30 Mute 36 P Phonebook Making calls 45 Viewing 44 Precautions 69 Privacy Mode 37 R Receiving a call 31 Redialing a call 33 Ringer Adjusting 34 Handset 12 22 Menu options 21 Soft Key 19 Speed ...

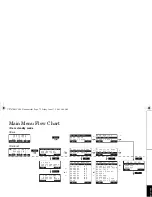
Page 73: ...R 1 6Q GPVGT KTGEV KPM OQFG RTGUU 06 4 06 4 CPFUGV CPFUGV CUG CPFUGV CPFUGV CPFUGV CPFUGV CPFUGV 6Q 4QQO QPKVQT CPFUGV CPFUGV 1 0 5 6 5 672 QPVTCUV G 6QWEJ 6QPG PKOCVKQP 5ETGGP P MG PUYGT CPPGT CPIWCIG 4KPIGT 6QPGU KUVKPEVKXG 4KPI FKV 8QKEG CKN WVQ 6CNM 1 CPIWCIG QPVTCUV FKV 8QKEG CKN 5 5 672 1 570 CPFUGV KTGEV KPM QFG 0 KTGEV KPM 570 0GY 4 07 Base Handset MENU or MENU OK OK Enter or OK OK OK or U...

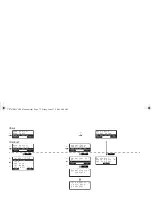
Page 74: ...1 CPFUGV 5GVWR NQDCN 5GVWR GTGIKUVGT 5 1 GTGIKUVGT 5 GU 0Q 1 GTGIKUVTCVKQP QORNGVG 1 2NCEG JCPFUGV QP OCKP DCUG VQ TGIKUVGT 4 07 Base Handset or or OK OK OK CUG 5GVWR 5 4GIKUVTCVKQP 1 NQDCN 5GVWR 1P JCPFUGV RTGUU JQNF MG HQT UGE 0 OK M AI N M E N U F LO W CH A RT UP747BH CH10 Flowchart fm Page 73 Friday June 17 2005 9 46 AM ...

Page 75: ...ebook etc Contact Uniden customer service at 800 554 7331 Monday Friday 8 am to 5 pm CST or visit the Uniden website at www uniden com for documentation FAQs and troubleshooting tips Need a Part To order headsets additional handsets replacement batteries or other accessories visit our website at www uniden com or call 1 800 554 3988 Mon Fri 8 a m to 5 p m CST Help for our Special Needs Customers I...

Page 76: ...N PRODUCT AY ...

Reviews: