background image

  [34]

Adjusting the Earpiece and Speaker Volume

Base Speakerphone:

 You can select eight different volume levels for the base speaker. To adjust the base 

speaker volume while on a call, press 

[select/ ]

 (to make it louder) or 

[select/ ] 

(to make it softer). This 

setting will remain in effect after the telephone call has ended.

Base Corded Handset:

 You can select the earpiece volume from among four volume levels. To adjust the  

earpiece volume of corded handset while on a call, press 

[select/ ]

 (to make it louder) or 

[select/ ]

 (to 

make it softer). This setting will remain in effect after the telephone call has ended.

Cordless Handset: 

You can select the earpiece volume from among four volume levels. To adjust the 

earpiece volume of cordless handset while on a call, press 

[volume/ /+]

 (to make it louder) or 

[volume/ /-]

 (to make it softer). This setting will remain in effect after the telephone call has ended.

Temporarily Muting the Base Ringer 

To mute the ring tone temporarily for the base, when the phone is ringing, press 

 ] 

(play/stop) on the 

base. The mute will last for the current incoming call only. The ring tone will return to the previous setting 
starting with the next incoming call.

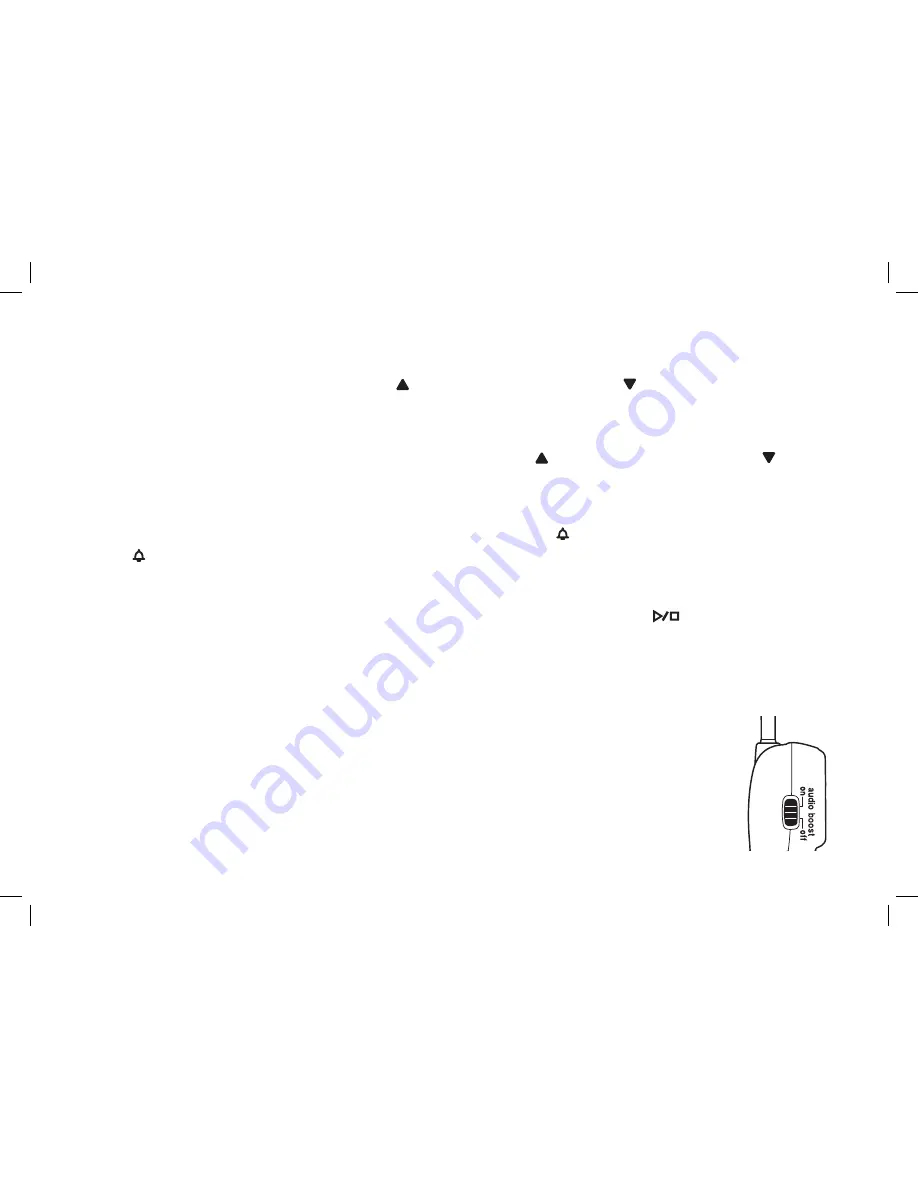
Audio Boost for the Cordless Handset

This feature allows you to hear phone conversations more clearly by boosting the high 
audio frequency tones.
To set audio boost on, slide the 

audio boost


on/off

 switch upward. BOOST ON appears 

on the handset display under the volume setting when you start a call. To set audio boost 
off, slide the 

audio boost


on/off

 switch downward.

USING YOUR 

PHONE

SSE17+1 OM.indb   34

SSE17+1 OM.indb   34

15/7/08   12:08:39 PM

15/7/08   12:08:39 PM

Summary of Contents for SSE17+1

Page 1: ...SSE17 1 SSE17 1 OM indb I SSE17 1 OM indb I 15 7 08 12 08 14 PM 15 7 08 12 08 14 PM...

Page 2: ...D Contrast 19 Name Tag 20 Insert 0 20 Setting Caller ID on Call Waiting CIDCW Base only 21 Setting AutoTalk Handset only 21 Emergency Dialing From the Base Cordless Handset 22 One touch Speed Dialing...

Page 3: ...48 Turning your Answering System On Off 48 Reviewing Messages 49 Screening Calls 50 Remotely Operating Your Answering Machine 50 Maintenance 52 Specifications 52 Power Failure 52 Battery Life 53 Low...

Page 4: ...ve calls during a power failure In addition to the corded base your new phone has a full featured cordless handset and charger that can be placed anywhere in your home where you have AC power and it d...

Page 5: ...while on another call Corded Handset on the Base A handset connected to the Base It can make and receive calls during a power failure Emergency Dial One touch speed dial key for your most important o...

Page 6: ...s Handset 3 One touch Speed Dial Numbers in the Base 10 Speed Dial Numbers in the Cordless Handset Ringer Volume Control Earpiece Volume Control Audio Boost for the Cordless Handset Hearing Aid Compat...

Page 7: ...p key 12 repeat rewind key 13 skip forward key 14 Coiled cord 15 delete key 16 on off key answer on off light 17 greet key 18 flash key 19 page hold key 20 redial pause key 21 Base Emergency key 22 me...

Page 8: ...9V jack 33 phone jack 34 Base antenna 35 Wall mount adapter 28 29 30 31 32 33 34 35 28 ringer tone button 29 ringer on off switch 30 Coiled cord jack 31 visual ringer hi lo off switch 32 DC IN 9V jac...

Page 9: ...ey 5 Handset battery compartment 6 Handset visual ringer 7 Handset earpiece 8 Handset display 9 CID key 10 redial pause key 11 tone key 12 memory key 13 menu key 14 talk key 15 Handset Emergency key 1...

Page 10: ...ts of the Cordless Handset Charging Cradle 2 3 1 2 3 1 P RO DU CT OV E RV I E W 1 Charging contacts 2 Charge light 3 DC IN 9V jack SSE17 1 OM indb 9 SSE17 1 OM indb 9 15 7 08 12 08 19 PM 15 7 08 12 08...

Page 11: ...stop on the base If you do not press a key within 30 seconds the phone will time out and exit the menu When setting Day and Time the time out period is extended to two minutes Using the Handset Menus...

Page 12: ...YOUR BASE Near an AC outlet and a telephone wall jack Microwave ovens Refrigerators TVs Other electronics Direct sunlight Extreme temperatures Fluorescent lighting Personal computers Wireless LAN equ...

Page 13: ...C wall outlet CAUTION To avoid risk of fire and shock only use the Uniden AAD 065S M AC adapter 4 Route the AC adapter cord inside the molded wiring channel as shown 5 Place the base unit close to the...

Page 14: ...your call connects your phone s settings are fine If your call does not connect Check the AC adapter cord Make sure it is securely connected to the DC IN 9V connector and to a standard AC power outlet...

Page 15: ...a switch for base visual ringer control so you can turn the visual ringers off when you do not want the base to flash brightly during incoming calls The visual ringer hi lo off switch allows you to se...

Page 16: ...el as shown 4 Plug the AC adapter into a standard 240V AC wall outlet 5 Plug the telephone cord into the phone jack 6 Route the telephone cord inside the molded wiring channel as shown 7 Plug the tele...

Page 17: ...wall Try to mount your phone within 1 5m of a working phone jack to avoid excessive cord lengths Make sure the wall material is capable of supporting the weight of the base and handset Use 10 screws...

Page 18: ...contact with the charging contacts 4 Charge the handset battery pack for at least 15 20 hours before using your new cordless handset for the first time 5 To test your connection try making a call fro...

Page 19: ...Installing the Optional Headset Your cordless handset may be used with an optional headset To use this feature insert the headset plug into the headset jack Your phone is ready for hands free convers...

Page 20: ...ute and then press menu set 6 Press select or select to choose AM or PM and then press menu set You will hear a confirmation tone Note Use delete to edit the hour and minute Adjusting the Base Display...

Page 21: ...he handset to select ON or OFF 4 Press menu set on the base You will hear a confirmation tone or press menu on the handset to complete the setting Insert 0 This feature adds 0 or 00 at the beginning o...

Page 22: ...select to select ON or OFF and then press menu set You will hear a confirmation tone Setting AutoTalk Handset only AutoTalk allows you to answer the phone simply by removing the cordless handset from...

Page 23: ...creen appears You can select EDIT NUMBER to edit this entry select DELETE NUMBER to erase this entry or select GO BACK to return to the previous screen 2 Store the number by following step 6 under Sto...

Page 24: ...select GO BACK to return to the previous screen 2 Store the number by following step 6 under Storing Names and Numbers for Speed Dialing on page 26 3 Press menu set on the base You will hear a confir...

Page 25: ...unt number simply press mem on the base or memory on the handset and the speed dial number where you stored your account number Then press menu set on the base or select intercom on the handset Or you...

Page 26: ...on the cordless handset delete on the base to delete all the characters If no name is required go to step 5 Refer to the letters on the number keys to select the desired characters Each time you pres...

Page 27: ...he dialing sequence press redial pause on the handset redial pause on the base to insert a two second pause between the numbers You can enter multiple pauses to increase the delay Each pause counts as...

Page 28: ...r instructions on viewing the Caller ID information see page 40 If the Caller ID information did not include the phone number then you will not be able to store it Follow these steps to store a Caller...

Page 29: ...n the base to overwrite The display returns to the Caller ID data Using Your Phone During a Power Failure Because the phone is a corded cordless combination phone it can still perform several of its f...

Page 30: ...number OR 1 Dial the number 2 Pick up the corded handset Note To insert a two second pause in the dialing sequence in standby press redial pause A P appears in the display Receiving a call 1 Pick up...

Page 31: ...ically dial the number To cancel press on the base or talk on the cordless handset To dial one of the speed dial numbers simply follow these steps 1 Press memory on the handset mem on the base The han...

Page 32: ...k on the handset or remove the corded handset from the base The displayed phone number dials automatically Note You can also press on the base or talk on the handset or remove the corded handset from...

Page 33: ...ve Call Waiting service Redialing the Last Number Dialed From the cordless handset From the base speakerphone From the base corded handset 1 Pick up the handset from the cradle 2 Press talk 3 Listen f...

Page 34: ...select 2 The base will sound the ringer volume at the selected setting and display the new ringer volume Adjusting the Handset Ring Tone and Volume Your cordless handset has two different ring tones...

Page 35: ...ordless handset while on a call press volume to make it louder or volume to make it softer This setting will remain in effect after the telephone call has ended Temporarily Muting the Base Ringer To m...

Page 36: ...hold on the base Paging is also canceled when the phone receives an incoming call Placing a Call on Hold from the Base 1 During a call from the base press page hold The call will be put on hold 2 To...

Page 37: ...ress talk on the handset During a call from the cordless handset press on the base During a call from the cordless handset pick up the corded base handset Exiting the conference call Press talk on the...

Page 38: ...2 The handset will be paged An intercom tone sounds To cancel the Page Press page hold or 1 Press page hold 2 The handset will be paged An intercom tone sounds 3 Pick up the corded handset To cancel t...

Page 39: ...number keypad Press page hold or Pick up the corded handset Hanging up an Intercom Page Press select intercom or talk Press Return the corded handset to the base Transferring a Call You can transfer a...

Page 40: ...is currently unavailable in New Zealand You may receive any one of the following messages When invalid data is received INCOMPLETE DATA When a private name is received PRIVATE NAME When a private num...

Page 41: ...ormation in historical order from new to old or from old to new use volume on the cordless handset select on the base to scroll through the data from the latest to the earliest or volume on the cordle...

Page 42: ...n the list is automatically deleted Individual Caller ID data can also be deleted manually by following these steps 1 Press CID on the cordless handset cid on the base while in standby 2 Find the mess...

Page 43: ...handset delete on the base 3 Press volume on the cordless handset select on the base to select YES and then press select intercom on the cordless handset menu set on the base You will hear a confirma...

Page 44: ...use your system to announce a special outgoing message to callers when you are away from your phone Features Digital Tapeless Recording Up to 11 minutes of Recording Time Call Screening Personal or Pr...

Page 45: ...t to select Record Time 1 MINUTE 4 MINUTES or ANNOUNCE ONLY 4 Press menu set You will hear a confirmation tone Note For your convenience voice prompts will guide you through the menus Press play stop...

Page 46: ...select to move the pointer to select RING TIME and then press menu set 3 Press select or select to select a Ring Time TOLL SAVER 6 TIMES 9 TIMES or 12 TIMES 4 Press menu set You will hear a confirmati...

Page 47: ...record your own personal outgoing greeting Your recorded greeting must be between 2 seconds and 30 seconds long Once you have recorded a personal greeting you can switch back and forth between the pre...

Page 48: ...eeting has been deleted Selecting Your Greeting You can switch back and forth between your personal greeting and the pre recorded system greeting With the phone in standby press greet Then press greet...

Page 49: ...ystem Turning your Answering System On Off Turning On Turning Off 1 With the phone in standby press on off on the base 2 The system announces Answering System is on and plays the current greeting 3 Th...

Page 50: ...ious message Press and hold repeat rewind to rewind through the current message Skipping a message Press skip forward to go to the beginning of the next message Press and hold skip forward to fast for...

Page 51: ...k play delete messages or even record a new greeting or turn your answering machine on and off Once you enter the remote access menu you must enter a command within 15 seconds or the system automatica...

Page 52: ...to stop the recording enter the command again 5 After all of the voice prompts have been played you will hear intermittent beeps indicating that the system is in the command waiting mode You may ente...

Page 53: ...600S M and BT 905S with your phone Power Failure During a power failure you can make and receive calls with the base corded handset however you will not be able to use the base speakerphone or the co...

Page 54: ...E HANDSET None of the cordless handset keys will operate until the cordless handset is fully charged If you are on a call and LOW BATTERY appears complete your conversation as quickly as possible and...

Page 55: ...nd slide the cover downward to remove 2 Plug the battery pack connector red black wires into the jack inside the battery compartment The connector notches fit into the grooves of the jack only one way...

Page 56: ...rub the damp cloth over the charging contacts until all visible dirt is removed Dry the contacts thoroughly before returning the handset to the cradle Caution Do not use paint thinner alcohol or othe...

Page 57: ...gged into the cradle and wall outlet Make sure the cordless handset is properly seated in the cradle Make sure the charging contacts on the cordless handset and charger are clean The audio sounds weak...

Page 58: ...rol toys wireless microphones alarm systems intercoms room monitors fluorescent lights and electrical appliances Move the base to another location or turn off the source of interference The Caller ID...

Page 59: ...call screen feature is set to on Cannot access remote call in features from another touch tone phone Make sure you are using the correct PIN code Make sure that the touch tone phone you re using can...

Page 60: ...dry reconnect the battery pack and the battery cover 4 Recharge the handset s battery pack for 15 to 20 hours before using 1 Disconnect the AC adapter from the base cutting off electrical power 2 Disc...

Page 61: ...r charger may damage the battery or cause the battery to explode The exclamation point within an equilateral triangle is intended to alert the user to the presence of important operating and maintenan...

Page 62: ...rcom 37 Liquid damage 59 M N O P Q Maintenance 52 Making a call 29 Message alert 45 Name Tag 20 One touch speed dial Base 23 Personal identification number PIN 47 Power failure 28 52 Precautions 60 Pr...

Page 63: ...E OPERATION CARD C U T Remote access away from home 1 Call your phone number from a touch tone phone 2 During the outgoing message press and enter your PIN code The answering system announces the numb...

Page 64: ...pts 0 Task Key Repeat a Message 1 Play Incoming Messages 2 Skip a Message 3 Delete a Message 4 Stop Operation 5 Answering System On 6 Memo Record Stop 7 Greeting Message Record Stop 8 Answering System...

Page 65: ...64 Memo SSE17 1 OM indb 64 SSE17 1 OM indb 64 15 7 08 12 08 50 PM 15 7 08 12 08 50 PM...

Page 66: ...65 Memo SSE17 1 OM indb 65 SSE17 1 OM indb 65 15 7 08 12 08 50 PM 15 7 08 12 08 50 PM...

Page 67: ...arranty only valid in the country of original retail sale PARTS COVERED This warranty covers for one 1 year the Product and included accessories STATEMENT OF REMEDY In the event that the Product does...

Page 68: ...2008 Uniden Australia Pty Limited Uniden New Zealand Limited Printed in China UPZZ01138ZZ 0 SSE17 1 OM indb 67 SSE17 1 OM indb 67 15 7 08 12 08 51 PM 15 7 08 12 08 51 PM...

Reviews: