background image

Entering Text on Your Phone

When you want to enter text into your phone (for example, a name 

in the phonebook), use the twelve-key dial pad to enter the letters 

printed on the number keys. Here's how it works:

The phone enters the letters in the order they appear on the key. 

For example, if you press the number key 

2

 once, the phone 

enters the letter 

A

. Press 

2

 twice for 

B

, and three times for 

C

If you press the key again after the last letter, the phone starts the 

same letter sequence with small letters. If you press 

2

 four times 

in a row, the phone enters 

a

 (small letter). Press 

2

 five times for 

b

and six times for 

c

.

If you see the icon 

[Aa]

 in the display, the phone enters capital 

letters first (

A B C

), then small letters (

a b c

), then the number on 

the key (

2

). The icon 

[aA]

 means the phone starts at the small 

letters, so it enters small letters first, then the number on the key, 

then capital letters.

The phone automatically uses a capital letter for the first letter and 

any letter right after a space; all other times, it uses small letters.

If two letters in a row use the same number key, enter the first 

letter, then use


CaLLer ID/rIGHT

 to move the cursor to the next 

position to enter the second letter. 

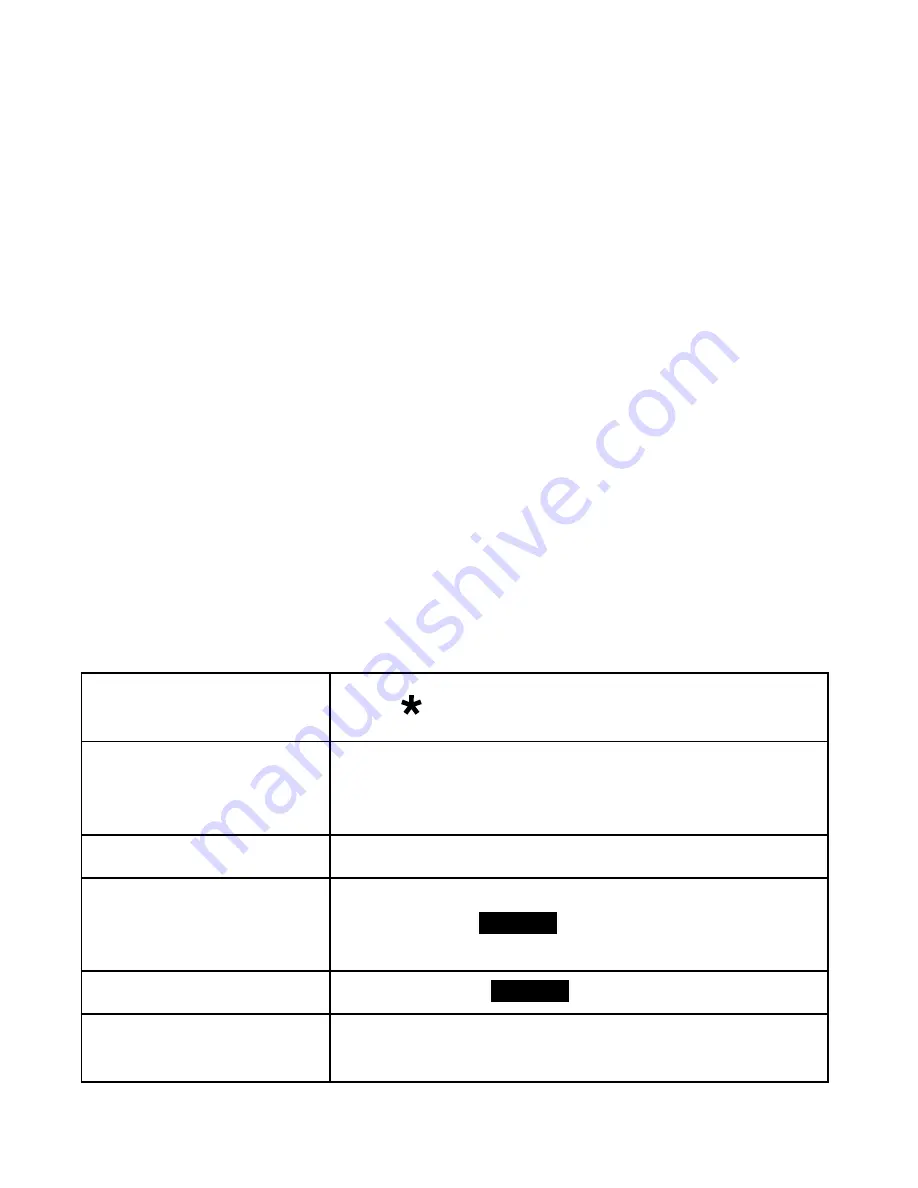
Switch between capital 

and small letters

Press  .

Move the cursor

Press 

PHoNEBooK/lEFT

 to move the cursor to the 

left or 

CAllEr ID/rIGHT

 to move the cursor to the 

right.

Leave a blank space

Press 

(

PoUND

).


Erase one letter

Move the cursor to the letter you want to erase 

and press the 

DElETE

 soft key. (On the base, you 

can also press 

DElETE

.)

Erase the entire entry

Press and hold 

DElETE

.

Enter punctuation or a 

symbol

Press 

0

 to rotate through the available symbols. 

Summary of Contents for DECT4096

Page 1: ...ce or TTY During regular business hours CST Visit our website for detailed business hours DECT4096 Series User s Guide What s in the box DECT4096 two line base with dual answering system Base AC adapt...

Page 2: ...the Handset 8 Reading the Displays 10 Using the Soft Keys 12 Entering Text on Your Phone 14 Using the Menus 15 The Handset and Base Setup Menu 16 The Clock Setup Menu 17 The Global Setup Menu 17 Spec...

Page 3: ...p it into the notch For wall mount use Turn the stand so the word Wall is right side up it will be on the right Insert the tabs into the notches marked Wall at the bottom of the base Press in on the l...

Page 4: ...phone jack for each line connect the cord from Tel Line 1 2 to the jack for line 1 then connect the cord from Tel Line 2 the jack for line 2 Plug the AC adapter into a standard 120 V AC power outlet...

Page 5: ...s a lot of noise or static see page 43 for tips on avoiding interference Test Line 2 Once you can make calls on line 1 make a test call on the second line Pick up the corded handset and press the unm...

Page 6: ...f you use pulse dialing and you need to send DTMF tones during a call if you re using an automated response system for example press to temporarily switch to tone dialing When the call ends the phone...

Page 7: ...cing forward The charge light should turn on If Try the charge light doesn t turn on reseating the handset checking the AC adapter connection seeing if the outlet is controlled by a wall switch Charge...

Page 8: ...cursor to the left In the first 2 seconds of a message go to the previous message Anytime after that go to the beginning of this message UP PHONEBOOK LEFT DOWN CALLER ID RIGHT INTERCOM HOLD Microphon...

Page 9: ...g decrease the speaker volume In the menu or any list move the cursor down one line Soft keys The soft keys automatically change their function based on what you are doing See Using the Soft Keys on p...

Page 10: ...Parts of the Handset Microphone 12 key dial pad Message waiting LED visual ringer Display Charging contacts Earpiece UP PHONEBOOK LEFT SPEAKER DOWN CALLER ID RIGHT REDIAL PAUSE INTERCOM HOLD TALK FLAS...

Page 11: ...page another station using the intercom During a call put the call on hold and start a call transfer Redial pause In standby open the redial list While entering a phone number insert a 2 second pause...

Page 12: ...swering system status for Status icon areas Caller ID count Day time Current functions for Soft key 1 Soft key 2 Soft key 3 Date Line 2 Line 1 1 2 1 2 LINE1 MENU LINE2 SUN 12 00A 12 31 08 New CID 4 An...

Page 13: ...is 1 fully charged 2 half charged 3 getting low or 4 empty NA The signal from the base is 1 very weak 2 low 3 strong or 4 very strong Answering system status icons The icons on the right hand side of...

Page 14: ...base On the handset 1 2 1 2 LINE1 MENU LINE2 SUN 12 00A 12 31 08 New CID 4 Soft key 1 Soft key 2 Soft key 3 SUN 12 00A Handset 1 New CID 2 LINE1 MENU LINE2 Soft key 1 Soft key 2 Soft key 3 Soft keys i...

Page 15: ...t the phone uses across several menus or operations These are not all the soft key descriptions but these are probably the ones you ll see most often Soft key description What it does Back Go back to...

Page 16: ...hen the number on the key 2 The icon aA means the phone starts at the small letters so it enters small letters first then the number on the key then capital letters The phone automatically uses a capi...

Page 17: ...ve it one space to the right Select an option Move the cursor to highlight the option then press OK Return to the previous screen Press Back If you press Back on the first screen the phone exits the m...

Page 18: ...2 Primary Line Select the line you want this station to use as the default line when you make a call see Assigning a primary line on page 19 Ringer Tones Handset only See the ring tones the handset is...

Page 19: ...lock Setup Use the numbers on the twelve key dial pad to enter the date Move the cursor to the next line then use the dial pad to enter the time Press to switch between AM and PM when you re finished...

Page 20: ...back into sync with your voice mail service see Using Voice Message Notification on page 34 Special Feature Menus The following menus control specific features of your phone These menus are explained...

Page 21: ...handset to the cradle put a call on hold Press intercom hold the soft key blinks to remind you the line is on hold To return to the call press the soft key Line1 or Line2 for the holding line switch l...

Page 22: ...ines you can join the two lines together in a conference call Place the first call on hold Switch to the other line and start the second call Press Menu then select Conference On the base you can also...

Page 23: ...et Press Speaker hang up a speakerphone call Press Speaker Press End On the handset press speaker to switch from the earpiece to the speakerphone Changing the Volume You can set the volume of the ring...

Page 24: ...record which line was used to dial the number Using the lists Open the CID list Press Caller ID right Open the redial list Press Redial pause Scroll through the CID or redial list Press Down to scroll...

Page 25: ...redial lists on any other stations Using Seven Digit Dialing If you can make a local call by dialing only seven digits instead of ten you can tell the phone to hide your local area code in the CID li...

Page 26: ...time you switch there is a short pause before you re connected to the other caller Finding a Lost Handset With the phone in standby press Intercom hold on the base Select the handset you want to find...

Page 27: ...ess Line1 Line2 The phone automatically dials the number in the first phone number slot 1 2 Dial either number for an entry Find the entry you want to dial and press Select Select one of the two phone...

Page 28: ...you can enter as many pauses as you want Each pause counts as one digit you ll see a P in the number Edit Number2 Enter the secondary number for this entry just like you did the primary number Person...

Page 29: ...the phonebook with the phone in standby and press Options to open the phonebook menu From the main phonebook screen you have two options Copy All Copy the whole phonebook to another station You must...

Page 30: ...ll you can save that code number to a phonebook entry and use the phonebook to send the code number Enter the code number up to 32 digits into the phonebook just like a regular phonebook entry Be sure...

Page 31: ...t be registered to the base before you can use them Handsets that aren t registered display a Handset not registered message For instructions on registering handsets to this base see page 44 or refer...

Page 32: ...l see a in the handset display and a in the base display To allow another station to join the call just turn privacy mode off by repeating the process above press Menu and select Call Privacy Using Ca...

Page 33: ...cancels the page so you can answer the incoming call To From the base From a cordless handset make an intercom page Press Intercom hold 1 Select the station you want to talk with or select All to page...

Page 34: ...f this ringer Using Do Not Disturb The Do Not Disturb or DND feature turns off the ringers of the base and all handsets at the same time With the phone in standby press and hold Do not disturb on the...

Page 35: ...any days as you want then press OK The alarm will ring on each day with a check mark beside it Highlight the ringer setting and press SELECT Select the ring tone you want the alarm to use then press O...

Page 36: ...sing Voice Message Notification This feature supports Frequency Shift Keying FSK message notification Contact your voice mail provider for more details If you subscribe to a voice mail service your ph...

Page 37: ...ystem will use its pre recorded greeting Hello no one is available to take your call Please leave a message after the tone To record your greeting Open the menu and select Ans Setup Select Line 1 or L...

Page 38: ...he system pick up after 2 rings if you have new messages or after 4 rings if you don t Record Time Set the amount of time callers have to leave a message either 1 minute or 4 minutes Choose Announce O...

Page 39: ...ds the phone returns to standby The icons on the handset s number keys and display show you which number key activates each answering system command these commands correspond to the answering system k...

Page 40: ...rompts you to select a line press Line1 or Line2 press 2 exit the system Press Play stop Press End Screening Your Calls Another feature your answering system gives you is call screening While the syst...

Page 41: ...ead of your greeting During the greeting or beeps press 0 and immediately enter your security code You have 3 tries to enter you security code if you enter it wrong 3 times the system hangs up and ret...

Page 42: ...ake or receive calls on line 2 Making sure line 2 is properly connected see page 2 Checking the dial mode on line 2 Seeing if another station has activated Privacy Mode on line 2 Making sure you have...

Page 43: ...de Contact customer service for more information I can t transfer calls Resetting all the handsets see page 44 I can t get two cordless handsets to talk to the caller Making sure both handsets are reg...

Page 44: ...e to change the line mode Contact customer service for more information I can t register a handset Seeing if there are 10 handsets registered to this base Resetting the handset My alarm rings at the w...

Page 45: ...or turn off the source if possible If the base has an adjustable antenna try raising the antenna so it stands straight up If you have any service that uses the phone line you might need a filter see...

Page 46: ...et you want to reset When the handset asks you to confirm select Yes It may ask you twice just to be sure The handset clears its information from the base and deletes it own link to the base 1 2 3 4 P...

Page 47: ...d the plastic housing i e liquid can be heard in the phone or liquid has entered the handset battery compartment or vent openings on the base follow these steps Handset Base Remove the battery cover a...

Page 48: ...ntact your phone company On single line jacks line 1 is connected to Tel line 1 2 and line 2 is connected to Tel line 2 You can switch Line 1 and Line 2 just by swapping the connectors Off hook The ph...

Page 49: ...harm Wash hands after handling Compliance Information FCC Part 68 information This equipment complies with Part 68 of the FCC rules the requirements adopted by the ACTA On the bottom of this equipmen...

Page 50: ...le for compliance could void your authority to operate this product NOTICE According to telephone company reports AC electrical surges typically resulting from lightning strikes are very destructive t...

Page 51: ...ne interface The termination on an interface may consist of any combination of devices subject only to the requirement that the sum of the Ringer Equivalence Numbers of all the devices does not exceed...

Page 52: ...arate packaging within the shipping carton The Product should include all parts accessories originally packaged with the Product Include evidence of original purchase a note describing the defect that...

Reviews: