background image

21

VoX

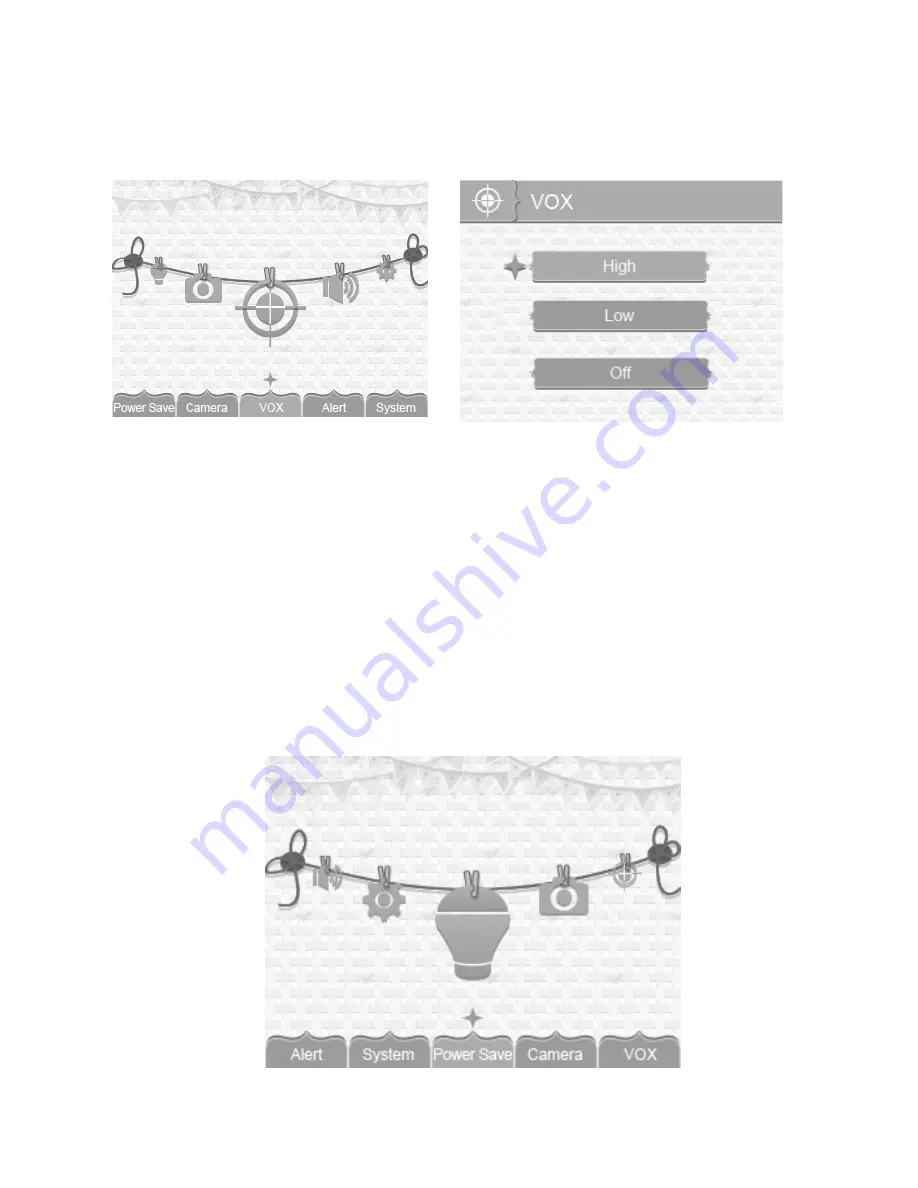
This option allows you to set the sound sensitivity for the camera. (Default = High)
1.  From the main menu selections, select VOX and press 

MENU/OK

. The 

VOX


sensitivity screen displays.  


2. 

Press ▲Vol or ▼Vol to select a level (High, Low, or Off).

3.  Press 

MENU/OK 

to save the selection and return to the main menu selections.

PoWeR sAVe

Activating the Power Save feature turns off the LCD after two minutes of inactivity. 

This option allows you to enable or disable this function. (Default = Off)
Voice Activation (VOX) will turn the LCD back on. Be sure that VOX is activated, 

(see above). If VOX is deactivated, press any button on the monitor to turn the LCD 

back on. Even with the LCD off, the LED light bar is still active

1.  From the main menu selections, select Power Save and press 

MENU/OK

. The 

Power Save

 screen displays.  

Summary of Contents for BW30xx Series

Page 1: ...1 BW30xx Series For more exciting new products please visit our website Australia www uniden com au New Zealand www uniden co nz 2 3 LCD Portable Wireless Baby Monitoring System...

Page 2: ...ectric shock from lightning avoid handling any electronic devices except battery powered ones during an electrical storm Use only the power cord and or batteries indicated in this manual Never dispose...

Page 3: ...und or interfere with the normal flow of air Warning to Parents and Other Users To avoid damage to your equipment follow these simple precautions Do not drop puncture or disassemble any part of the eq...

Page 4: ...y 12 USING THE BW30xx sERIES 14 SYSTEM MENU DESCRIPTIONS 15 System 16 Alert 20 VOX 21 Power Save 21 Camera 22 SPECIAL FEATURES 24 Zoom 24 Night Light 24 Lullabies 24 Using The Intercom 25 Camera Pairi...

Page 5: ...r Australian model www uniden co nz for New Zealand model Digital Wireless Monitor Digital Wireless Camera Suction Cup Adaptor Bar AC Power Adaptor Screws and Anchors Owner s Manual Model Name 2 3 Mon...

Page 6: ...affect reception quality Avoid having a direct light source in view of the camera ceiling or floor lamps Carefully plan where and how the camera will be positioned and where you will route the cable...

Page 7: ...e Indoor Camera on ledges and shelves 1 Press the mounting clip as shown 2 Place the unit over the mounting surface and release 3 Adjust the camera as needed Connect Power 1 Insert the AC adaptor powe...

Page 8: ...ges 5 Suction Base Attach to mount the camera on glass or metallic surfaces 6 Vol Increase speaker volume 7 Vol Decrease speaker volume 8 Lullaby PLAY STOP Press this button to play lullabies See page...

Page 9: ...the sound transmitted from the monitor 16 POWER Turns the camera ON or OFF 17 NIGHT LIGHT Press to turn the night light ON or OFF 18 Charging LED Red Charging Green Fully charged Off Camera and power...

Page 10: ...ED indicates power and remaining LEDs indicate sound 3 POWER Turns the camera on and off 4 2 3 inch LCD screen 5 Vol Increase speaker volume In Menus Scroll up In Lullaby increase volume In Zoom Scrol...

Page 11: ...m Scroll right In Live view Switch between available cameras 15 NIGHT LIGHT Remotely turn the camera night light ON or OFF The monitor s night light function is only available when the camera is paire...

Page 12: ...displays in full screen mode only The number of bars in the signal indicator shows the strength of the signal received from the camera One or no bars indicates the signal is poor and 4 bars indicate...

Page 13: ...en you press and hold TALK on the monitor see page 25 6 Battery level Indicates the amount of power left in the battery The icon displays when the battery is charging 7 Volume indicator Displays when...

Page 14: ...n Operations To Do Change between quad view single view and scan for Live view Press CH to cycle through the Live modes in the following order CAM1 CAM2 CAM3 CAM4 QUAD AUTO Scan CAM1 Check the tempera...

Page 15: ...em menus Use the navigating buttons to navigate up Vol down Vol left CH and right CH in the menus then press MENU OK to confirm a setting Use CH or CH to focus on the 5 different system menu selection...

Page 16: ...t is Year Month Day Hour Minute 1 From the System menu select Date Time and press MENU OK The Date Time screen displays 2 Press Vol or Vol to increase decrease the number for that setting 3 Press CH o...

Page 17: ...ain System options The new brightness level displays in the Live view Factory Reset This option allows you to restore your system to factory settings Default No 1 From the System menu select Factory R...

Page 18: ...to select a language 3 Press MENU OK to save the setting and return to the main System options Temperature Display Unit This option allows you to set the temperature to display in Celsius C or Farenhe...

Page 19: ...rature 25 C Off 1 From the System menu select Temp alert range and press MENU OK The Temp alert range screen displays 2 Press CH or CH to select Low temperature or High temperature 3 Press Vol or Vol...

Page 20: ...allows you to set the alert volume There are 6 levels available Default Zero Mute 1 From the main menu selections select Alert and press MENU OK The Alert screen displays 2 Press CH or CH to adjust t...

Page 21: ...enu selections POWER SAVE Activating the Power Save feature turns off the LCD after two minutes of inactivity This option allows you to enable or disable this function Default Off Voice Activation VOX...

Page 22: ...menu selections CAMERA This option allows you to pair the monitor with cameras up to 4 cameras supported or to turn on off an individual camera The cameras are still powered on but no longer visible t...

Page 23: ...hat camera s video displays on the monitor when pairing is successful Before pairing additional cameras be sure they are powered and turned on See page 6 Pair the cameras to the monitor before mountin...

Page 24: ...you want to control them from the monitor the camera you want to play them through must be in full screen mode When you press LULLABY PLAY STOP to turn on the lullaby feature Lullaby 1 begins playing...

Page 25: ...paired It will communicate with the monitor when it is powered on The pairing function lets you add up to 3 additional cameras to your system It also lets you re pair your first camera if needed Pair...

Page 26: ...range of the camera microphone moving the camera or monitor farther apart if the unit emits a loud screeching noise feedback The picture has become choppy The picture may become choppy when experienci...

Page 27: ...NERAL CAMERA Image Sensor Type Manufacturer Model 1 6 5 Color CMOS Image sensor Effective Pixel 640 x 480 Image Processing MJPEG Lens 3 0mm F2 8 Exposure Auto White Balance Auto Power Requirement 5 0V...

Page 28: ...x 240 Power Requirement 5 0VDC 5 Power Consumption 260mA Max Normal 740mA Max Charging Operating Temperature Range 10 C 40 C 14 F 104 F Operating Humidity Range Within 85 Relative Humidity RoHS Compli...

Page 29: ...or New Zealand and will expire one 1 year from the date of the original retail sale If a warranty claim is made this warranty will not apply if the Product is found by Uniden to be A Damaged or not m...

Page 30: ...NSUMER ACT 2010 Australia or the CONSUMER GUARANTEES ACT New Zealand as the case may be none of which can be excluded Procedure for Obtaining Warranty Service Depending on the country in which the Pro...

Page 31: ...31...

Page 32: ...32 2013 Uniden Australia Pty Ltd Uniden New Zealand Limited Printed in PRC...

Reviews: