7
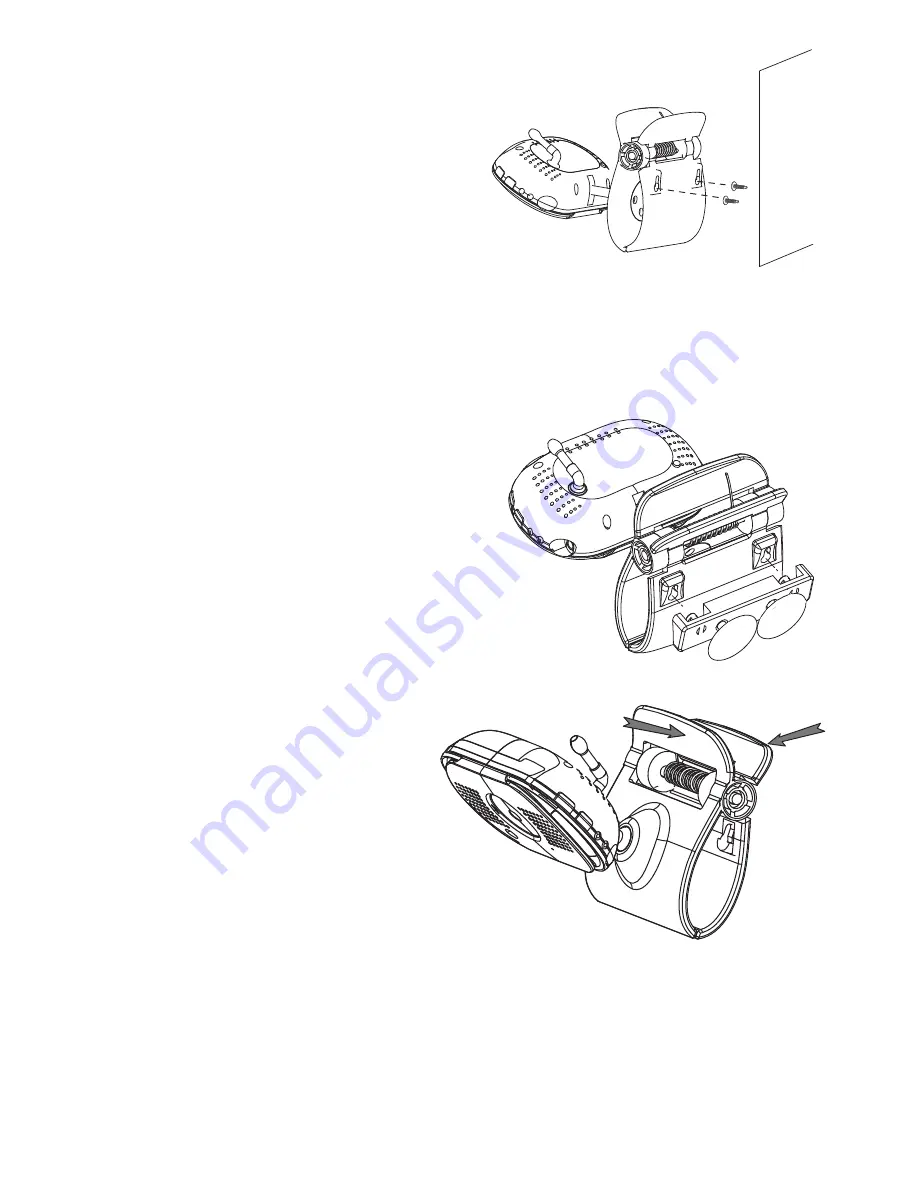
Wall Mount
The Indoor Camera mounting clip has two
slots that fit over screws to mount the unit on
the wall.
1. Mark the position of the screw holes on
the wall.
2. Drill holes and insert the anchors and
screws provided.
3. Be sure to leave room for the mounting to
fit over the screw heads.
4. Place the mounting over the installed screws and push it downwards, locking it
into place.
5. Adjust the camera as needed.
Suction Mount
1. Insert the suction base into the mounting
clip as shown.
2. Firmly press the camera with the suction
base attached onto glass or metallic
surfaces.
3. Adjust the camera as needed.
Clip Mount
Clip the Indoor Camera on ledges and
shelves.
1. Press the mounting clip as shown.
2. Place the unit over the mounting
surface and release.
3. Adjust the camera as needed.
Connect Power
1. Insert the AC adaptor power plug into the camera’s DC adaptor input jack.
2. Plug the other end into a 240 volt AC (standard indoor) power outlet or surge
protector. The charging LED turns on. If the battery is not fully charged, the LED
glows red. If it is fully charged, the LED glows green.
3. Press
POWER
. The green power LED turns on and the monitor now displays
camera video. If it doesn’t, try reconnecting the AC adaptor, making sure the
power outlet isn’t controlled by a wall switch.
WALL
#
“Suctions will not stick well on a curved/
textured or wet surface. Make sure the spot
is smooth and flat. Dry the spot completely
(use a lint-free cloth, if possible).


