- 27 -
5. Click the
“Discover Device” button to explore the printers that exist on the network.
6. Select the printer in the left side of listed printers, the correspondent IP address will be shown in the right
side
“IP address/Printer Name” field.
7. Click
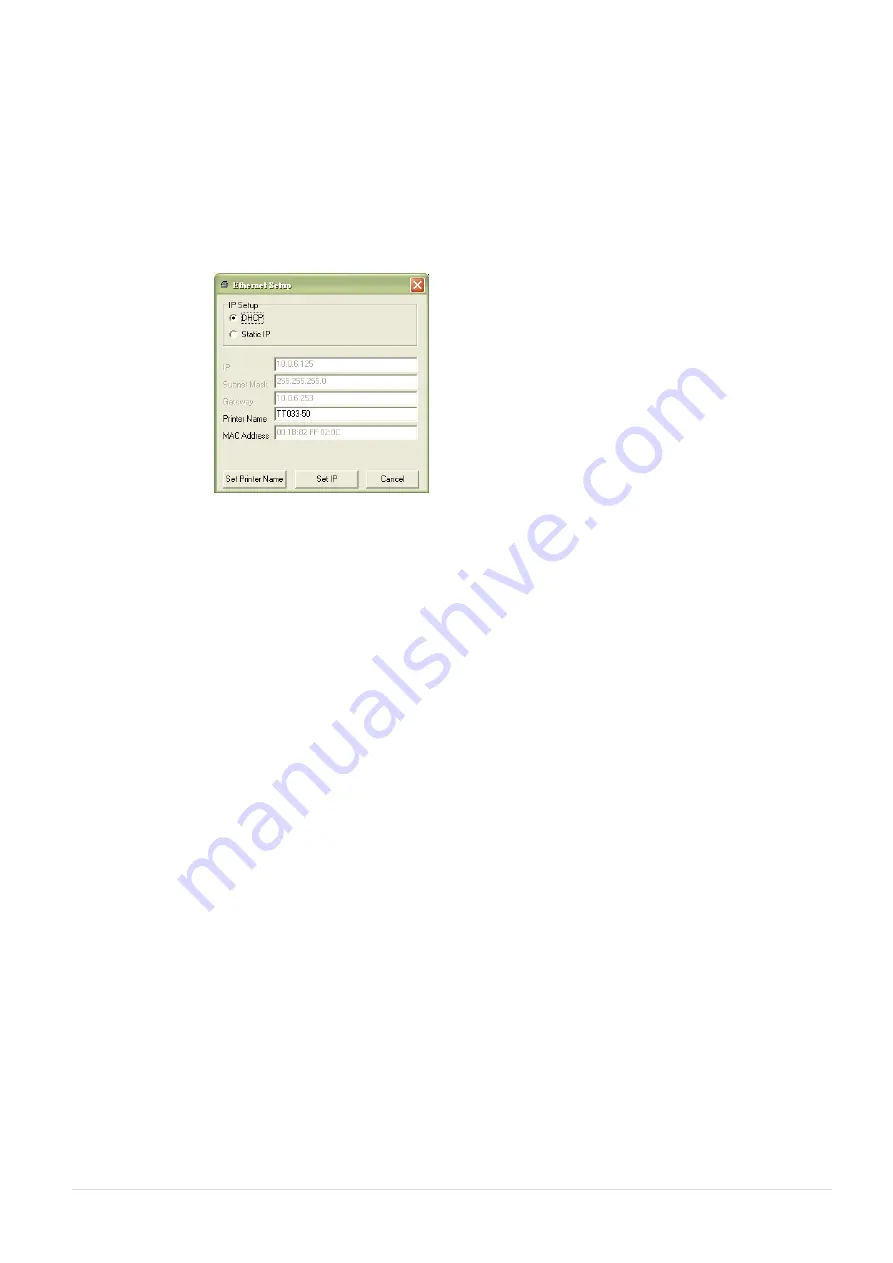
“Change IP Address” to configure the IP address obtained by DHCP or static.
The default IP address is obtained by DHCP. To change the setting to static IP address, click
“Static IP”
radio button then enter the IP address, subnet mask and gateway. Click
“Set IP” to take effect the
settings.
Users can also change the
“Printer Name” by another model name in this fields then click “Set Printer
Name
” to take effect this change.
Note: After clicking the
“Set Printer Name” or “Set IP” button, printer will reset to take effect the
settings.
8. Click
“Exit” button to exit the Ethernet interface setup and go back to Diagnostic Tool main screen.
Factory Default button
This function will reset the IP, subnet mask, gateway parameters obtained by DHCP and reset the printer
name.
Summary of Contents for UltraLabel PRO-600
Page 1: ...USER S MANUAL UltraLabel PRO 600 THERMAL TRANSFER DIRECT THERMAL BAR CODE PRINTER...
Page 4: ...iii HAZARDOUS MOVING PARTS KEEP FINGER AND OTHER BODY PARTS AWAY...
Page 7: ...vi...
Page 8: ......
Page 26: ...18 Loading path for media...
Page 41: ...33 Numbers of download files Total available memory space Print head check pattern...


