background image

STORAGE & MAINTENANCE

WARNING RISK OF UNIT 

BURSTING!

DO NOT STORE/OPERATE UNIT 
IN A FREEZING ENVIRONMENT!

WINTERIZING:

For storage and transportation purposes in subfreezing ambient tempera-
tures, it will be necessary to winterize this unit.  This unit must be protected 
to the lowest incurred temperature for the following reasons:

 *GBOZQBSUPGUIFQVNQJOHTZTUFNCFDPNFTGSP[FOFYDFTTJWFQSFTTVSF

may build up in the unit which could cause the unit to burst resulting in
possible serious injury to the operator or bystanders.

2.

The pumping system in this unit may be permanently damaged if frozen.

'3&&;&%"."(&*4/05$07&3&%#:8"33"/5:

If you must store your unit in an area where the temperature may fall below 

Š'ZPVDBOQSPUFDUZPVSVOJUCZGPMMPXJOHUIFQSPDFEVSFPVUMJOFECFMPX

1.

Gather the following items:

a.

Two 5 gallon containers.

b.

One gallon of antifreeze.  (

CSE 

recommends an environmentally

safe antifreeze.)

c. Water supply.

E 5ISFFGPPUIPTF*%XJUIBJODINBMFHBSEFOIPTFåUUJOH

2.

Procedure:

a. To start winterizing, unit must be run and primed according to the

“Start-up Procedures” listed on page 14.

b. After running and priming, shut off the unit and water supply.
c. Relieve system pressure by pointing the trigger gun in a safe direction

BOETRVFF[JOHUIFUSJHHFSVOUJMXBUFSæPXDFBTFTUPFYJUUIFOP[[MF

d. Lock the trigger gun in an OFF position and remove the nozzle.
e. In one 5 gallon container, mix the antifreeze and water according to

manufacturer’s recommendations for the temperature to which you are
winterizing.

NOTE: Proper winterizing is based on the recommended manufacturer’s 

instructions listed on the “Protection Chart” shown on the back label 
of most antifreeze containers. 

f. Remove the water supply hose from the unit and attach the 3 foot

hose securely to the inlet connection. Submerge the other end into
the antifreeze solution.

g. Shut off the detergent injector if applicable.
h. Point the wand into the empty container and start the unit.
i. Trigger the gun until the antifreeze begins  to exit the wand. Release

the trigger for 3 seconds, then trigger the gun for 3 seconds. Continue
cycling the gun several times until all the antifreeze mixture is siphoned
from the container.

j. Stop the unit.
k. Detach the 3 foot hose from the unit and drain any excess antifreeze

back into the 5 gallon container.

l. Disconnect the hose/gun/wand assembly from the unit and drain any

excess antifreeze back into the 5 gallon container.

m. Store the hose, gun and wand with the unit in a safe, non-freezing area.
n. Store antifreeze solution for next use or dispose of according to state

EPA laws.

3.

Optional Procedure:

a. Shut the unit and water supply off.
b. Relieve system pressure by pointing the trigger gun in a safe direction

BOETRVFF[JOHUIFUSJHHFSVOUJMXBUFSæPXDFBTFTUPFYJUUIFOP[[MF

c. Disconnect and drain the hose, gun and wand.
d. Start the unit and allow it to run until all the water exits the unit.  Once

UIFXBUFSIBTTUPQQFEæPXJOHGSPNUIFVOJUUVSOUIFVOJUPGG

NOTE: When using this procedure, caution should be used as ice chips 

can form from drops of water which could cause the unit to burst if 
starting before completely thawed.

32˚F

0˚C


Revision 11/3/2021

16 

Summary of Contents for ES320AIR

Page 1: ...ATORS MANUAL DIRECT DRIVE PRESSURE WASHER Once the unit has been removed from the box immediately write in the serial number of your unit in the space provided below SERIAL NUMBER_____________________...

Page 2: ...ON 11 WATER SUPPLY 12 UNLOADER 12 THERMAL RELIEF VALVE 12 PRE START INSPECTION PROCEDURES 13 OPERATING INSTRUCTIONS 14 15 PRIMING THE PUMP 14 START UP 14 CLEANING WITH DETERGENTS 15 SHUTDOWN 15 STORAG...

Page 3: ...MPHASIZE SAFETY WARNINGS THAT MUST BE FOLLOWED WHEN OPERATING THIS PRESSURE WASHER ACCOMPANYING THE SAFETY WARNINGS ARE SIGNAL WORDS WHICH DESIGNATE THE DEGREE OR LEVEL OF HAZARD SERIOUSNESS THE SIGNA...

Page 4: ...Complete the following checklist prior to starting installation in a hazardous area All actions must be completed in accordance with Directive 2014 34 EU Checklist for installation in hazardous areas...

Page 5: ...e Connect the sound absorber on the exhaust air port or valve connection Do not add any thrust to the end or side of the shaft when making connections Do not use a hammer on the shaft or connections L...

Page 6: ...ent will help to maintain proper vane performance Flush the motor if it is operating slowly or inefficiently Use only Gast AH255B Flushing Solvent DO NOT use kerosene or ANY other combustible solvents...

Page 7: ...peratetheunitwhenfatigued PS VOEFS UIF JO VFODF PG BMDPIPM PS ESVHT 4 NEVER squeeze the trigger unless securely braced The thrust from the water traveling through the nozzle may be powerful enough to...

Page 8: ...JOH UIF pump to thaw 4 When connecting the water inlet to the water supply mains local regulations of your water company must be observed In some areas the unit must not be connected directly to the p...

Page 9: ...air lines 5VSOJOH the machinery over by hand during adjustment or cleaning might start the motor and machinery with it causing serious injury to the operator 3 Know how to stop the pressure washer and...

Page 10: ...SO JT CFTU TVJUFE GPS VTIJOH EJSU NVE BOE HSJNF 6TFT 8FU TXFFQJOH MFBWFT GSPN XBMLT DVSCT BOE ESJWFXBZT DMFBOJOH TUBCMF PPST XBTIJOH TXJNNJOH pool bottoms degreasing engines 5IF OP MF 5IJT JT B MPX QS...

Page 11: ...equired on some models e Connect the wand assembly to the gun hose assembly 4 Follow the incoming water requirements listed below a Water pressure must be a minimum of 25 pounds per square inch PSI an...

Page 12: ...UIF TZTUFN PRE START INSPECTION PROCEDURES FGPSF TUBSUJOH UIF VOJU QFSGPSN UIF GPMMPXJOH QSPDFEVSFT 1 Check the oil level in the pump and motor 2 Inspect the water inlet strainer Clean or replace if...

Page 13: ...unit during start up Slowly apply air flow to the motor not to exceed 100 psi 7 bar 7 Once the motor has started perform the following procedures with the gun open a Inspect for system oil leaks and f...

Page 14: ...UIF USJHHFS O B fewmomentsadetergent watermixturewillexitthelowpressurenozzle Start spraying the lower portion of the surface being cleaned and move up using long overlapping strokes Applying from th...

Page 15: ...cement o ring to correct the leak Additional o rings can be purchased from your dealer TROUBLESHOOTING GUIDE Problem Reason and Remedy for Problem Low Torque Low Speed Won t Run Runs Hot Runs Well The...

Page 16: ...ich you are winterizing NOTE Proper winterizing is based on the recommended manufacturer s instructions listed on the Protection Chart shown on the back label of most antifreeze containers f Remove th...

Page 17: ...gun closed for more than 3 minutes Defective valve Replace Oil appears milky or foamy Water in oil Change pump oil Fill to proper level Oil leaking from unit DO NOT USE Contact CSE Customer Service D...

Page 18: ...osive environments or under conditions causing pump cavitation IMPORTANT This unit was designed to be operated in a medium duty application only The use of this washer in any other applica tion will v...

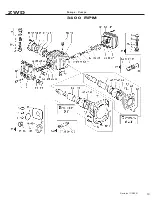
Page 19: ...ZW D Pom pe Pum ps 3 4 0 0 3 4 0 0 RPM r Revision 11 3 2021 19...

Reviews: