background image

13

8).

figure 8

6

Use fresh product to chase any remaining sanitizer from the

bowl(s). Drain this solution. Do not rinse out the machine.

5. 4  IN-PLACE SANITIZATION

Daily: 

The In-Place Sanitization prior to starting the machine

may be performed, if needed, only as further precaution, in

addition to the Disassembled Parts Sanitization described

before, but never in lieu of it.

1

Prepare two gallons of a warm (45-60°C, 120-140 °F) sani-

tizing solution (100 PPM available chlorine concentration or 1

spoon of sodium hypoclorite diluted with two litres of water)

according to your local Health Codes and manufacturer’s speci-

fications.

2

Pour the solution into the bowl(s).

3

Using a brush suitable for the purpose, wipe the solution on

all surfaces protruding above the solution-level and on the

underside of the top cover(s).

4

Install the top cover(s) and operate the unit. Allow the solu-

tion to agitate for about two minutes. Drain the solution out of

the bowl(s).

5

Use fresh product to chase any remaining sanitizer from the

bowl(s). Drain this solution. Do not rinse out the machine.

6  ROUTINE MAINTENANCE

1

Replacement of lighted top cover bulbs (see figure 9) : 

-

Remove the fixing screws placed in the upper part of the top

cover, 

-

remove the lower part and replace the bulbs (using a 24-

28V 21W max bulbs). 

-

Reassemble the top cover and replace the fixing screws.

figure 9

2

Daily: 

inspect the machine for signs of product leaks past

seals and gaskets. If proper assembly does not stop leaks

around seals or gaskets, check for improper lubrication, worn

or damaged parts. Replace parts as needed with original spare
parts from the supplier.

6. 1  MAINTENANCE (TO BE CARRIED OUT BY 

QUALIFIED SERVICE PERSONNEL ONLY)

Montly

: clean all internal components, primarily the condenser,

using compressed air, in order to remove dust.

To clean these internal parts, unplug the unit.

Condenser fins are very sharp. Use extreme caution when cle-
aning.

IMPORTANT

Use gloves of a minimum PL 0-4 class (EN388).

ATTENTION

Verify the correct position of the cable before closing the

cabinet and before supplying electricity.

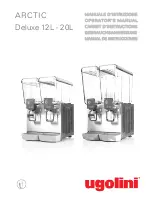
Summary of Contents for Arctic Deluxe 12L

Page 1: ...ARCTIC Deluxe 12L 20L MANUALE D ISTRUZIONE OPERATOR S MANUAL CARNET D INSTRUCTIONS GEBRAUCHSANWEISUNG MANUAL DE INSTRUCCIONES ...

Page 2: ...e los aparato DISTRIBUIDOR DE BEBIDAS FRIAS Marca UGOLINI S p A Fabricante UGOLINI S p A Modelo ARCTIC DELUXE 1 12 2 12 3 12 4 12 1 20 2 20 3 20 4 20 responden con las siguientes Normativas En cumplimiento de las Normas 2006 42 CE 2006 95 CE 2004 108 CE EN ISO 12100 1 2010 EN ISO 12100 2 2010 EN60335 1 2012 EN60335 2 24 2010 EN60335 2 75 2004 A1 2005 A11 2006 A2 2008 A12 2010 EN62233 2008 11 EN622...

Page 3: ...atura giunta a fine vita L adeguata raccolta differenziata per l avvio successivo dell apparecchiatura dismessa al riciclaggio al trattamento e allo smaltimento ambientalmente compatibile contribuisce ad evitare possibili effetti negativi sull ambiente e sulla salute e favorisce il reimpiego e o rici clo dei materiali di cui è composta l apparecchiatura Lo smaltimento abusivo del prodotto da parte...

Page 4: ... elettrica sia affidata ad un interruttore onnipolare tale interruttore deve garantire una distanza di apertura dei contatti che consenta la disconnessione completa nelle condizioni della categoria di sovratensione III Non usare prolunghe per colle gare elettricamente l apparecchio 8 Il distributore non esce prelavato e sanitizzato dalla fab brica Prima dell uso esso deve essere smontato lavato e ...

Page 5: ...caso si vogliano distribuire prodotti concentrati da dilu irsi con acqua potabile versare nei contenitori l acqua aggiun gendo in seguito la dovuta quantità di concentrato secondo le istruzioni del fabbricante Volendo utilizzare spremute naturali è consigliabile filtrarle onde evitare che le parti solide in esse contenute possano ostruire il passaggio dal rubinetto 4 Montare i coperchi sopra i con...

Page 6: ...i esclusivamente ad un tecnico La temperatura ottimale della bevanda è stata stabilita e rego lata in fabbrica 6 Per evitare rischi di cadute le parti intorno alla macchina deve essere mantenute asciutte 5 3 PULIZIA Pulizia e lavaggio sono fondamentali per garantire la perfetta conservazione del gusto della bevanda e la massima efficienza del vostro distributore Le procedure descritte nel seguito ...

Page 7: ...alle autorità del vostro paese rispettando le specifiche del produt tore In mancanza di un prodotto sanitizzante specifico prepa rare una soluzione di acqua e ipoclorito di sodio varechina in proporzione di 1 cucchiaio ogni 2 litri di acqua 3 Immergere nella soluzione tutte le parti da sanitizzare per il tempo indicato dal fabbricante del prodotto 4 Fare asciugare all aria su una superficie pulita...

Page 8: ...a permettere alla soluzione di agitarsi per circa 2 minuti 5 Svuotare i contenitori dalla soluzione sanitizzante attra verso i rubinetti e poi eliminarla 6 Risciacquare con bevanda fresca in modo da togliere ogni possibile residuo di soluzione sanitizzante dal fondo dei conte nitori Asciugare l interno dei contenitori con un tovagliolo di carta del tipo usa e getta 7 Non procedere ad ulteriori ope...

Page 9: ...clea ned and sanitized according to this handbook instructions chapter 5 3 CLEANING AND SANITAZING PROCEDURES 8 The appliances shall be installed only in places where qualified people could control them 4 TO OPERATE PROPERLY AND SAFELY 1 Do not operate the dispenser without reading this opera tor s manual 2 Do not operate the dispenser unless it is properly groun ded 3 Do not use extension cords t...

Page 10: ...y placed over the bowls 5 Set the control switches as shown in chapter 5 1 DESCRIPTION OF CONTROLS 6 The dispenser must always run with the covers installed to prevent a possible contamination of the product 7 Always leave the dispenser on as the refrigeration stops automatically when the beverage reaches the dispensing tem perature The mixing devices will continue to turn 8 To maintain a high sta...

Page 11: ...r to the disassembly and cleaning the machine must be emptied of product 5 3 1 DISASSEMBLY 1 Remove cover from the bowl 2 Remove the empty bowl by lifting pulling lever 1 and its front side faucet side up and off bowl gasket see figure 2 figure 2 3 Remove the bowl gasket 4 Remove the pump impeller from its location 5 Pinch tube faucet push the dispensing handle 1 and take the pinch tube off from i...

Page 12: ...rts in the sanitizing solution for five minutes 4 Do not immerse the lighted top covers in liquid Carefully wash their undersides with the sanitizing solution 5 Place the sanitized parts on a clean dry surface to air dry 6 Wipe clean all exterior surfaces of the unit Do not use abra sive cleaner 5 3 4 ASSEMBLY 1 Slide the drip tray into place 2 Pinch tube faucet push the dispensing handle 1 and in...

Page 13: ...t of the bowl s 5 Use fresh product to chase any remaining sanitizer from the bowl s Drain this solution Do not rinse out the machine 6 ROUTINE MAINTENANCE 1 Replacement of lighted top cover bulbs see figure 9 Remove the fixing screws placed in the upper part of the top cover remove the lower part and replace the bulbs using a 24 28V 21W max bulbs Reassemble the top cover and replace the fixing sc...

Page 14: ...CT ETSANS DANGER 1 Ne pas utiliser le distributeur avant d avoir lu ce carnet d instructions 2 Ne pas utiliser le distributeur s il n est pas branché correcte ment à la terre 3 Ne pas utiliser de rallonges pour brancher électriquement le distributeur 4 Ne pas mettre le distributeur en fonction si les panneaux ne sont pas à leur place et bloqués avec des vis 5 Ne pas faire obstacle au flux d air de...

Page 15: ...onctionner 8 Pour garantir une bonne conservation de la boisson le distributeur doit fonctionner également pendant la nuit 9 Tournez le couvercle de 180 pour l éteindre voir figure 1 figure 1 5 1 DESCRIPTION DES COMMANDES Le distributeur est équipé d un interrupteur général et pour chaque réservoir d un interrupteur pour le dispositif de mélange Leurs fonctions sont les suivantes Interrupteur géné...

Page 16: ...gure 2 figure 2 3 Enlever le joint du réservoir 4 Enlever la turbine de la pompe de son siège 5 Robinet avec tube en cautchou pousser 1 le levier de débit robinet et défiler 2 le tuyau robinet de son siège sur le fond du réservoir voir figure 3 figure 3 6 Robinet en inox à gravité défiler le piston et démonter le levier de débit robinet voir figure 4 figure 4 7 Faire glisser le tiroir égouttoir et...

Page 17: ...dans la solution pour la durée indiquée par le fabricant du produit 4 Laisser sécher à l air sur une surface propre les pièces désinfectées 5 Essuyer les parties externes du distributeur sans utiliser de chiffons abrasifs 5 3 4 REMONTAGE 1 Introduire le tiroir égouttoir à sa place 2 Robinet avec tube en cautchouc Pousser 1 le levier de débit robinet et enfiler 2 le tuyau du robinet dans son siège ...

Page 18: ...er tout rés idu de solution désinfectante du fond des réservoirs Essuyer l intérieur des réservoirs avec une serviette en papier jetable 7 Ne pas procéder à d autres opérations de rinçage 6 ENTRETIEN 1 Substitution des ampoules du couvercle lumineux voir figure 9 Enlever les vis placées dans la partie supérieure du couver cle Sortir la partie inférieure et remplacer les ampoules utiliser ampoules ...

Page 19: ...wenden 8 Das Gerät wird im Werk nicht gewaschen und desinfiziert bevor es geliefert wird Es muß daher vor der Inbetriebnahme gemäß den Anleitungen im Kapitel 5 3 REINIGUNG auseinander genommen gewaschen und desinfiziert werden 9 Wenn Sie das Gerät für längere Zeit nicht nutzen sollten Reinigen desinfizieren Sie das Gerät und entfernen sie den Netzstecker 4 SICHERHEITSMAßNAHMEN 1 Den Dispenser nich...

Page 20: ...en Produkten gewünscht wird trink wasser die mit Wasser zu verdünnen sind das Wasser in den Behälter schütten und anschließend die gemäß den Anweisungen des Herstellers erforderliche Menge des konzentrierten Produkts hinzufügen Natürliche frisch gepreßte Säfte sollten gefiltert werden um zu vermeiden daß die im Saft enthaltenen festen Teile den Abfluß aus dem Hahn behindern 4 Die Deckel auf den Be...

Page 21: ...n einen Fachmann Die optimale Getränketemperatur wurde werkseitig eingestellt 6 Das Gerät darf nicht in Bereichen eigesetzt werden in denen es mit Spritzwasser in Berührung kommen könnte 5 3 REINIGUNG Reinigen und Waschen des Geräts sind grundlegende Maßnahmen zur perfekten Erhaltung des Geschmacks der Getränke und der maximalen Leistunsfähigkeit Ihres Dispensers Die im folgenden beschriebenen Ver...

Page 22: ...le zu desinfizierenden Teile in die Lösung tauchen Dabei die vom Hersteller angegebene Zeit einhalten 4 Die desinfizierten Teile auf einer sauberen Fläche an der Luft trocknen lassen 5 Die äußeren Teile des Dispensers trocknen Dabei dürfen keine scheuernden Tücher verwendet werden 5 3 4 MONTAGE 1 Die Tropfschale in ihren Sitz einsetzen 2 Ausschlauchventil den Betätigungshebel des Ventils drücken 1...

Page 23: ...gen kann 5 Die Desinfektionslösung über die Hähne aus den Behältern ablassen 6 Mit frischem Getränk spülen um eventuelle Rückstände der Desinfektionslösung vom Boden der Behälter zu entfernen Die Behälter innen mit einer Einweg Papierserviette trocknen 7 Keine weiteren Spülungen vornehmen 6 INSTANDHALTUNG 1 Austausch der Birnen im beleuchteten Deckel Bild 9 Entfernen Sie die Halteschrauben der obe...

Page 24: ...terruptor omnipolar este debe garantizar una distancia de apertura de los contactos que permita la desconexión completa en las condiciones previstas para la categoría de sobretensión III No utilizar cordones conectores para enchufar el aparato al suministro de corriente eléctrica 8 El distribuidor no sale de fábrica prelavado e higienizado Antes de utilizarlo debe ser desarmado lavado e higienizad...

Page 25: ...ado no superar dicho nivel La cantidad de producto presente en el contenedor en litros o en galones está indicada con señales específicas situadas en el contenedor mismo 3 Si se quiere distribuir productos concentrados a diluirse con agua verter en los contenedores el agua agregando a continuación la cantidad necesaria de producto concentrado según las instrucciones del fabricante Si se quieren em...

Page 26: ...aso cuando el producto dentro de los contenedores está frio es señal de que todo funciona bien y que el calor producido no es alarmante 5 Regulación de la temperatura para este tipo de operación dirigerse exclusivamente al técnico La temperatura ideal de las bebidas ha sido establecida y regulada en la fábrica 6 Para evitar riesgos de caídas las partes alrededor de la máquina tienen que mantenerse...

Page 27: ...etergente todas las partes en contacto con la bebida 3 Enjuagar todas las partes con agua corriente 5 3 3 REMONTAJE 1 Colocar el cajón recoge gotas en su alojamiento 2 Grifo con tubo de goma empujar la palanca mando grifo 1 y insertar el tubo de goma de salida en su situación vertical en el fondo del contenedor 2 Tirar 3 ligeramente hacia abajo la extremidad del tubo de goma hasta ajustarlo comple...

Page 28: ...ara higienizar aprobado por las autoridades de vuestro país respetando las especificaciones del fabricante Si se carece de un producto para higienizar específico preparar una solución de agua e hipoclorito de sodio lejía uso alimenticio en la proporción de 1 cucharadita por cada 2 litros de agua 2 Verter la solución en los contenedores 3 Usando un cepillo apropiado fregar con la solución todas las...

Page 29: ...el condensador Antes de efectuar dicha operación desenchufar el distribuidor de la toma de corriente Prestar atención a las aletas del condensador porque tienen filo IMPORTANTE Para el mantenimiento del producto el personal técnico tiene que utilizar guantes que dispongan por lo menos de un grado de clasificación PL 0 4 EN388 ATTENCION El operador autorizado para efectuar el mantenimiento tiene qu...

Page 30: ...30 Arctic Deluxe 12 20 ELENCO RICAMBI SPARE PARTS LIST LISTE DES PIECES DE RECHANGE ERSATZTEILLISTE DESCRIPCION PIEZAS DE REPUESTO ...

Page 31: ...fixing screw for panel Vis inox de fixation du pan neaux Bolt for faucet side panel Tornillo inox fijacion paneles 29 22900 03700 Griglia cassetto raccogli gocce Drip tray cover Couvercle tiroir égouttoir Tropfgitter Rejilla cajón 2922900 03700 200Griglia cassetto raccogli gocce bianco White Drip tray cover Couvercle tiroir égouttoir blanche Tropfgitter weiß Rejilla cajón blanco 30 22900 03800 Cas...

Page 32: ...Photo Dia Fotografia 51 22900 00500 Rubinetto Push handle Robinet Ausgabe Palanca de mando grifo 52 22900 06501 Molla contatto elettrico coperchio 20lt 20lt light wire Ressort de contact 20lt Feder 20lt Muelle para contacto luz 20lt 52 22900 06500 Molla contatto elettrico coperchio 12lt 12lt light wire Ressort de contact 12lt Feder 12lt Muelle para contacto luz 12lt 53 22800 22805 Gommino con cont...

Page 33: ...no per basetta Cam to board 12 22600 01240 Ventolina miscelazione super Super mixing impeller SCHEMA ELETTRICO WIRING DIAGRAM SCHEMA ELECTRIQUE SCHALTSCHEMA ESQUEMA ELECTRICO 1 2 Interruttore Switch Interrupteur Schalter Interruptor 3 4 5 6 Termostato Thermostat Thermostat Thermostat Termostato 7 8 9 10 Interruttore pompa agitatore Pump mixer switch Interrupteur pompe brasseur Pumpe Mixerschalter ...

Page 34: ...34 Arctic Deluxe 12 20 NOTE NOTES NOTES ANMERKUNGEN NOTAS ...

Page 35: ...35 NOTE NOTES NOTES ANMERKUNGEN NOTAS ...

Page 36: ...Ugolini spa Via dei Pioppi 33 20090 Opera MI Tel 02 5300591 www ugolinispa com 02407 00099 V5 5 16A30 ...

Reviews: