- 15 -
Preparation before driving
If the bicycle is not fully loaded, it must ensured that:
•
brackets not in use are removed from the rack frame and
stowed in the car boot,
•
all keys are removed and stored,
•
all wheel rail lashing straps are closed.
Replacing bulbs
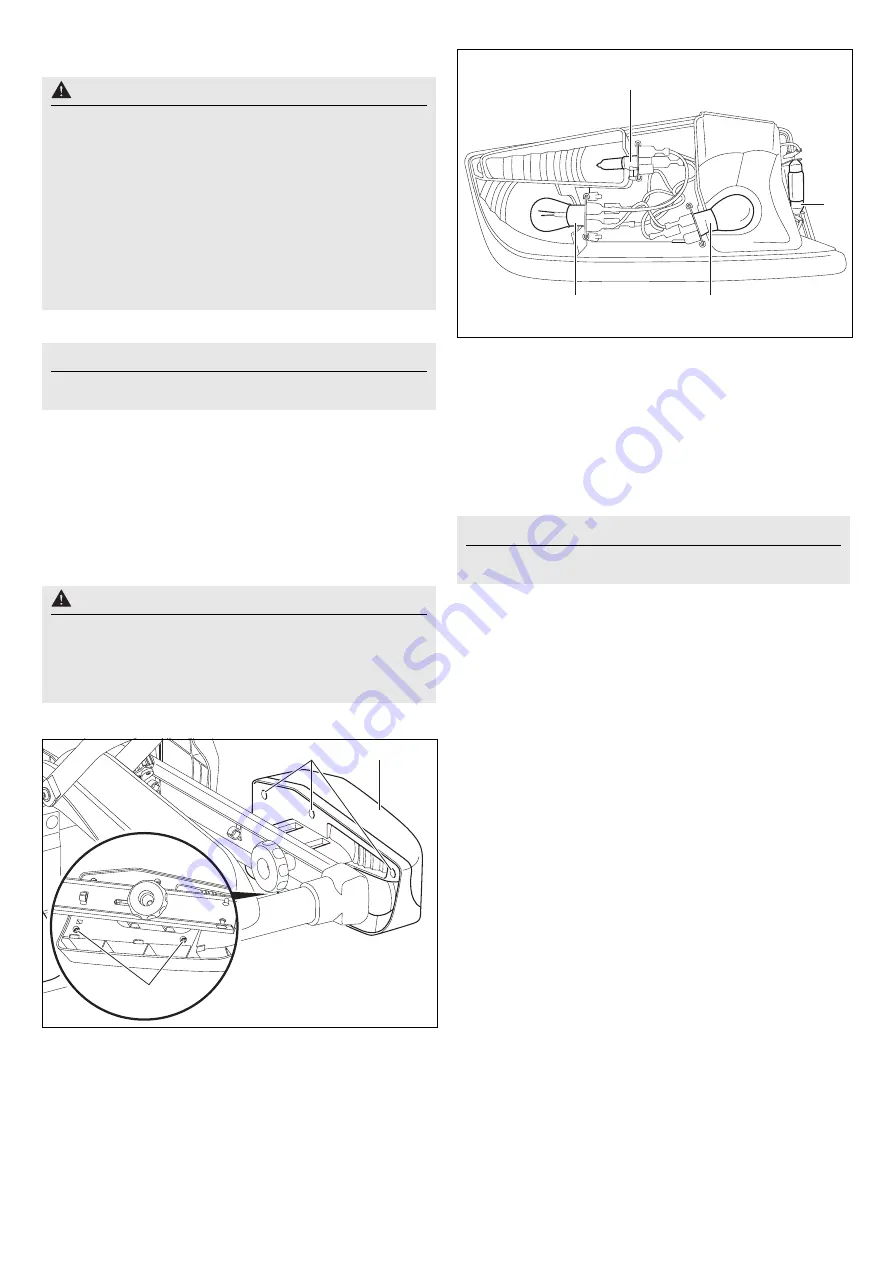
1. Undo the screws (30) and remove the lens (31).
2. Gently press defective bulbs into the sockets (32), (33), (34)
or (35).
Unscrew the bulb from the socket (33).
Turn the bulbs in sockets (32), (34) or (35) approx. 90° anti-
clockwise and remove.
3. Gently push new bulbs into sockets (32), (33), (34) or (35).
Turn the bulbs in sockets (32), (34) or (35) additionally approx.
90° clockwise.
Bulbs required, see page 10.
4. Replace the lens (31) and fasten hand tight in place using
screws (30).
Attention
All screw connections and attachments of the bicycle rack and
the bicycles must be checked before assembly, before every
trip and during lengthy trips to ensure they are sitting firmly,
and they must be retightened if necessary.
The lighting system must be checked to ensure it is working
properly before every trip.
If these instructions are not followed, the bicycle rack together
with the mounted bicycles may free themselves from the
vehicle and cause injury to you and other persons, and/or may
result in an accident.
This check must be repeated at regular intervals regardless
of road conditions.
Attention
The bicycle rack license plate and the lighting system must
not be covered.
Attention
When replacing bulbs the vehicle ignition must be switched
off and the plug for the lighting system removed from the trailer
hitch electrical system. Failure to do so can result in a short
circuit or damage to property. If you are not sure, the bulbs
should be replaced by a specialist dealer.
30
30
31
M+P-25A-0151
Attention
Always handle new bulbs with a clean cloth and insert in
sockets (32), (33), (34) or (35)
32
33
35
34
M+P-25A-0128


