


Mr Bot 280
13
Step 4
Your semi-assembled printer should
look like in the photo.
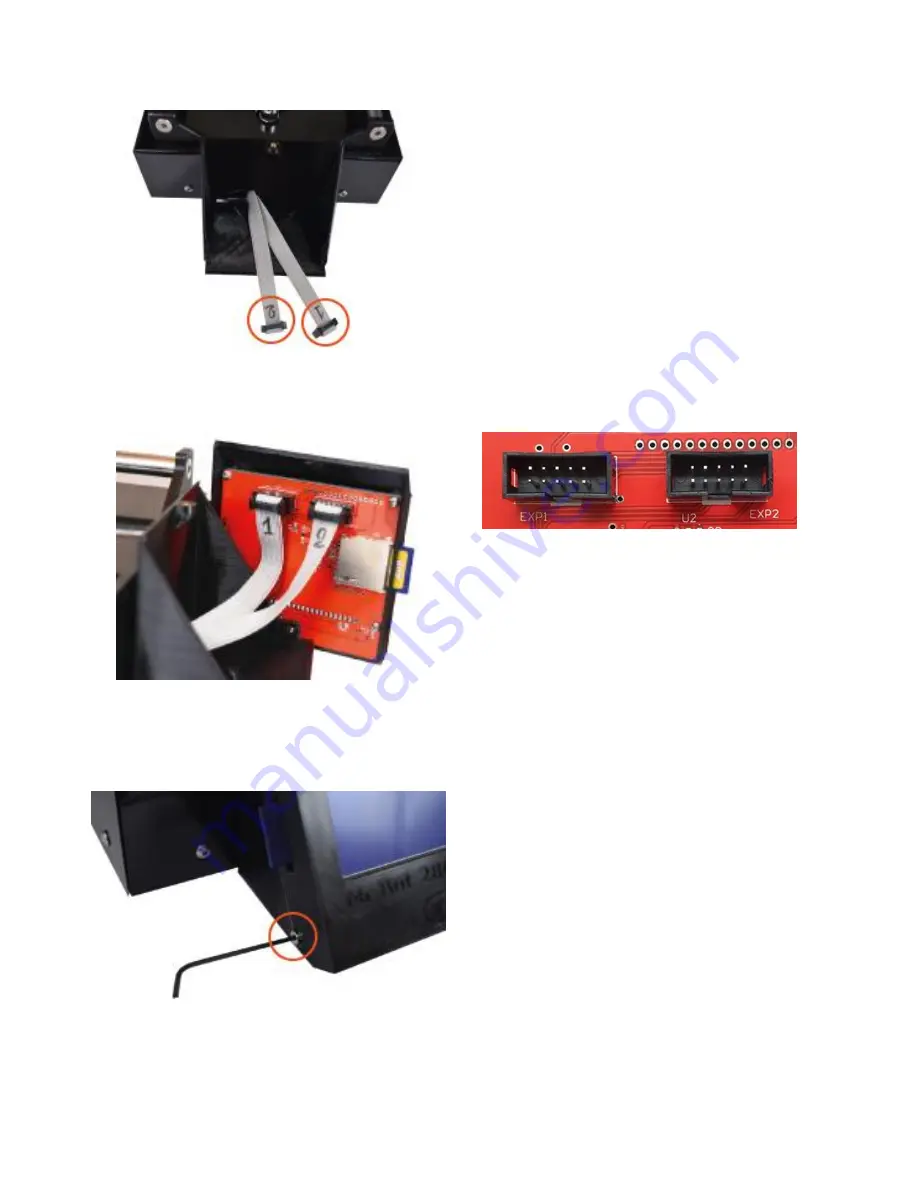
Step 5
Connect the numbered ribbon cables
to the corresponding numbered plugs
on the back of the LCD display.
Step 6
Screw the pre-assembled part of the
LCD display to the printer's sub-
assembly with the three M3x6mm
screws (4).


