background image

SETUP USING THE APP FOR WiFi CONNECTION

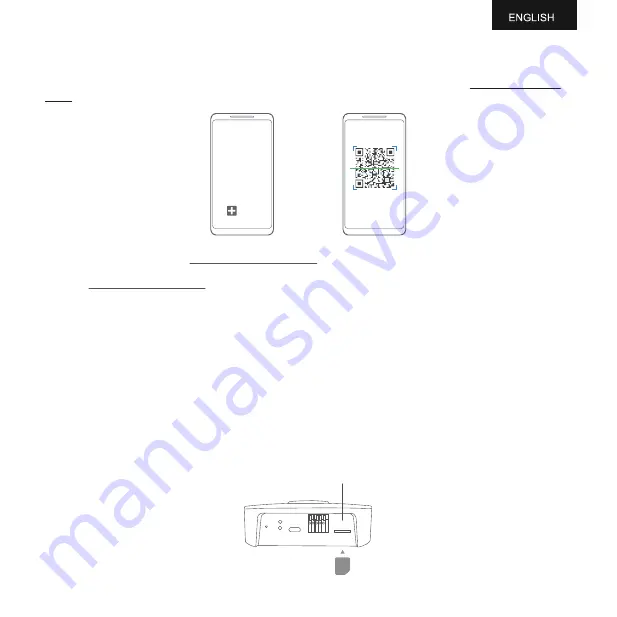
Launch the App and log in. On the home page, tap "+" to start adding your device. Then please follow the 

in-app instructions to complete the setup. You can also view the demonstration video at www.ubibot.com/-

setup for step by step guidance.

3

Via our app and web console (http://console.ubibot.com), you are able to view the readings as well as  config-

ure your device, such as create alert rules, set data syncinterval, etc. You can find and watch the demonstration 

videos at www.ubibot.com/setup. 

SETUP USING THE APP FOR MOBILE NETWORK *

Before you set up the device on mobile data, please check the APN information of the SIM card used for the 
UbiBot device.  

An APN (Access Point Name) provides the details your device needs to connect to mobile data through your 
network operator. APN details differ by network and you will need to get these from your network operator. 

With the device off, insert the SIM card as indicated in the picture. Launch the app and log in. Tap the "+" to start 
seng up the device. Please follow the in-app instructions to complete the setup process. Please note, the setup 
will fail if you don't have data allowance. 

New Device

Micro

SIM

Micro SIM card* Slot

Summary of Contents for AQS1

Page 1: ...Air Quality Sensor AQS1 User Manuel...

Page 2: ...ccording to the version you purchased PACKAGE LIST INTRODUCTION Device 1 User Manual User manual 3 External antenna 2 Note The 4 prong data cable included with the device supports data transfer Using...

Page 3: ...release the button to restore the factory state Breathing lamp can light up 4 colors green yellow orange and red Each color indicates a corresponding value range of the data collected by AQS1 The wor...

Page 4: ...at www ubibot com setup SETUP USING THE APP FOR MOBILE NETWORK Before you set up the device on mobile data please check the APN information of the SIM card used for the UbiBot device An APN Access Poi...

Page 5: ...online document SETUP USING PC TOOLS STEP 1 Launch the App and log in With the device switched on use the Type C USB cable provided to connect your device to the computer The PC Tools will automatical...

Page 6: ...racy 0 3 Range 10 90 RH Accuracy 3 RH Range 26 126 kPa Range 0 500 g m3 Accuracy 10 g m3 0 100 g m3 10 100 500 g m3 Range 0 65000 ppb Range 400 65000 ppm Range 0 10000 ppm 400 2000 higher accuracy mea...

Page 7: ...power supply of the device is properly connected Check whether the router is working properly If using the mobile data tra c provided by the SIM card inside the device you need to check whether the S...

Page 8: ...data is displayed on the platform after the equipment has been successfully connected to the network Di erent sensors require di erent acquisition times You need to click the Con guration button to u...

Page 9: ...man made damage to the product such as exceeding the temperature and humidity range of the equipment water caused damage including natural water such as water vapor etc fall abnormal physical force de...

Page 10: ...V1 0 0...

Reviews: