UBI EasyCoder 201 IIE
UBI EasyPak 71 – Getting Started
9
PRINT YOUR FIRST LABEL
USING UBI LabelShop
❏
Check that the parallel interface cable is properly
connected between your PC and your printer.
❏
Turn the printer ON.
❏
"LABELSHOP" comes up in the printer display.
❏
Check that paper is properly loaded and that the
printhead is lowered. Press the "Feed" button for
feeding one label and to confirm that all is OK.
(If not, see how to load paper on page 10.)
❏
Double click on the "UBIlShop" icon to start the
program.
❏
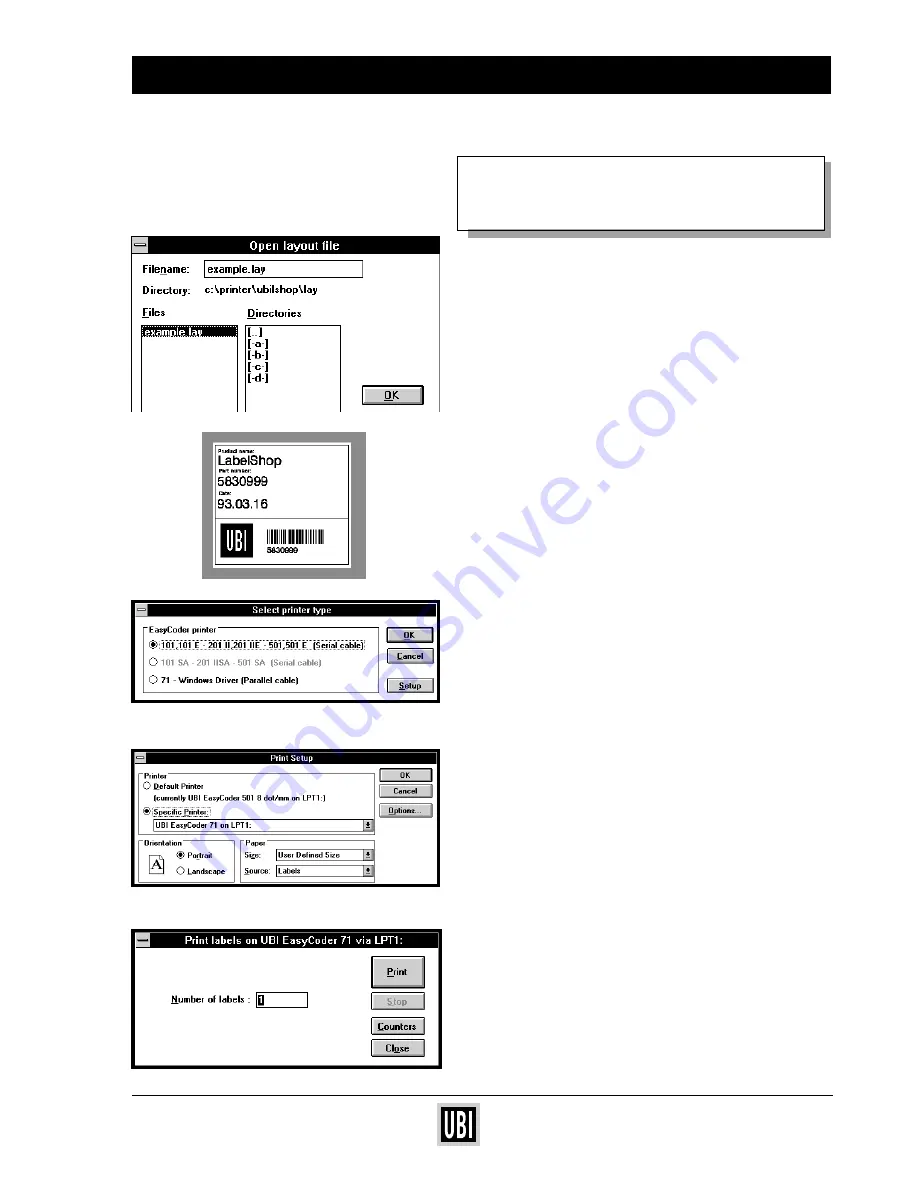
From the menue File, choose "Open".
❏
Select the pre-designed label layout "example.lay".
The layout will appear on your screen.
❏
From the menue File, choose "Print setup".
❏
Select "71–Windows Driver (Parallel cable)" and
click "Setup".
If UBI EasyCoder 71 is not set as default printer,
then choose "Specific Printer: UBI EasyCoder 71
on LPT1" and click "OK". Set up your label dimen-
sions by using "Paper size".
❏
From the menue File, choose "Print".
❏
State number of labels required and click "Print".
The labels will now be printed on your UBI
EasyCoder!
❏
For further usage, please read your UBI LabelShop
manual.


