background image

UBI EasyCoder 201 IIE

UBI EasyPak 71  –  Getting Started

11

Self-strip Model

To load self adhesive labels, follow the
instructions on previous page, step 1—6.
Then proceed as follows:

1

Press the "Feed" button until a full
label has been fed out.

2

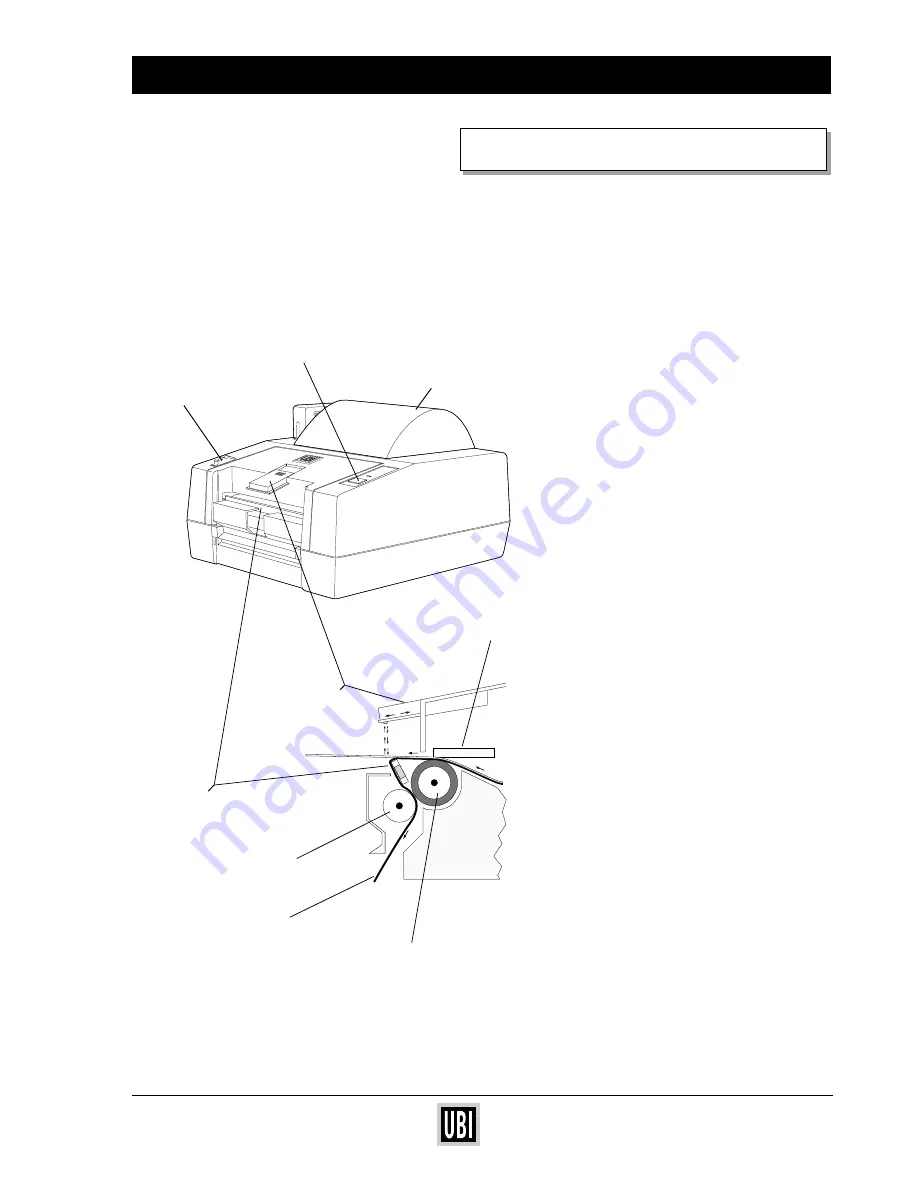
Manually peel off the first label from
the backing paper. Then thread the
backing paper around the dispenser
edge and down between the black
platen and the white self-strip roller.
Push the paper down as far as it will go.

3

Press the "Feed" button until the back-
ing paper appears at the bottom of the
printer.

4

With your left hand, push the print head
release knob back towards the back of
the printer.

5

Press the "Feed" button and release it
when the top of next label becomes
visible.

6

If you want to use the label-taken
sensor, pull it out until it snaps into
extended position.

7

Rewind excess label web onto the roll
and place it into the cavity. Close the
cover.

LOAD PAPER, cont’d

Easy

Coder

71

Power

Feed

Print head

Label

Platen

Cover

Release
  knob

Self-strip roller

Backing paper

Feed button

Dispenser
  edge

Label-taken
sensor

(Side view)

Summary of Contents for EasyCoder 71

Page 1: ...3 Introduction 4 Check the package contents 4 Connect power cord 5 Connect interface cable 5 Install your UBI Windows Printer Driver 6 Use your UBI Windows Printer Driver 7 Install your UBI LabelShop...

Page 2: ...subject to change without prior notice and does not represent a commitment on the part of UBI Printer AB Copyright UBI Printer AB 1993 All rights reserved Published in Sweden EasyCoder LabelShop and...

Page 3: ...over Dispenser edge Label taken sensor Feed Button Cover Easy Coder 71 Power Feed Memory Cartridge Release Knob Control Lamp No light Power off Red light Power on Out of paper Green light Power on Rea...

Page 4: ...tivity and greater job satisfaction CHECK THE PACKAGE CONTENTS Make sure the following items are included in your EasyPak boxes UBI EasyCoder 71 printer UBI LabelShop floppy disk Windows Printer Drive...

Page 5: ...er inlet The Power control lamp lights red when the power is on CONNECT INTERFACE CABLE Before connecting an interface cable please make sure that both computer and printer are turned OFF For Windows...

Page 6: ...ontrol Panel option In the Control Panel window open the Printers option In the Printers window click the Add button In the List of printers select the Install Unlisted or Updated Printer option and c...

Page 7: ...st label size from the list To show the list point at the little arrow to the right of User Defined Size Check that the parallel interface cable is properly connected between your PC and your printer...

Page 8: ...ick the OK button UBI LabelShop Installation dialogue box comes up on your screen You may change the file directory by clicking the Change Directory button Default is C UBILSHOP You may now change lan...

Page 9: ...age 10 Double click on the UBIlShop icon to start the program From the menue File choose Open Select the pre designed label layout example lay The layout will appear on your screen From the menue File...

Page 10: ...is off center push the print head release knob towards the back of the printer and hold while adjusting labels Then release the knob 9 While keeping the paper straight rewind excess paper onto the rol...

Page 11: ...as far as it will go 3 Press the Feed button until the back ing paper appears at the bottom of the printer 4 With your left hand push the print head release knob back towards the back of the printer...

Page 12: ...UBI EasyCoder 201 IIE UBI EasyPak 71 Getting Started 12 NOTES...

Reviews: