background image


UAV-1004045-001 AV-30-C ICA 

17 

Revision A 

Rotating the knob left and right will access the various parameters 
that may be configured.   

Pressing the knob when the desired field is shown will allow the 
associated setting to be edited. The parameter and associated setting 
will be shown in magenta while the editing mode is active: 


Rotating the knob left and right changes the indicated value.  After 
adjustment, pressing the knob again will disable the editing mode but 
the Install Menu will remain active.   

Pressing DONE will exit the Install Menu. 

7.9.4 Applicable Install Menu Settings 

The Install Menu options and settings allow for various parameters to 
be set and calibrated.  Parameter settings that are not associated 
with ongoing maintenance (operational modes, port settings, etc.) 
must not be modified and maintained in accordance with the setting 
definitions within 

AV-30-C Installation Manual

.   

7.9.5 Altimeter Trimming 

Connect the pitot static test set and follow applicable calibration 
procedures in accordance with 

4 CFR Part 91.411

.  Trim the 

indicated altitude as required. 

Once complete, exit the Install Menu and turn power off.  The altitude 
trim setting will be stored in internal memory. 


Summary of Contents for AV-30-C

Page 1: ...UAV 1004045 001 AV 30 C ICA 1 Revision A AV 30 C Instructions for Continued Airworthiness...

Page 2: ...ided that the complete text of this copyright notice is retained Unauthorized commercial distribution of this manual or any revision hereto is strictly prohibited uAvionix and Ping are registered trad...

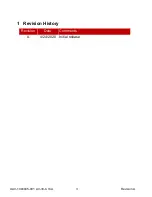
Page 3: ...UAV 1004045 001 AV 30 C ICA 3 Revision A 1 Revision History Revision Date Comments A 4 24 2020 Initial release...

Page 4: ...ion Number ECCN 7A994 These items are controlled by the U S Government and authorized for export only to the country of ultimate destination for use by the ultimate consignee or end user s herein iden...

Page 5: ...dified or altered Disclaimer of Warranty IN NO EVENT SHALL UAVIONIX BE LIABLE FOR ANY INCIDENTAL SPECIAL INDIRECT OR CONSEQUENTIAL DAMAGES WHETHER RESULTING FROM THE USE MISUSE OR INABILITY TO USE THE...

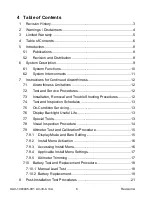
Page 6: ...cedures 12 7 3 Installation Removal and Trouble Shooting Procedures 12 7 4 Test and Inspection Schedules 13 7 5 On Condition Servicing 13 7 6 Display Backlight Useful Life 13 7 7 Special Tools 13 7 8...

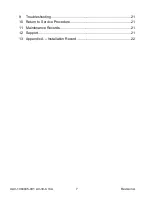
Page 7: ...UAV 1004045 001 AV 30 C ICA 7 Revision A 9 Troubleshooting 21 10 Return to Service Procedure 21 11 Maintenance Records 21 12 Support 21 13 Appendix A Installation Record 22...

Page 8: ...t Number uAvionix Document D 0031 0 UAV 1003947 001 AV 30 C Installation Manual D 0032 0 UAV 1003946 001 AV 30 C Pilots Guide D 0044 0 UAV 1004044 001 AV 30 C Flight Manual Supplement Owner operators...

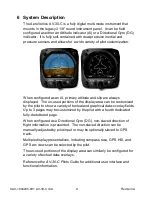
Page 9: ...isplay area can be customized by the pilot to show a variety of textual and graphical data overlay fields Up to 3 pages may be customized by the pilot with a fourth dedicated fully decluttered page Wh...

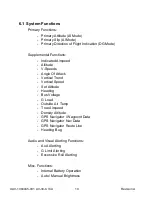
Page 10: ...d Airspeed Altitude V Speeds Angle Of Attack Vertical Trend Vertical Speed Set Altitude Heading Bus Voltage G Load Outside Air Temp True Airspeed Density Altitude GPS Navigator Waypoint Data GPS Navig...

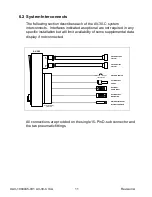
Page 11: ...stallation but will limit availability of some supplemental data display if not connected AIRCRAFT STATIC SYSTEM 2 AMP BREAKER AIRCRAFT PITOT SYSTEM S P AIRCRAFT POWER OPTIONAL OAT PROBE OPTIONAL GPS...

Page 12: ...pment and or installation No component level overhaul is required 7 2 Test and Service Procedures Utilize Section 7 8 Visual Inspection Procedure of this document to perform visual inspections when re...

Page 13: ...ed when conditions symptoms and or servicing should take place only after the system is troubleshot based on guidance provided in this manual and per common avionics maintenance practices 7 6 Display...

Page 14: ...signs of cracking chafing abrasion melting or any other form of damage Inspect unit connector and ground strap for corrosion evidence of moisture or other defects Inspect pneumatic connections and rep...

Page 15: ...l and operation required to enter and navigate the maintenance mode is provided here For a full description of the user interface refer to document AV 30 C Pilots Guide 7 9 1 Display Mode and Baro Set...

Page 16: ...ssible To access the Install Menu ensure the unit is turned off Press and hold the main control knob while power is applied Push and Hold While Applying Power Keep the knob pressed until the startup l...

Page 17: ...ctive Pressing DONE will exit the Install Menu 7 9 4 Applicable Install Menu Settings The Install Menu options and settings allow for various parameters to be set and calibrated Parameter settings tha...

Page 18: ...ground power turn the instrument on and allow full charge levels to be obtained 3 Set manual mode for display backlight and set to maximum brightness 4 Remove power to the unit by pulling the corresp...

Page 19: ...ng internal thermal energy when operating at cold temperatures The existing thermal blanket is re used Battery replacement consists of removing the battery cover removal and unwrapping of the old batt...

Page 20: ...sert into the battery cover leaving the battery connection wires outside of the wrapping 5 Locate the keyed side of the battery connector and press firmly into the mating connector on the unit 6 Tuck...

Page 21: ...30 C Installation Manual 11 Maintenance Records After conducting the test and service procedures as defined in this document the aircraft may be returned to service Record the following information i...

Page 22: ...ion and should be kept in the aircraft permanent records NOTE A copy of this form must be sent to maintenance uavionix com AV 30 C Installation and Configuration Log Date By Aircraft Information Make...

Reviews: