- 83 -
5.2. Touch Screen Calibration (Resistive Type)
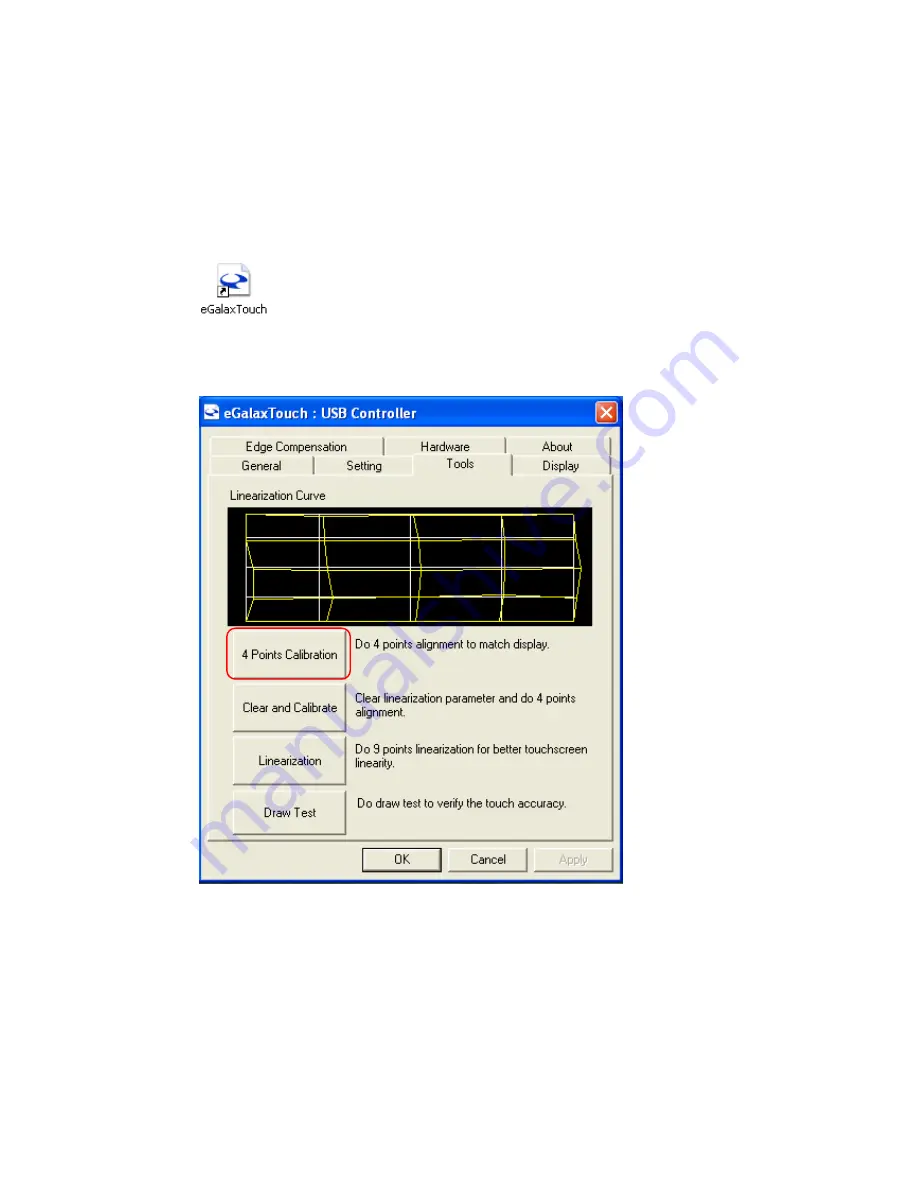
After the driver is installed to the system, there is a shortcut on the desktop for touch screen
Calibration. User can re-configure the touch screen by initiating the utility.
To calibrate the touch screen:
a.
Double click the icon to access the utility.
b.
User can perform 4-point-calibration by selecting the function “4 Points Calibration”.
Click “OK” to continue.
Summary of Contents for POS-6000-i
Page 1: ...i POS 6000 Series User Manual POS 6000 i Ver 1 0 Copyright Fametech Inc TYSSO 2014...
Page 7: ...vi...
Page 11: ...4 Dimensions Left View Front View Right View Rear View Bottom View...
Page 14: ...7 1 4 I O Ports Bottom I O Ports Side I O Ports Side I O ports USB...
Page 32: ...25 3 Select CPU Smart Fan Control 4 Select Enable...
Page 44: ...37 Port 4 Port 5...
Page 46: ...39 3 2 9 Network Stack This section configures settings relevant to the network stack...
Page 51: ...44 3 3 Chipset This field is used to configure the functions of relevant chipset...
Page 55: ...48 PCH Azalia Configuration Azalia Select the control detection of the Azalia device...
Page 56: ...49 3 3 2 System Agent SA Configuration...
Page 59: ...52 NB PCIe Configuration Enabled PEG Enables or disables the PEG Memory Configuration...
Page 67: ...60...
Page 72: ...65 b Setup is now installing the driver c Setup completed Click Exit to close the program...
Page 79: ...72 c Click Finish to finish the installation...
Page 88: ...81 q Now the software is installing to the system...
Page 103: ...96...
Page 106: ...99 COM 5 Jumper Setting JP19...
Page 107: ...100 Cash Drawer Power Select J2...
Page 108: ...101 Jumper Location and Settings...
Page 109: ...102 Jumper Settings...
Page 110: ...103...
Page 111: ...104 05102014...


