


3
TP9KACX / TP9KSCX
Jan 2017
PREPARATION
The installation of this lift is relatively simple and can be accomplished by 2 men in a few hours. The
following tools and equipment are needed:
•
12 quarts of Non-Detergent / Non-Foaming Hydraulic Oil - SAE-10, AW 32 or equivalent
•
Chalk line and 12’ Tape Measure
•
4ft. Level
•
Rotary Hammer Drill with 3/4” Masonry Drill Bit. (Core Drill Rebar Cutter also recommended)
•
Hammer and Hex Key Wrench Set
•
Metric Sockets and Open Wrench set - 13mm-30mm
•
Medium Adjustable Wrench and Medium Pipe Wrench
•
Crow Bar for Shim Installation and Medium Flat Screwdriver
•
Locking, Needle Nose and Snap Ring Pliers
GENERAL INFORMATION
1. Carefully remove the crating and packing materials.
CAUTION! Be careful when cutting steel banding material as items may become loose and fall
causing personal harm or injury.
2. Identify the components and check for damage or shortages.
Please contact your distributor immediately, if any damages or shortages are discovered.
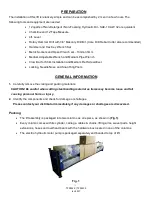
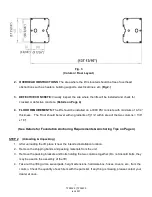
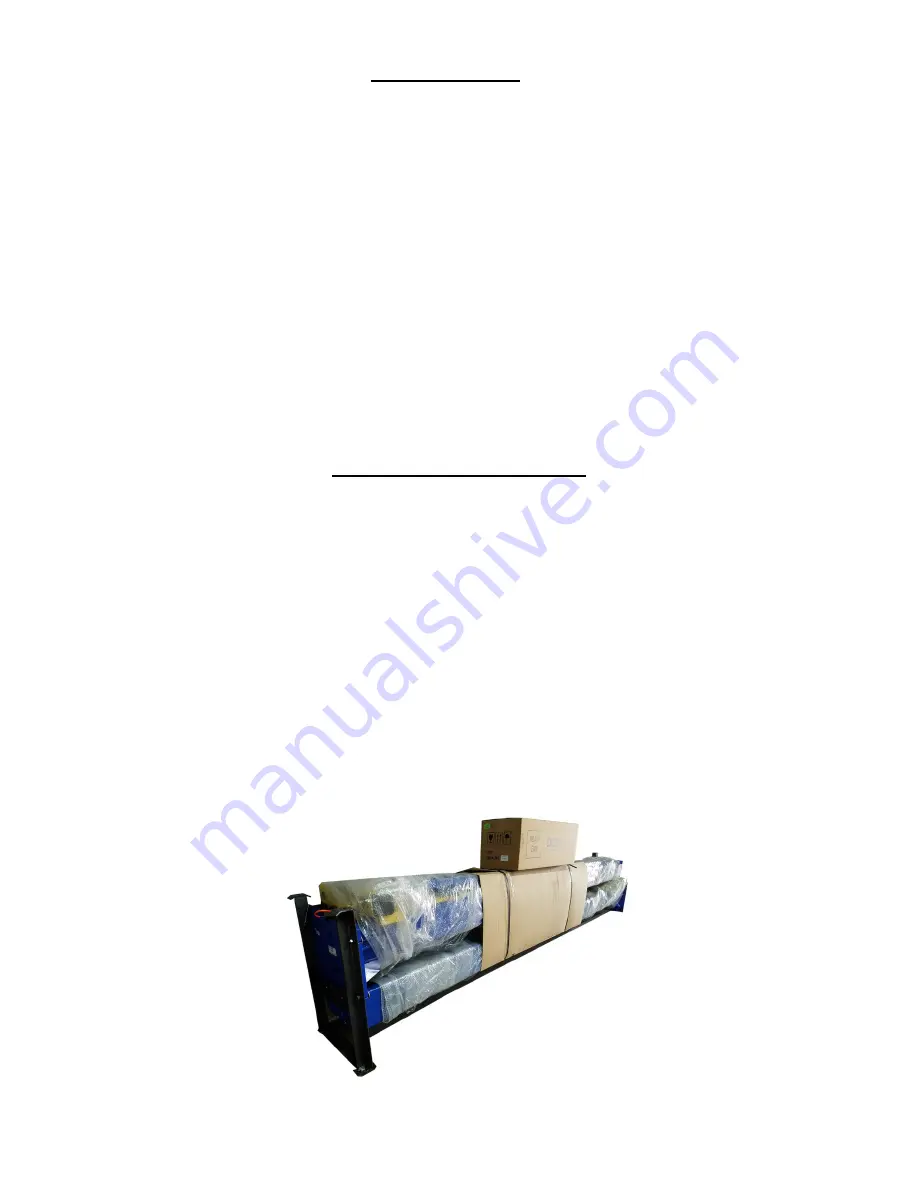
Packing:
•
The lift assembly is packaged into two columns as one piece, as shown in (Fig.1).
•
Every column comes with its cylinder, carriage, cables & chains, lifting arms, swivel pads, height
extensions, hoses and overhead beam with the hardware box located in one of the columns.
•
The electric-hydraulic motor pump is packaged separately and banded to top of lift.
Fig. 1
Summary of Contents for TP9KACX
Page 4: ...4 TP9KACX TP9KSCX Jan 2017 ...
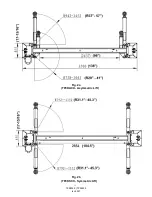
Page 6: ...6 TP9KACX TP9KSCX Jan 2017 Fig 2a TP9KACX Asymmetric Lift Fig 2b TP9KSCX Symmetric Lift ...
Page 21: ...21 TP9KACX TP9KSCX Jan 2017 EXPLODED VIEW 1 ...
Page 22: ...22 TP9KACX TP9KSCX Jan 2017 EXPLODED VIEW 2 ...
Page 26: ...26 TP9KACX TP9KSCX Jan 2017 ...