background image

PUTTING INTO SERVICE 

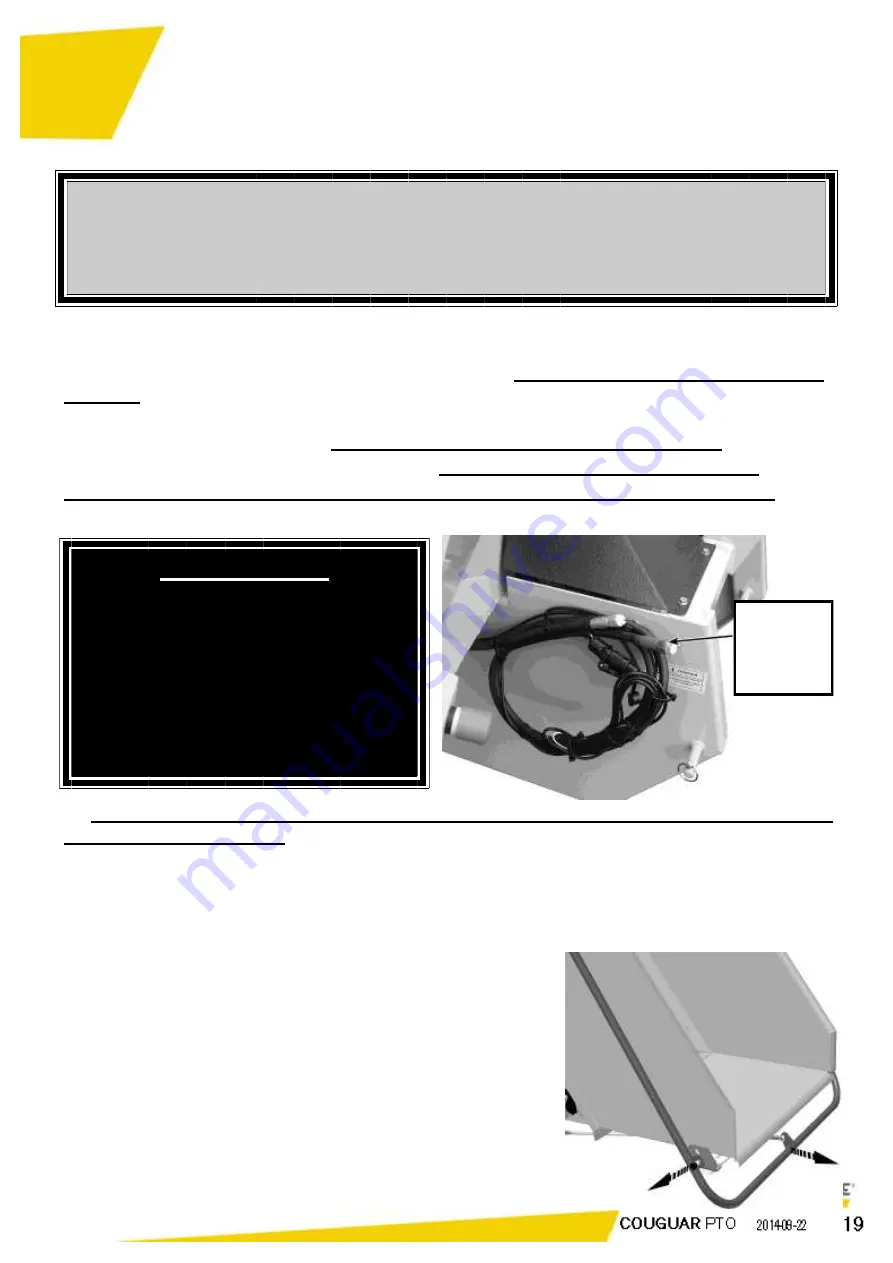
Mount at the end of the crusher’s flexible tubes hydraulic plugs suited for the tractor  

1) Connect the plugs to a single-effect distributor; the flexible tube marked red to the 

pressure and the other flexible tube to a free return  


OR


to a double-effect distributor, the flexible tube marked red to the pressure and the 
unmarked flexible tube to the other plug; 

always respect the distributor’s 

engaging direction directionistributor'enclenchement du distributeur.


Flexible 

tube with 

red marking 

=  Pressure 

ATTENTION ! 

In  order  for  the  feeder  roller 

to be able to run in forward, it 

is  essential  that  the  crusher’s 

electric  supply  cable  be 

connected  to the  tractor via a 

12-volt  power  supply  source 

and be at maximum speed.


2)  Connect  the  power  supply  cable  of  the  VarioStress  system  to  the  tractor,  while 

respecting the polarities:


- white wire: +12 volt 
- blue wire: negative 

3) 

Check whether the emergency stop buttons and the “VarioStress” anti-jamming system 

are working.


4) 

Check  that  the  cap  at the  top  of the discharge  shaft is 

open


5) Gradually

 engage the clutch of the tractor’s power take

-off.


6) 

Increase the engine speed to maximum.


7) 

U n l o c k i n g   t h e   f i n g e r   i n d e x i n g  and put 

the feed roller into rotation by pulling the control bar. 

8) Adapt the speed of the feeder roller according to the 

oil  flow  produced  by  the  tractor  by  playing  on  the 

adjusting wheel of the distributor on the crusher. 


9) 

Start the shredding. 

WARNING! 

If for any unknown reason the shredder has difficulty shredding the material and you 

have to stop it: 

only restart the engine once the cause has been removed and the 

material has been cleared from the shredding rotor!


O P E R A T I N G  

P R O C E D U R E S  

Summary of Contents for Saelen GS/COUGAR PTO

Page 1: ...TECHNICAL MANUAL...

Page 2: ...MAJ 09 2008...

Page 3: ..._________________ MAINTENANCE SCHEDULE ______________________________________________ LUBRICATION POINTS __________________________________________________ PRESSURE OF THE FEED DRUM ON THE MATERIAL __...

Page 4: ...that invention patent the text of which is appended shall be delivered to SAELEN S N S Company FR The delivery produces its effects for a period of twenty years starting on the date of deposit of the...

Page 5: ...her reference For additional information technical data or additional copies of this manual please contact your dealer Safety instructions This equipment is only designed for the crushing and shreddin...

Page 6: ...pieces of metal plastic rubber and any other material that may be mixed in with the waste Always wear protective goggles work gloves and ear protection The machine must under no circumstances be used...

Page 7: ...uesting technical information always have the serial number of your COUGAR shredder ready The manufacturer s plate is on the front of the chassis Serial number The serial number is located as indicate...

Page 8: ...parts and accessories that are already under the guarantee of their manufacturer and the servicing of which is covered by the latter s administration Service items such as lubricants belts paint and...

Page 9: ...fore using the plant shredder it is the duty of the owner to ensure that all possible operators or employees have the user instructions The most important safety feature of this equipment is a safe op...

Page 10: ...e extinguisher within reach in case of fire Keep it in a visible place 4 Use appropriate protective equipment Here are a just a few suggestions do not limit yourself to them Helmet and ear protection...

Page 11: ...les Work gloves and waterproof clothing Danger rotating blades GENERAL SAFETY Rotation commands of the conveyor belt Chipping material forward operation 1 Unlocking the finger indexing 2 Pull the hand...

Page 12: ...ving parts 4 Before carrying out maintenance on adjusting repairing or unjamming the machine put the engine into idle speed using the accelerator handle wait until all moving parts have stopped stop t...

Page 13: ...d after carrying out maintenance on or servicing the shredder 4 Warning Keep hands hair and clothing away from moving parts 5 Install and ensure that all the protectors and guards are securely attache...

Page 14: ...way code in force 2 Ensure that your equipment is always equipped with working signalling lights that are clean and visible to other drivers 3 Reduce your speed on country roads and bumpy surfaces S C...

Page 15: ...t shredder is intended for the shredding of plants and branches up to 110mm 4 33 Inch in diameter La machine comprend les l ments principaux suivant A ch ssis B transmission 540 RPM C shredding unit D...

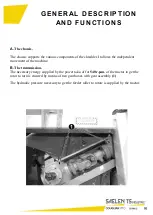
Page 16: ...achine B The transmission The necessary energy supplied by the power take off at 540 r p m of the tractor to get the rotor to turn is ensured by means of two gearboxes with gear assembly 1 The hydraul...

Page 17: ...t can be run in both directions forward and reverse run using the bar located underneath the rear of the feed hopper Shredding rotor The key element of the machine it shreds the material carried by th...

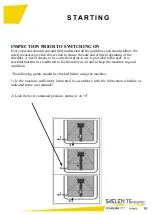
Page 18: ...list of checks to be carried out prior to use is provided to the user It is essential that this list is adhered to for the safety of all and to keep the machine in good condition The following points...

Page 19: ...power supply cable of the VarioStress system to the tractor while respecting the polarities white wire 12 volt blue wire negative 3 Check whether the emergency stop buttons and the VarioStress anti ja...

Page 20: ...the feed roller and inside the shredder which could jam the rotor when the machine is next started up 2 Push the control bar forward to stop the feed roller so what is locked by the finger indexing 3...

Page 21: ...mance multi purpose and extreme pressure EP SAE grease 2 Oil feeding 2 reductions valves SAE 90 EP MAINTENANCE SAFETY 1 Put the parking brake on remove the ignition key and wait until all the moving p...

Page 22: ...of feed roller rotation Check and remove the branches winding around the bearings axes and the hydraulic motors Every 150 Inspect wear of counter blade Lubrication shaft drive Every 200 Verification...

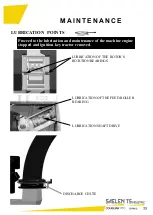
Page 23: ...HE FEED ROLLER BEARING LUBRICATION SHAFT DRIVE Proceed to the lubrication and maintenance of the machine engine stopped and ignition key tractor removed DISCHARGE CHUTE LUBRICATION OF THE ROTOR S ROTA...

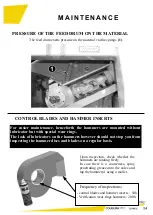
Page 24: ...The lack of lubricators on the hammers however should not stop you from inspecting the hammer discs and blades on a regular basis Upon inspection check whether the hammers are rotating freely In case...

Page 25: ...TITE thread lock adhesive To disassemble use a suitable wrench in good condition Remove all the blades and hammer pellet screws when reassembling only use new well degreased screws Clean the support s...

Page 26: ...are resting on their heel IMPORTANT always take care to install new well degreased screws so that the thread lock can adhere correctly Reassemble the main body extender 3 Start the engine and leave it...

Page 27: ...the two safety bolts 2 diam 8 at each end of the counter blade Drive the blade out by sliding it in its housing to either side If the edge is worn out remove the counter blade from its housing and re...

Page 28: ...linked to an automat Hence we can prevent the machine from being blocked permanent information about the rotating speed of the rotor is being sent to the VarioStress When the rotor speed falls below...

Page 29: ...2 suitable for manipulating mixed materials consisting of branches vegetation and conifers Configuration 3 a higher engine speed to improve ventilation for chipping plants and confers or heavy and den...

Page 30: ...y the requested page Rem push during 1 to 1 5 seconds to change the program 1 2 3 Functioning running time count can only be performed if the chipper shredder rotor is in motion Continuous Display of...

Page 31: ...I P T I O N A N D H A N D L I N G EMERGENCY STOP BUTTON The machine has two emergency circuit breaker buttons placed at either side of the feed hopper for instantly stopping the forward run of the fe...

Page 32: ...ed not even below the VarioStress intervention threshold Electric or hydraulic problem Contact your dealer The hydraulic oil heats up quickly and abnormally Incompatibility between the tractor and cru...

Page 33: ...meter Rotor weight Rotor width Engine power reqired PTO speed Rotor speed Anti jamming Hydraulic power supply Hydraulic pressure 110 mm 10 m3 according tractor 2 20 m 1 30 m 1 60 m 450 Kg 6 2 400 mm 4...

Page 34: ......

Page 35: ......

Page 36: ...CONNECTION OF THE HYDRAULIC HOSES HYDRAULIC COUPLING...

Page 37: ...Fax 49 0 2845 9292 28 HEREBY DECLARES THAT THE MACHINE Trademark TS industrieTM Type GS COUGAR PTO Technical documentation detained by St phane MORBU that the product is in conformity with the followi...

Page 38: ......
Reviews: