background image

Easy Scan 9600 Plus

13

Function

1

Zoom: Magnifies scanning area.

2

Mirror: Flips scanning area.

3

Invert: Sets inversion.

4

Descreen: Eliminates moiré patterns in the printed matter.

5

Gamma: Sets gamma.

6

HSV: Sets colour, tone and saturation

7

Tone adjustment: Edits colours

8

Auto Color Control: Automatic setting

9

Special Effect: Initiates special effects. (Left: fuzzy image;
Middle: normal image; and Right: sharp image)

Functions 1 to 8 are also explained in Help. To call Help, press the
question-mark key (?) located at the bottom of the window.

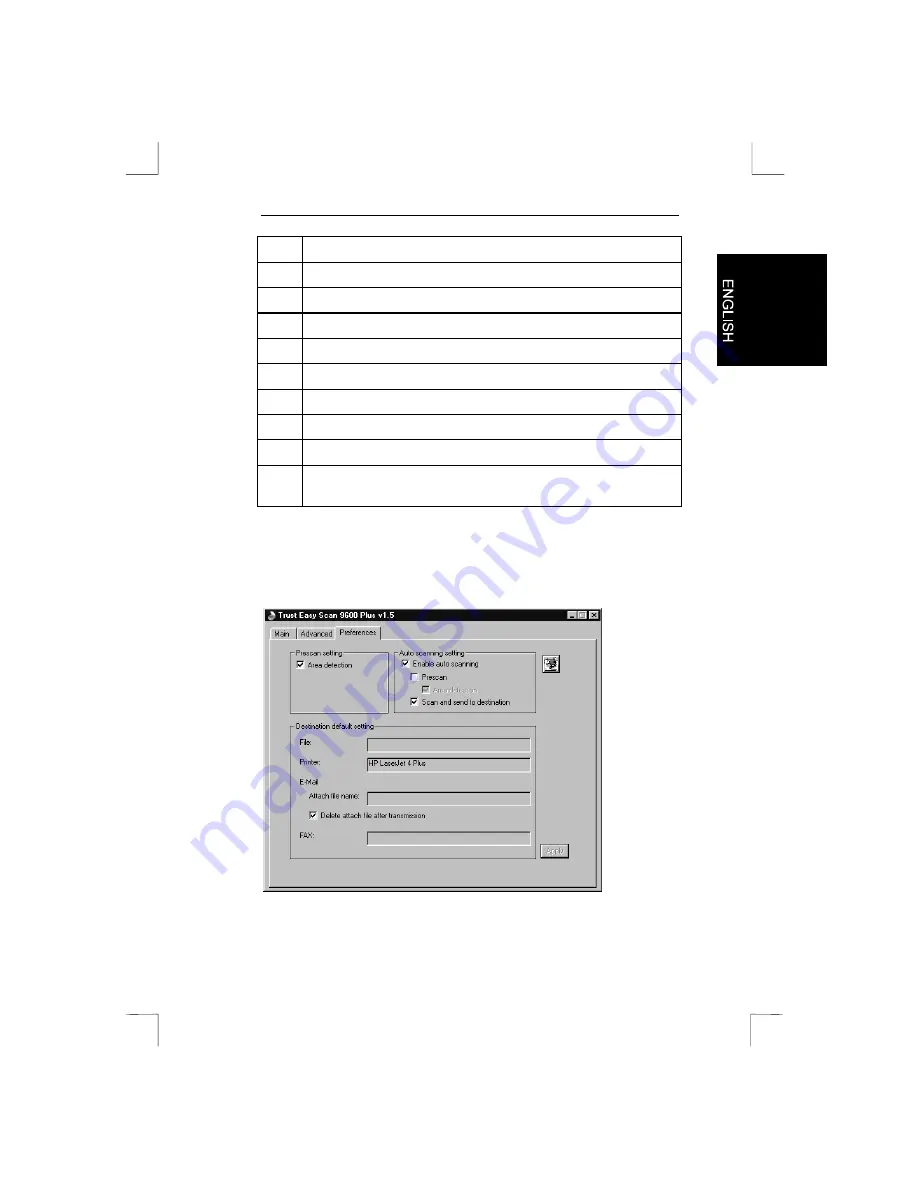
5.2.3 Preferences window

This window enables you to record certain preferences.

Figure 8:

Preferences window

Summary of Contents for Easy Scan 9600 Plus

Page 1: ...Easy Scan 9600 Plus Easy Scan 9600 Plus User s Manual Version 1 0...

Page 2: ...warranties of merchantability and fitness for a particular purpose with respect to the software the product manual s and written materials and any other accompanying hardware The manufacturer reserves...

Page 3: ...8 5 Working with the scanner 9 5 1 Activating the TWAIN program 9 5 1 1 From the Start menu 9 5 1 2 From the software 9 5 2 The TWAIN program 10 5 2 1 Main 10 5 2 2 Advanced window 12 5 2 3 Preferenc...

Page 4: ...e instructions key Here you must press a key The name of the key will appear between brackets System This is a specific term from a program e g a term used in Windows DIR Text in this font indicates t...

Page 5: ...system requirements Compatible PC with an 80486 CPU and 8 MB RAM Microsoft Windows 95 98 or Windows NT 4 0 Printer port EPP Hard disk with at least 60 MB of available hard disk space for installation...

Page 6: ...re the cord can wear or be damaged 4 Never insert objects into the openings on the outside of the device as you can come into contact with live electrical components This can cause fire or give strong...

Page 7: ...the rear of the scanner Figure B Connector B 4 Remove the interface cable from the packaging and connect it to the parallel port of your computer 5 Connect the other side of the cable to the Host con...

Page 8: ...the TWAIN program 1 Re start Windows 2 Insert the CD ROM with the driver into your CD ROM player 3 Click the Start button with your mouse and select Run 4 Type in D DRIVER SETUP EXE on the command li...

Page 9: ...on Continue You will only be able to recognise text in the languages which you have selected here Figure 3 Selecting languages 7 Click Continue to accept the installation directory of TextBridge Class...

Page 10: ...d then select Run if the installation does not start automatically 3 Type in D AUTORUN EXE on the command line see Figure 2 and click OK The installation program appears 4 Click on Adobe PhotoDeluxe 2...

Page 11: ...Scan 9600 Plus 5 The TWAIN program now appears on your display screen see Figure 6 5 1 2 From the software Execute the following to activate the TWAIN program from the software 1 Start the applicatio...

Page 12: ...us 10 5 2 The TWAIN program The TWAIN program consists of 3 tabs Main Advanced Preferences 5 2 1 Main This main functions needed in order to be able to work with the scanner are displayed here Figure...

Page 13: ...eferences This window enables you to record preferred settings 2 Sets unit of measurement e g inch cm pixel 3 Sets length and width 4 Preview key 5 Scan key 6 Activates the help function 7 Closes the...

Page 14: ...nted by your printer Printer required Send to Mail The scanned image is sent via e mail You must enter the e mail address into the Preferences window Modem and Internet account required Send to Fax Th...

Page 15: ...and saturation 7 Tone adjustment Edits colours 8 Auto Color Control Automatic setting 9 Special Effect Initiates special effects Left fuzzy image Middle normal image and Right sharp image Functions 1...

Page 16: ...tart the program Trust Easy Scan 9600 Plus See Chapter 5 1 1 2 Find the auto scan key on the front of the scanner Figure 9 Key A 3 Press button A The scanner now starts the scanning process 4 A presca...

Page 17: ...ting and starting TWAIN 3 Select Trust Easy Scan 9600 Plus from the window 4 Click OK The scanner is now set for use 6 2 Scanning with Adobe PhotoDeluxe 1 Start the Adobe PhotoDeluxe program 2 Place t...

Page 18: ...to Adobe PhotoDeluxe 9 When the scanner is finished scanning click Exit to return to Adobe PhotoDeluxe You can now edit the image This was a brief introduction to the program Consult the program s He...

Page 19: ...e 6 option 12 7 Set the resolution to 300 DPI 8 Click Scan After scanning is completed TextBridge Classic will ask whether any other items must be scanned You can scan additional pages 9 Click END to...

Page 20: ...Easy Scan 9600 Plus 18 TextBridge also has more advanced options Look in the on line help and the documentation on the CD ROM for more information...

Page 21: ...le properly Chapter 3 Power supply adapter is not connected Connect the power supply adapter properly Chapter 3 Scan key does not work Trust Easy Scan 9600 Plus program is not started Start the Trust...

Page 22: ...that the scanner is connected to the electrical mains Printer works according to the GUI principle Use a separate printer card or connect your printer directly to the parallel port if you want to pri...

Page 23: ...ing information ready 1 Operating system 2 Hardware configuration CPU MHz Memory MB Available free space on hard disk MB Display adapter resolution and number of colours 3 Scanner settings Scan mode c...

Page 24: ...y interpolation 9600 x 9600 DPI Scanning method 1 bit black white 10 bit grey value 30 bit colour Document format 210 x 297 mm A4 8 5 x 11 inch Letter Interface Parallel port EPP SPP Voltage source 22...

Reviews: