


5. A-B repeat
While in playing music mode, press [A-B] button to set the
start point A, “ ” will appear on the display. Press [A-B]
again to set the end point B, “ ” will appear on the display.
Press [A-B] again to cancel A-B repeating.
Operations
Note:
Please make sure that the player is fully charged and
the earphone is connected.
•
1. Play music and power off
Press and hold [ESC / ] to turn on / off this unit.
Turn on / off
a)
When the player is not playing or recording, it will turn
off automatically if there is no operation for one minute
or longer, which you can change in the system setting
menu. (This feature will be disabled if the player is
connected to the PC, playing music files, browsing
pictures/E-books, recording, playing games, or in FM
radio mode.)
Press and hold [ESC / ] button. Press [
] or [
]
button to select Figure 2, press [ / ] button. Select the
desired file and press [ / ] button again (Figure 15).
Play music (Power on)
b)
Figure 15
Press [ / ] button.
Pause
c)
Press [ESC / ] button.
Exit the interface
d)
Press [VOL+] or [VOL–] button.
Volume adjustment
e)
Press [
] or [
] button.
Skip to the Previous / Next track
f)
2. Hold
When in playing music / recording / FM radio mode, press
and hold [MENU] button to lock the keys (Figure 1). To
release the hold feature, press and hold [MENU] button to
unlock.
3. EQ mode
Press EQ button to select the desired EQ mode (Figure 1).
NOR / ROC / BAS / CLA / POP / JAZ / TRE.
4. Play mode
Press and hold [EQ] button to select play mode (Figure 1),
Normal , Repeat One , Repeat All , Shuffle.
Play the tracks in the currently directory.
Normal
:
Repeatedly play the current track.
Repeat One:
Repeatedly play all of the tracks in the current
directory.
Repeat All :
Randomly play the tracks in the current
directory.
Shuffle
:
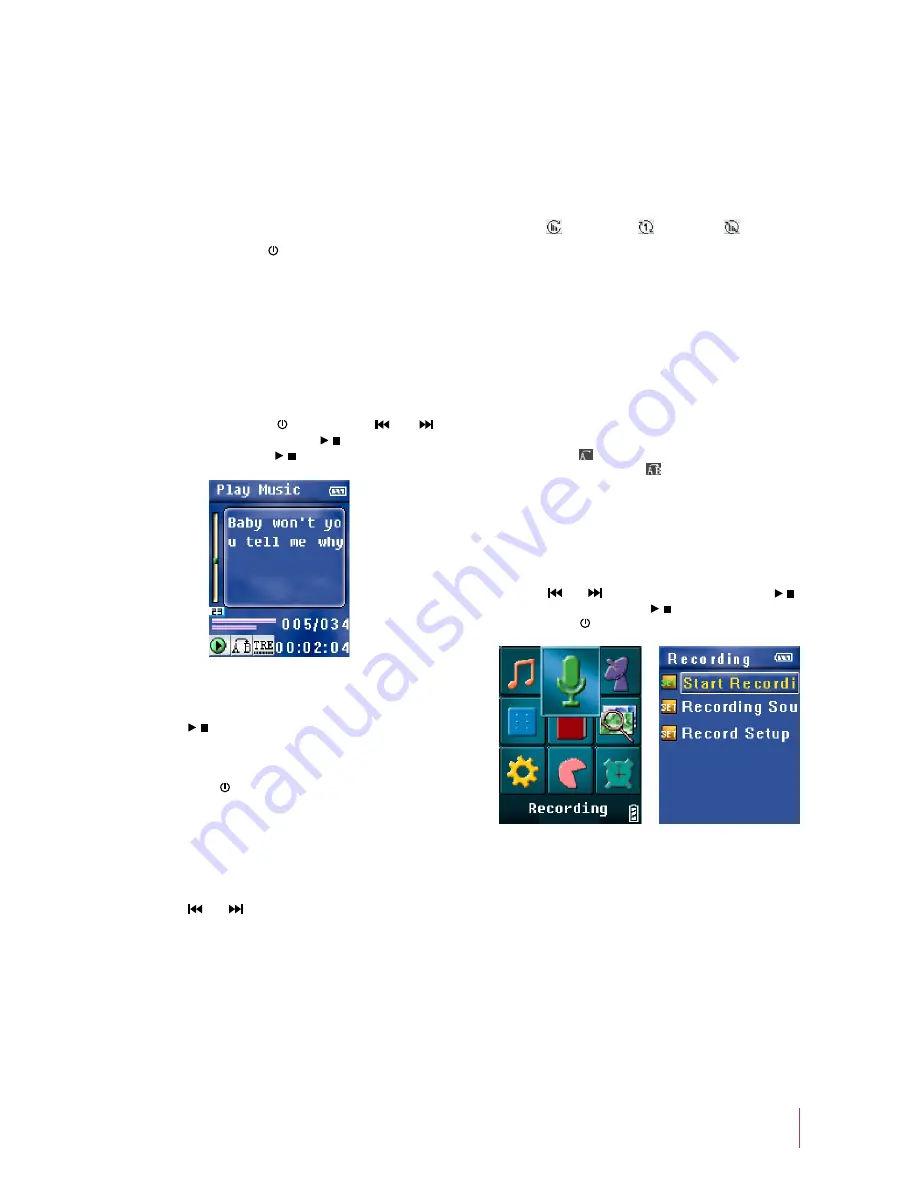
6. Record
Press [
] or [
] button to select Figure 16. Press [ / ]
button (Figure 17). Press [ / ] again to start recording,
press [ESC / ] button to stop recording.
Start Recording
a)
Figure 17
Figure 16
Recording Sources (Signal Sources)
b)
Using built-in microphone.
MIC
:
Using LINE IN port to receive external audio
signals.
LINE IN :
Note:
In the recording setting menu, select MIC as the
recording source.
•
The files will be saved as MP3 files in the Voice directory
in the order of VORC001, V002.
•
If the recording time is less than 2 seconds, the player
will not save the file and an error message will be
shown in the display.
•
7


