


-
-
XM340-V1.2 - A
22
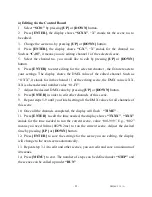
a) Editing via the Control Board
1.
Select
“SC01”
by pressing
[UP]
or
[DOWN]
button.
2.
Press
[ENTER]
, the display shows
“SCXX”
, “X” stands for the scene no. to
be edited.
3.
Change the scene no. by pressing
[UP]
or
[DOWN]
button.
4.
Press
[ENTER]
, the display shows
“C-X”
, “X” stands for the channel no.
Such as
“C-01”
, it means you are editing channel 1 of the selected scene.
5.
Select the channel no. you would like to edit by pressing
[UP]
or
[DOWN]
button.
6.
Press
[ENTER]
to enter editing for the selected channel , the fixture reacts to
your settings. The display shows the DMX value of the edited channel. Such as
“11XX”, it stands for in the channel 11 of the editing scene, the DMX value is XX ,
XX is a hexadecimal number value “01-FF”.
7.
Adjust the desired DMX value by pressing
[UP]
or
[DOWN]
button.
8.
Press
[ENTER]
in order to edit other channels of this scene.
9.
Repeat steps 5-9 until you finish setting all the DMX values for all channels of
this scene.
10.
Once all the channels completed, the display will flash
“TIME”
.
11.
Press
[ENTER]
to edit the time needed, the display shows
“TXXX”
,
“XXX”
stands for the time needed to run the current scene, value “001-999”. E.g., “002”
means you need 0.4ms (002*0.2ms) to run the current scene. Adjust the desired
time by pressing
[UP]
or
[DOWN]
button.
12.
Press
[ENTER]
to save the settings for the scene you are editing, the display
will change to the next scene automatically.
13.
Repeat step 3-14 to edit and other scenes, you can edit and save a maximum of
48 scenes.
14.
Press
[MENU]
to exit. The number of steps can be defined under
“STEP”
and
the scenes can be called up under
“RUN”
.