Tripp Lite B072-032-IP2-K Owner'S Manual Download Page 20

20

2. Web Configuration Interface

The following table describes the columns found in the 

My Targets 

section 

Data Pane

.

Server Name

The 

Server Name

 column displays all of the Target Servers and Serial devices that are accessible to the logged in 

account. The 

Server Name

 for each port can be changed in the 

Configuration

 section of the Web Configuration 

Interface (see the 

Switch Configuration

 section of this manual for details). Double-click on a Target Server to initiate a 

remote session (See the 

Remote Session

 section of this manual for details on managing a remote session).

Server Status

The 

Server Status 

column shows the status of the Target Server connected to the corresponding port; 

Available, Off, 

Blocked, Local Exclusive Session, Remote Exclusive Session, Remote Session, 

or 

No Communications with Device. 

• 

Available – 

Indicates that a computer is connected to the corresponding port, and is available for use. This server 

status is indicated by a Blue port in the graphic of the KVM’s back panel.

• 

Off – 

Indicates that a computer/server is not connected to the corresponding port. This server status is indicated by 

a Black port in the graphic of the KVM’s back panel.

• 

Blocked – 

Indicates that the maximum number of simultaneous users have logged onto the KVM and are accessing 

connected computers. In this situation, the status of all Target Servers is 

Blocked

, except those that are being 

accessed by other accounts. For those ports that are being accessed by other accounts, the status will appear as 

either 

Remote Session 

or 

Remote Exclusive Session

. (see the 

Sharing a Remote Session 

and 

Exclusive Session 

sections in this manual for details) Target Servers that are 

Blocked 

cannot be accessed. A 

Blocked

 server status is 

indicated by a Reddish Brown port in the graphic of the KVM’s back panel.

• 

Local Exclusive Session – 

Indicates that the corresponding port is currently being accessed by a local account. 

This server status is indicated by a Green port in the graphic of the KVM’s back panel.

• 

Remote Exclusive Session – 

Indicates that an account is currently accessing the corresponding port in

 exclusive 

mode, preventing anyone else from connecting to it. This server status is indicated by an Orange port in the graphic 

of the KVM’s back panel.

• 

Remote Session – 

Indicates that an account is currently accessing the corresponding port in 

share 

mode, which allows 

up to 5 users to access a port at the same time. (see the 

Sharing a Remote Session 

and 

Exclusive Session 

sections in 

this manual for details) This server status is indicated by a Green port in the graphic of the KVM’s back panel.

• 

No Communications with Device – 

Indicates that a computer/server is connected to the corresponding port, but is 

not communicating with the KVM, and is therefore inaccessible. This server status is indicated by a Red port in the 

graphic of the KVM’s back panel.

User

The 

User

 column displays the account that is currently accessing the corresponding port.

There is an untitled column to the right of the User column. This column will contain a colored icon that indicates which type 

of SIU is connected. Green indicates that a B078-101-USB2 is connected; Light Blue indicates that a B078-101-USB-1 is 
connected; Orange indicates that a 0SU51078, 0SU51079, B078-101-PS2, or B078-101-USB is connected.

SIU (Server 

Interface Unit)

This column includes a description of the connected SIU. The B078-101-USB2 is described as a FVM SIU, the B078-

101-USB-1 as a VM SIU, and the 0SU51078, 0SU51079, B078-101-PS2, and B078-101-USB as a SIU.

The following table describes the functionality of the Web configuration toolbar buttons.

Icon

Description

Click the 

Save

 icon after making any changes in the Configuration section. This saves your changes.

In the 

Configuration 

section, clicking the 

Reload 

icon will return a page to the most recently saved settings. For example, 

if you enter incorrect information into a field and want to go back to the previous value, but can’t remember what the 
previous value of the field was, clicking the 

Reload 

icon will bring it back.

Click the 

Device Reboot 

icon to reboot the KVM.

Click the 

Device Upgrade 

to perform a firmware upgrade on the KVM (See the 

Firmware Upgrade 

section in this manual 

for details).
Click the 

SIU Upgrade 

icon to perform a firmware upgrade on the SIUs in the installation (See the 

Firmware Upgrade 

section in this manual for details).

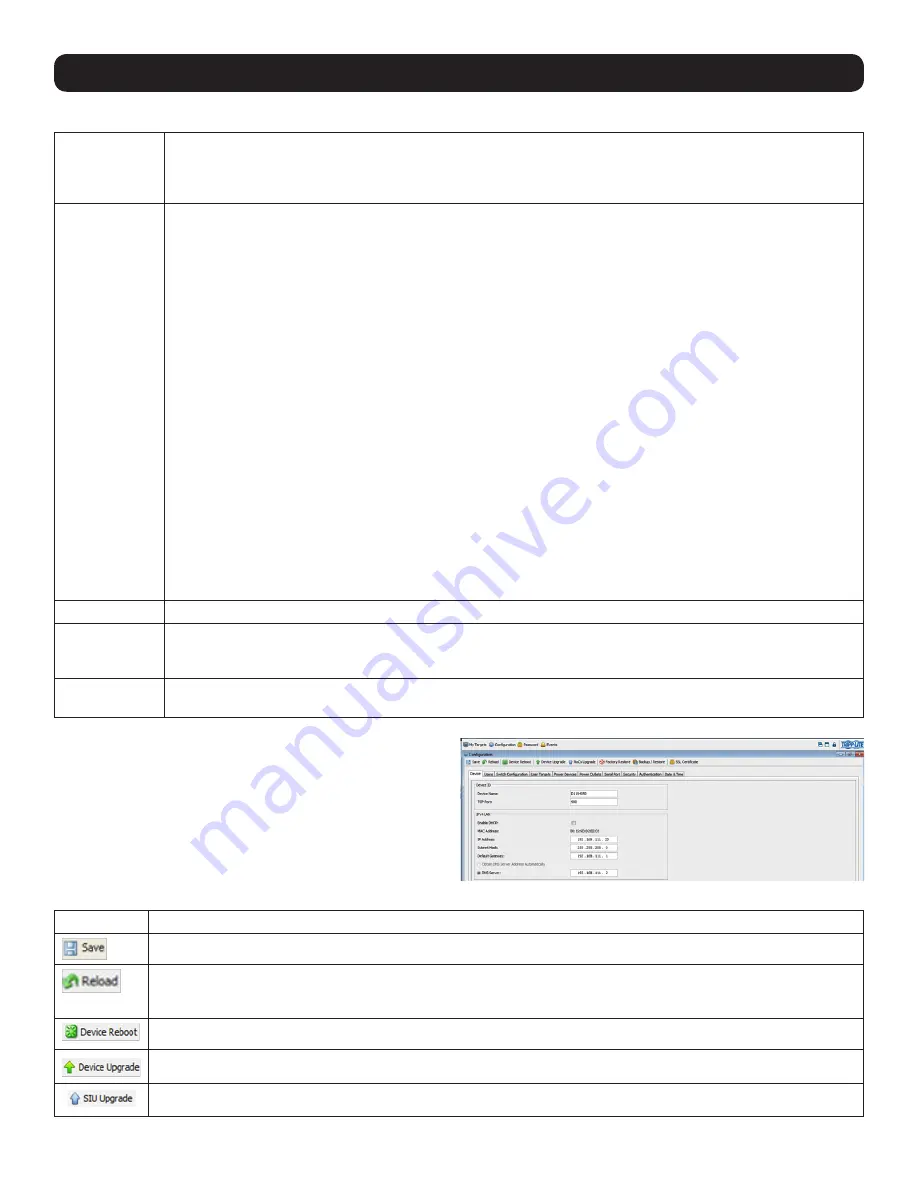
2.4 Configuration Section

The 

Configuration 

section of the Web Configuration Interface is 

where administrator accounts can configure the KVM’s settings and 

account access. When accessing the 

Configuration 

section, there 

are a number of sub-sections displayed as notebook tabs. Clicking 
on a tab will display the settings for that sub-section. The features of 
the 

Configuration

 section are described in the following pages.

Summary of Contents for B072-032-IP2-K

Page 1: ...72 016 IP4 B072 032 IP2 B072 032 IP2 K B072 032 IP4 B072 032 IP4 K 1111 W 35th Street Chicago IL 60609 USA www tripplite com support Copyright 2018 Tripp Lite All rights reserved Legal Notice 2 1 Product Overview 2 2 Web Configuration Interface 13 3 Conducting a Remote Session 40 4 Local Console 51 5 Serial Port Pinout 55 6 Security Certificate Installation 55 7 Technical Specifications 61 8 Video...

Page 2: ... access Administrator and User account types Remote authentication support RADIUS and LDAP S Supports both IPv4 and IPv6 PDU Control Add IP PDUs as devices that can be controlled by the KVM Assign individual ports on the KVM to a PDU port to Power Cycle or Power Off On the computer server connected to that port BIOS level control to any server s brand and model regardless of the server condition a...

Page 3: ...ed on the device Use of this equipment in life support applications where failure of this equipment can reasonably be expected to cause the failure of the life support equipment or to significantly affect its safety or effectiveness is not recommended Do not use this equipment in the presence of a flammable anesthetic mixture with air oxygen or nitrous oxide This device is designed for IT power di...

Page 4: ...vice exhibits a distinct change in performance indicating a need for service o The device does not operate normally when the operating instructions are followed Adjust only those controls that are covered in the operating instructions Improper adjustment of other controls may result in damage that will require extensive repair work by a qualified technician 1 6 System Components Before installing ...

Page 5: ...n Note Only one LAN port can be turned on at a time they cannot both be turned on If you don t wish to use network redundancy connect a single network cable to LAN 2 Port 5 Console KVM ports A USB keyboard and mouse and VGA HD15 monitor connect here for local operation of the NetCommander IP KVM 6 USB Port This port currently serves no functional purpose It is included for future functionality upg...

Page 6: ...nfiguration See the Serial Port Pinout section in this manual for the pinout information 11 Using the power cords provided connect the NetCommander IP to the C14 outlets on the back of the KVM and plug them into a Tripp Lite Surge Suppressor Power Distribution Unit PDU or Uninterruptible Power Supply UPS There are no Power On Off switches so plugging in the power cords will power on the KVM 12 Tur...

Page 7: ... press the left Shift key twice to open the OSD 2 Press the F2 key to open the Settings menu and then press the F2 key again to open the IPv6 Settings menu 3 In the IPv6 Settings menu with the Mode field at the top of the screen highlighted press the Spacebar key to toggle between DHCP Stateless and Static DHCP is selected by default and automatically assigns an IP address via the IPv6 DHCP server...

Page 8: ... a popup window similar to the one below will likely appear To resolve this issue install a supported version of Java 1 8 or 1 9 Once a supported JRE has been installed restart the browser and retry accessing the KVM Web Configuration Interface The installed version of Java may require the KVM Web Configuration Interface be added to an exception list In such cases upon logging into the KVM applica...

Page 9: ...he panel that opens click the Add button then enter the URL of the relevant KVM device 4 Click the OK buttons to close the windows Restart the browser and retry accessing the KVM WEB Configuration Interface Only SSL connections are allowed You must start the IP address with HTTPS not HTTP 1 Open your web browser see section 1 4 Client Computer Compatibility for browser support Enter in the KVM s I...

Page 10: ...ificate Installation 3 Upon installing the certificate or accepting the unrecognized certificate for the current session the initial web page will appear and the Java application will launch Before the installation completes a Security Warning popup may appear stating the connection to the website is untrustworthy This is a security issue similar to the one you get from your web browser Click the ...

Page 11: ...Launcher is selected then click the OK button Google Chrome The targets jnlp file is downloaded to the status line in the browser Click it to launch the Interface If the login page does not appear on its own click the Log On button in the center of the web page to open If clicking on the Log On button does not open the login page add targets jnlp to the end of your IP address See Troubleshooting a...

Page 12: ...e is required Clear the Java Web Start cache prior to accessing the KVM Web Configuration Interface To clear the cache open a command prompt type the following command then press the Enter key javaws uninstall For troubleshooting purposes the Interface can be opened directly through the browser s text field Type the following command then press the Enter key https IP address of the KVM Device targ...

Page 13: ...s Before logging on the first time verify the latest Java version 1 8 or 1 9 is installed on your computer If the Java Runtime Environment is not installed on the client PC a popup window similar to the one below will likely appear To resolve this issue install a supported version of Java 1 8 or 1 9 Once a supported JRE has been installed restart the browser and retry accessing the KVM Web Configu...

Page 14: ...n In the panel that opens click the Add button then enter the URL of the relevant KVM device 4 Click the OK buttons to close the windows Restart the browser and retry accessing the KVM WEB Configuration Interface Only SSL connections are allowed You must start the IP address with HTTPS not HTTP 1 Open your web browser see section 1 4 Client Computer Compatibility for browser support Enter in the K...

Page 15: ... Certificate Installation 3 Upon installing the certificate or accepting the unrecognized certificate for the current session the initial web page will appear and the Java application will launch Before the installation completes a Security Warning popup may appear stating the connection to the website is untrustworthy This is a security issue similar to the one you get from your web browser Click...

Page 16: ...Start Launcher is selected then click the OK button Google Chrome The targets jnlp file is downloaded to the status line in the browser Click it to launch the Interface If the login page does not appear on its own click the Log On button in the center of the web page to open If clicking on the Log On button does not open the login page add targets jnlp to the end of your IP address See Troubleshoo...

Page 17: ...Java Web Start cache prior to accessing the KVM Web Configuration Interface To clear the cache open a command prompt type the following command then press the Enter key javaws uninstall For troubleshooting purposes the Interface can be opened directly through the browser s text field Type the following command then press the Enter key https IP address of the KVM Device targets jnlp Ensure the Java...

Page 18: ...ormat Log Out and display information about the KVM The My Targets icon brings you to the page that displays the Target Servers and Serial Devices that you can access The Configuration icon brings you to the page that allows you to configure the KVM s settings and account access The Password icon brings you to a page that allows the logged in account to change their password The Events icon brings...

Page 19: ...ted Serial 1 and 2 Ports An Orange serial port indicates that a serial device is connected and currently being accessed by another account A Black serial port indicates one of three things a device is connected and available for use a device is connected but is not functioning properly or a device is not connected LAN 1 and 2 Ports A Green LAN port indicates that it is the active LAN port The othe...

Page 20: ... is currently accessing the corresponding port in share mode which allows up to 5 users to access a port at the same time see the Sharing a Remote Session and Exclusive Session sections in this manual for details This server status is indicated by a Green port in the graphic of the KVM s back panel No Communications with Device Indicates that a computer server is connected to the corresponding por...

Page 21: ...settings remain intact For more information refer to the firmware release notes 1 Download the firmware upgrade file from www tripplite com support 2 Save the firmware upgrade file on the Client Computer 3 Login to the Web Configuration Interface and navigate to the Configuration section In the Configuration section s toolbar click on the icon The Device Firmware Upgrade page appears displaying th...

Page 22: ...SIU s that you want to upgrade Click the Select All button to select all ports at the same time 5 Click the Show Versions button to display the current hardware and firmware versions of the SIUs connected to the selected ports 6 In Upgrade File field browse to and select the firmware upgrade file that you just downloaded from the Tripp Lite website 7 Verify that the firmware upgrade file is a newe...

Page 23: ...click the Browse button to open up the Enter file name to backup to screen 3 Navigate to the location on your computer where you want to save the backup file and then give it an appropriate file name and click the Open button Backup files are saved in the 64b format 4 The Backup Restore Data screen reappears with the newly saved location and file name populating the Backup to file field Click on t...

Page 24: ...ertificate You can install an SSL Certificate to ensure secure transactions between the web server resident on the NetCommander and client browsers To install an SSL Certificate 1 In the Configuration sections toolbar click on the icon The SSL Certificate screen appears 2 In the Certificate file field browse to locate and select the Cer file you want to install 3 In the Private key file field loca...

Page 25: ...ss When the Enable DHCP checkbox is unchecked this field becomes available for editing Enter in an IP address appropriate for your network Subnet Mask When the Enable DHCP checkbox is unchecked this field becomes available for editing Enter in a Subnet Mask appropriate for your network Default Gateway When the Enable DHCP checkbox is unchecked this field becomes available for editing Enter in a De...

Page 26: ...dded with any combination of Administrators and Users The following section describes this page and how to configure accounts There are two levels of user access Administrator Has unrestricted access to all windows and settings and can change the name and password of all users User Can access and control Target Servers that they are given access to by an administrator Users cannot access the Confi...

Page 27: ...e the password of an Administrator who is currently logged on to the system 4 Click OK The Users page opens with the user information changed accordingly 5 Click the Save button at the top of the screen to save your changes To edit an account 1 In the Users page select an account from the list and click the Edit button The Edit User page appears To delete a User 1 In the Users page select an accou...

Page 28: ...at the top of the screen to save your changes 2 4 6 Switch Configuration The Switch Configuration tab allows unique names to be assigned to each port to help distinguish the Target Servers that are connected to them To edit a port name 1 From the Configuration section click on the Switch Configuration tab The Switch Configuration page appears ...

Page 29: ...elect all Target Access button at the top of the column to check the checkboxes of all ports 4 In the Virtual Media Access column check the checkboxes of all ports that you are giving the account Virtual Media permission for Note You can click on the Unselect all Virtual Media Access button at the top of the column to clear the checkboxes of all ports Correspondingly you can check the Select all V...

Page 30: ...e PDU is added to the Power Devices page 7 Click the Save button at the top of the screen to save your changes To Edit an existing PDU 1 In the Power Devices page select a PDU from the list and click the Edit button The Edit PDU page appears 2 Update the PDU Name Type and or IP fields as required 3 Click OK The Power Devices page opens with the modified information 4 Click the Save button at the t...

Page 31: ... the same time To configure the power outlets 1 From the Configuration section select the Power Outlets tab The Power Outlets page appears 2 The Name drop down list contains all of the PDUs that have been added to the KVM Select the desired PDU The Power Outlets page populates according to the number of outlets on the selected PDU 3 For each outlet on the PDU that has a Target Server connected to ...

Page 32: ...b The Serial Ports page appears 2 For each serial device connected enter an appropriate Device Name and then set the Baud Rate Parity Data Bits and Stop Bits settings accordingly 3 Click the Save button at the top of the screen to save your changes 2 4 11 Security The Security section allow you to configure the security features of the KVM such as Account Blocking Password Policy Idle Timeout and ...

Page 33: ...o require that a username and password be entered for local user access to the OSD By default a password is not required to access the KVM via the local console Accounts created in the Web Configuration Interface are used for both local and remote access 4 There is only one field in the Idle Timeout portion of the Security page Disconnect after In this field select the amount of time that an accou...

Page 34: ...x To switch the priority of LDAP and RADIUS authentication highlight the desired option by clicking on it and then click on the Up and Down buttons to move it up and down in the list LDAP S Authentication Settings Once enabled in the Enabled Authentications Methods section just described LDAP S authentication is set up using the fields in the Authentication Sources section To setup LDAP S authenti...

Page 35: ...ver to the list Servers can be edited or deleted by highlighting them in the list and clicking on Edit or Delete They can be re ordered according to their priority by highlighting them and clicking on Up or Down to move them in the list Search The Search section is where you set the account DN that is used to query the LDAP S server and where in the directory to search during authentication Refere...

Page 36: ...n and gives them access rights to the KVM switch based on those that are assigned to them via a dedicated Access Rights attribute o Group When selected this method authenticates accounts that log in and gives them access rights to the KVM switch based on which Group they belong to Access rights for Groups are based on those that are assigned to them via a dedicated Access Rights attribute User Nam...

Page 37: ...omma An asterisk can be used to indicate access to all ports Sample Permission String kvmdevice D1144567 kvmrole user kvmports 1 2 5 vm_ports 1 2 kvmtelports The permission string above assigns a User or Group with access to the KVM with Device Name D1144567 The account is given User permissions and has access to ports 1 2 and 5 on the KVM can access virtual media on ports 1 and 2 and can access a...

Page 38: ...port Default Realm Enter in the Default Realm for the RADIUS server here Enable Accounting Support Check this checkbox to enable Accounting Support or leave it unchecked to disable it When enabled Accounting Support will generate Start and Stop accounting events that keep track of when a user accesses a KVM port and when it disconnects from it RADIUS Access Rights RADIUS access rights are assigned...

Page 39: ...Events Log 1 Click on the icon in the menu bar of the Web Configuration Interface The Events page appears with a log of all system events displayed To reload the Events Log 1 With the Events page open click the icon in the toolbar The list of events on the page is refreshed to show the most current information To clear the Events Log 1 With the Events page open click the icon in the toolbar A prom...

Page 40: ... one of four ways Select a port from the Data Pane of the My Targets screen and click on the Display icon in the toolbar Select a port from the Data Pane of the My Targets screen and press the Enter key Double click on a port in the Data Pane of the My Targets screen Administrator s Only Double click on a port in the graphic of the KVM s back panel Note A Target Server with a Remote Exclusive Sess...

Page 41: ...o mount an ISO file to the Target Server as virtual media Note 1 Virtual Media data transfer rates up to 12Mbps are supported To achieve data transfer rates up to 12Mbps a B078 101 USB2 must be used 2 A B078 101 USB 1 can be used to provide Virtual Media support but only at speeds up to 1Mbps B078 101 USB and B078 101 PS2 SIUs are not compatible with Virtual Media 3 The ISO file that your are moun...

Page 42: ...e pointer None Hides the Client Computer s mouse pointer altogether so that only the Target Server s mouse pointer can be seen Dot Displays the Client Computer s mouse pointer as a dot Default Displays the Client Computer s mouse pointer in the standard format 3 In the On Connect section choose amongst the following options Auto hide When this checkbox is checked the remote session toolbar will be...

Page 43: ...Video Adjust Video Mode and Advanced Refresh Selecting the Refresh feature will regenerate the remote screen to show the most current video A video refresh may be necessary when changing the display attributes of a Target Server Video Adjust Selecting the Video Adjust feature will perform an auto video adjust which aligns the Target Server s video so that it displays properly in the remote session...

Page 44: ...nt when a static screen is displayed The more noise that is present the slower your keyboard and mouse response time will be Adjusting the Phase and Scale fields can help decrease the noise level 6 When you are done making changes click the OK button To exit without saving changes click on the Restore button first 3 2 4 Power Clicking on the Power icon will display a list of three power management...

Page 45: ...re not already provided Note The Predefined and Custom Keys that are added to the Special Key Manager are unique to each port You will need to customize the keyboard sequences that are available for each port Once you do this you will not need to do it again except to add or remove keyboard sequences To add a keyboard sequence 1 Click on the icon in the remote session toolbar and choose the Specia...

Page 46: ...y Manager window select the desired key sequence and then click the Edit button The Record New Custom Key macro screen appears with the name of the key sequence to edit appearing in the Label field 2 Click the Start Recording button 3 On your keyboard press the keys to include in the key sequence The names of the pressed keys appear in the provided area as you type them 4 Click the Stop Recording ...

Page 47: ...n Absolute Mouse Position is selected Note Absolute Mouse Position mode cannot be used for Target Servers connected with a PS 2 SIU Relative Mouse Position OS Generic Relative Mouse Position OS Generic mode should be used if the other mouse settings modes are not performing satisfactorily When this mode is in effect the user must focus the mouse within the remote session window by clicking inside ...

Page 48: ...of the Target Server 5 Check the USB checkbox if the Target Server is connected with a USB SIU 6 Click the Advanced button The Advanced settings window appears 7 The Advanced settings window allows you to select what type of mouse is connected to the local console port of the KVM Select Standard Mouse when using a 2 button mouse or 2 button touchpad Select Wheel Mouse for any mouse touchpad with 3...

Page 49: ... sure that the Enhanced Pointer Precision setting is unchecked If checked the local and remote mouse pointers will not align The image below shows this screen from a Windows Vista computer There are times when a Video Adjust does not properly align the Target Server s video in the remote session screen If the screen is not aligned properly you will see a black bar on a side of the remote screen an...

Page 50: ...he same time and share the Keyboard Mouse control Keyboard mouse commands are performed by whichever account takes control Once an account stops using the keyboard mouse another account can immediately start using it When initiating a remote session in Share Mode the following message appears 3 4 Exclusive Session When in a remote session without any other logged in accounts you can prevent other ...

Page 51: ...red port using the h and i arrow keys or type the two digit port number of the desired computer 2 Press the Enter key The selected computer is accessed 4 1 Move Label F1 When a Target Server is accessed via the local console a Confirmation Label appears briefly displaying the port number and name of the Target Server being accessed After a few seconds the Confirmation Label disappears You can posi...

Page 52: ...uter press and release the left Shift key and then press and release the F12 key Note This hotkey combination will change if the hotkey combination used to open the OSD is changed When the OSD hotkey is Shift Shift the Power Management hotkey is Shift F12 When the OSD hotkey is Ctrl Ctrl or Ctrl F11 the Power Management hotkey is Ctrl F12 When the OSD hotkey is Print Screen Print Screen the Power ...

Page 53: ...al console press the left Shift key twice to open the OSD 2 Press the F2 key to open the Settings menu and then press the F2 key again to open the IPv6 Settings menu 3 In the IPv6 Settings menu with the Mode field at the top of the screen highlighted press the Spacebar key to toggle between DHCP Stateless and Static DHCP is selected by default and automatically assigns an IP address via the IPv6 D...

Page 54: ... To change the keyboard language 1 In the F2 SETTING window navigate to the Keyboard Language field 2 Press the Spacebar key to toggle between the available options 3 After choosing the desired language press the Esc key to exit the F2 SETTING window 4 Local Console Inputing and Updating DDC Information Display Data Channel DDC is a VESA standard for communication between a monitor and a video ada...

Page 55: ... not among the browser and or Java control panel s list of trusted certificates To add the certificate to the list of trusted certificates follow the steps in this section Once installed the security warning will no longer appear Note If the IP address of the KVM switch is changed you will need to reinstall the security certificate Browser Security The following steps apply to Internet Explorer 9 ...

Page 56: ... Certificate Installation 3 Click on the Certificate error message to display the Certificate Invalid prompt 4 Click on the View certificates option at the bottom of the prompt to redirect to the Certificate screen ...

Page 57: ... to Place all certificates in the following store then click the Browse button Highlight the Trusted Root Certification Authorities folder 7 Click OK You will be redirected back to the previous screen Click Next followed by Finish Upon clicking Finish you will be prompted to confirm installation of the certificate 8 Click Yes to complete the certificate s installation ...

Page 58: ...lorer as an Administrator to install the security certificate 1 Open your Web browser and login to the KVM If the KVM certificate has not yet been installed in the browser a URL bar with a Certificate error message will appear Click on the Certificate error or Security Lock icon in the toolbar to pull up the Certificate screen 2 Click on the View Certificates option When the Certificate window app...

Page 59: ...t Wizard appears 4 Click Next accepting the default values until you get to the File to Export page 5 Click the Browse button to navigate the location you want to save the certificate file and then type a name into the File name field Click Next to go back to the File to Export screen where the file path will be entered ...

Page 60: ...ol Panel 6 Security Certificate Installation 8 Click on the Security tab then click the Manage Certificates button 9 In the Certificate type drop down menu at the top of the screen select the Secure Site option 10 Click the Import button and navigate to the location where the KVM certificate file is saved Click OK to add the KVM certificate to the Secure Sites list to complete installation ...

Page 61: ...ight 4 3 Kg 7 5 lbs Dimensions H x D x W 44 x 270 x 439 mm 1 7 x 10 6 x 17 28 Power input 100 240 VAC 0 8 A 50 60 Hz Operating temperature 0 C to 40 C 32 to 104 F Storage temperature 40 C to 70 C 40 F to 158 F Humidity 80 non condensing relative humidity Specification B078 101 PS2 SIU B078 101 USB 1 B078 101 USB2 Connections VGA HD15 KM x2 MiniDin6 System RJ45 VGA HD15 KM USB System RJ45 VGA HD15 ...

Page 62: ...N Visit www tripplite com warranty today to register your new Tripp Lite product You ll be automatically entered into a drawing for a chance to win a FREE Tripp Lite product No purchase necessary Void where prohibited Some restrictions apply Open to U S residents only See www tripplite com for details FCC Notice Class A This device complies with part 15 of the FCC Rules Operation is subject to the...

Reviews: