


12
1. Product Overview
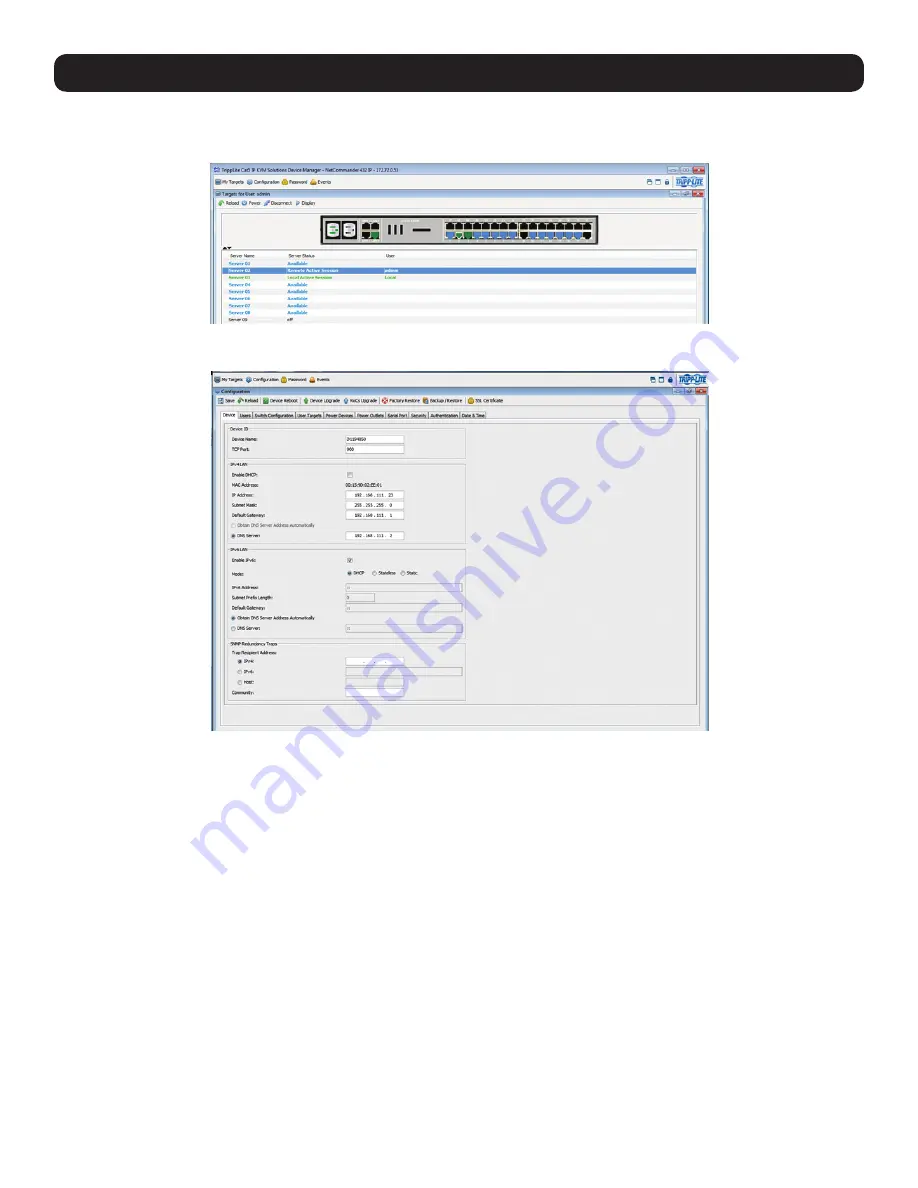
7. There are two LAN sections in the
Device
tab, one for IPv4 and one for IPv6. For IPv4, you have the options of automatically assigning
an address via DHCP server (default) and manually assigning an address. For IPv6, you have the options of automatically assigning
an address via DHCP server (default), automatically assigning a stateless address, manually assigning an address, or disabling IPv6
altogether. Make the desired selections, depending on how you wish the IP address to be assigned.
8. Populate the fields in the IPv4 or IPv6 sections with the desired network information.
9. Click the
Save
icon in the toolbar above the
Configuration
menu tabs to save the network settings. Upon clicking
Save
, you will be
prompted to reboot the KVM to finish the implementation of the new
Device
settings. Click
Yes
to proceed.
Troubleshooting
Below is a list of tips that may help resolve common issues when accessing the KVM Interface:
•
Verify that file downloads are enabled in the browser.
If a supported JRE has not been installed, downloading the necessary file is
required.
•
Clear the Java Web Start cache prior to accessing the KVM Web Configuration Interface.
To clear the cache, open a command
prompt, type the following command, then press the
Enter
key:
javaws -uninstall
• For troubleshooting purposes, the Interface can be opened directly through the browser’s text field. Type the following command, then
press the
Enter
key:
https://<<IP address of the KVM Device>>/targets.jnlp
•
Ensure the Java cache and JavaScript are enabled.
•
Uninstall older versions of Java or verify they cannot be loaded
by managing the Java Runtime versions from the Java Control Panel.
•
Enter the KVM Interface’s URL in the Java Control Panel’s Exception Site List,
as described above.
• Changing Java Control Panel’s advanced settings may compromise the Interface.
Consider resetting to defaults if they have been
changed.
6. Click on the
Configuration
icon at the top of the screen to pull up the KVM’s
Configuration
screen. It opens with the
Device
tab
displayed.
5. Enter in your username and password, and press
Enter
. If this is the first time you are accessing the KVM, enter in the default
username
(admin)
and password
(access)
. The
My Targets
page of the Web Configuration Interface opens, showing the state of your
unit, and displaying all your available Target Servers.