5
5.2 Rackmounting the NetCommander KVM
Use the L-shaped brackets and screws provided to mount the KVM in a server rack as
illustrated below.
Figure 5.2 Connecting the L-shaped bracket
Insert screws to
connect to rack
Insert screws to
connect to Switch
side panel
• Switch off all computers
• Ensure that the cables are not close to any sources of electrical noise interference such as
fluorescent lights, HVAC systems or motors
• Ensure that the distance between any computer and the KVM switch does not exceed 100 ft.
• Shut down all PS/2 computers. If you plug the keyboard and mouse connectors into an active
PC, they may not work.
5.3 Pre-Installation Guidelines
5. Installation
(continued)
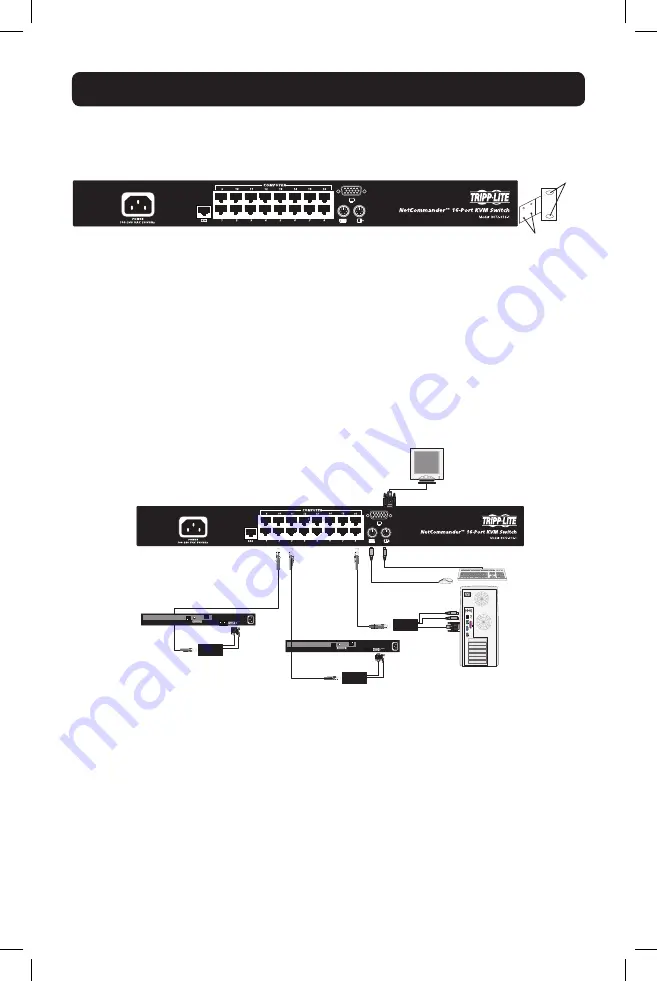
5.4 Connecting the NetCommander KVM System
NetCommander B072-016-1 KVM Switch
Cat 5e/6 Cable
Cat 5e/6 Cable
SIU
SIU
SIU
Figure 5.4 NetCommander KVM system connections
Connect each computer to the KVM using a Server Interface Unit (SIU) and Cat5e/6 patch cable.
Figure 5.3 illustrates the connection options.
The Server Interface Unit receives power from the connected computer. In the case of the
NetCommander PS/2 Server Interface Unit (B078-101-PS2), power is drawn from the keyboard
port. In the case of the NetCommander USB Server Interface Unit (B078-101-USB-1), power is
drawn from the USB port. SIUs allow a computer/server to be located up to 100 ft. from the KVM
switch.
5.5 NetCommander Server Interface Unit (SIU)
15-08-291-933350.indd 5
8/31/2015 9:59:10 AM


