


Stainless Steel Vent Outlet Adapter Removal
1. Dismount the vent outlet adapter from top of boil-
er cabinet by removing the 4 mounting screws.
Do not discard the mounting screws and vent out-
let adapter as they will be reused. (Fig. 2)
2. Remove entire vent outlet adapter by lifting ver-
tically upward and out of the boiler cabinet
using a twisting / rocking motion (Fig. 3).
3. In case of insufficient space above the boiler,
remove combustion air inlet piping and boiler
relief valve / air vent assembly from the top of
the boiler. Close the DHW cold water supply
isolation valve and open a hot water faucet to
relieve water pressure in the water heater.
Remove all DHW piping including T&P relief
valve from the DHW connections on the top of
the boiler. Remove all screws securing the top
jacket panel from the side panels and remove
vent outlet adapter and top jacket panel togeth-
er from the boiler cabinet. Put all items in a safe
place as they will all be reused.
4. Once the vent outlet adapter is removed from the
boiler, it should be inspected for deformation
damage or corrosion.
If there are any signs of deformation, damage or
corrosion on the vent outlet adapter, replace it
immediately. Check condition of flue sensor
mounting, replace vent outlet adapter if necessary.
Failure to comply could result in flue gas leakage
resulting in severe personal injury or death.
Polypropylene Vent Outlet Adapter Removal
1. Dismount the vent outlet adapter from top of boil-
er cabinet by twisting the vent outlet adapter
counter clockwise to disengage the retaining tabs.
Remove the vent outlet adapter by lifting verti-
cally to disengage it from the internal vent pipe.
2. Remove the internal vent pipe from the unit by
lifting vertically upward and out of the boiler
cabinet using a twisting / rocking motion.
Removal of Electrical Connections (MCBA)
Before disconnecting any wire connections mark and
label all connections and location of the connections.
WARNING
NOTICE
PRESTIGE Excellence
HX Field Replacement
Kit
3
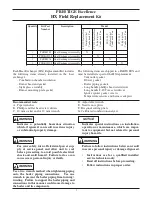
Vent Outlet
Adapter
Test
Port
Banding
Clamp
Mounting
Screws
(4) Each
Fig. 2: Vent Outlet Adapter Mounting
Flue Gasket
Heat Exchanger
Flue Adapter
Vent Outlet
Pipe
Fig. 3: Removal of Vent Outlet Adapter


