YOUR MOOD-LIGHT
This Operation Manual gives you some important and detailed information on how to use your Mood-Light. Read through
the Operation Manual carefully and follow all steps to get started.
Contents / Accessories:
1) Mood-Light
2) Remote Control (optional models)
3) 2 AAA Batteries (with each remote)
4) Power Supply Adaptor (optional models)
5) AC Power Cord (optional models)
6) Operation Manual (with each remote)
7) 1 x CR1616 Lithium Battery
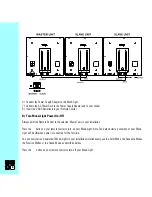
8) Interconnecting Cable (Master/Slave)
9) 2 x Mounting Brackets, 2 x Screws, 4 x Supporters
GETTING STARTED
A) Installation
1) Install the CR1616 Lithium cell into the battery compartment located on the rear lower right-hand corner of the Mood-
Light. The ”+” sign on the battery should be facing outwards.
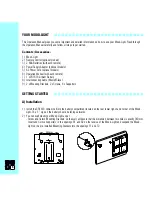
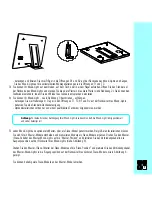
2) You can wall mount your Mood-Light as per
Fig. 1
:
- Screw and fix two ‘Mounting Brackets’ on the wall, amke sure that the dimension between two holes is exactly 340mm.
- Insert and fix two ‘supporters’ in the openings B1 and B2 on the reverse of the Mood-Light and suspend the Mood-
Light on the pre-installed Mounting Brackets into the openings T1 and T2.
0
6
(Fig.1)
340mm
T1
T2
B1
B2
Summary of Contents for Mood Light Classic
Page 1: ......
Page 2: ...0 4 ...
Page 24: ...2 5 ...
Page 25: ...2 4 2 6 Subtractive Color Chart Illustration 1 Color Chart Illustration 2 Additive ...
Page 26: ...2 5 2 7 CIE Chromaticity CIE Chart ...
Page 27: ...2 8 ...
Page 48: ...4 9 ...
Page 49: ......


