


3. Move the switch to the right.
4. Power on the indicator. The indicator shows “CH X”, use PESK (SET) key entering the
User (“A”) Menu, use the
CHANNEL
( ) key or the
( ) key to move
right or left in the Setup (“F”) menu until the indicator shows “A1”.
3.4.2 Navigating in the User Menu
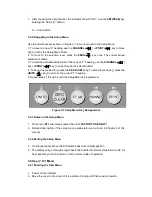
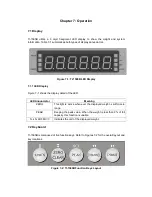
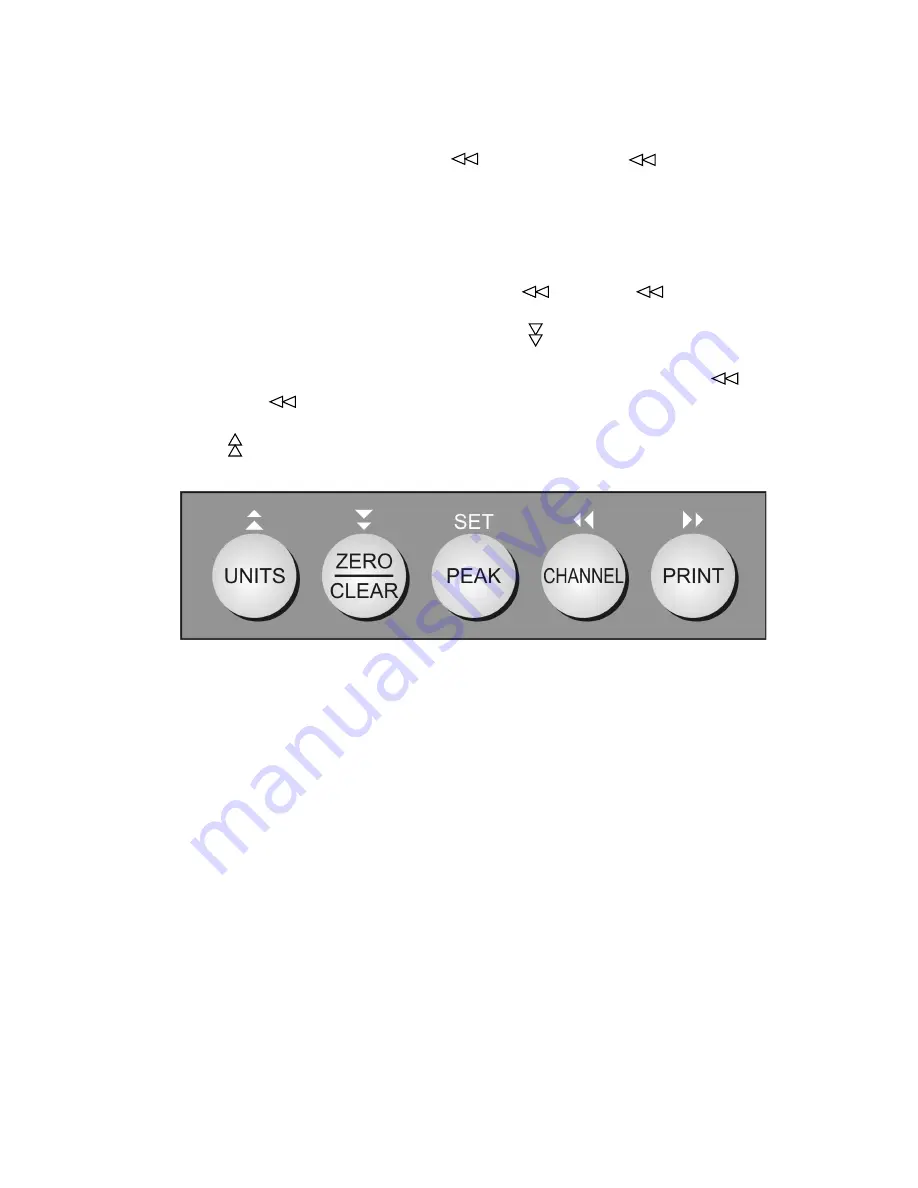
Use the directional keys shown in Figure 3-2 to move around in the User Menu.
1. To move to a new “A” heading, use the
CHANNEL
( ) or
( ) key to move
right or left in the User Menu Chart.
2. To move to the selection level, press the
ZERO
( ) key once. The current saved
selection is shown.
3. To view the available selections for the current “A” heading, use the
CHANNEL
( )
key or
( ) key to move through the selection field.
4. To save a new selection, press the
PEAK (SET)
key. To exit without saving, press the
UNITS
( ) key to return to the current “A” heading.
5. Repeat steps 1 through 4 until the User Menu is programmed.
Figure 3-2 User Menu Key Assignments
3.4.3 Notes on the User Menu
1. Detailed descriptions of the user menu parameters can be found in Chapter 5 of this
manual.
3.4.4 Exiting the User Menu
1. On the rear panel. Move the DIP switch back to its original position.
2. The display will go through a digit check, then settle into Normal Operation mode. All
front panel keys will now return to their normal mode of operation.
Note: From F3.3 (“F” Menu) to F3.4 (“A” Menu) have the same entering terminal,
you can finish all the parameters setting, then exit the menu.
Chapter 4: Setup Menu