background image

3

GB

BD51 SMR

2

Screws

Screwdriver 

Touch-Switch

Touch-Switch

1

First remove the middle part of the cover strip, then remove the two sides of the cover strip

4

GB

BD51 SMR

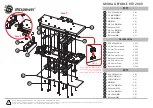
Number Plate Holder Installation

Remove


the


product


packing


and


ensure  that


all


components


are


included.


Charge


the


Camera


(with


number


plate


holder)


During


normal


use,


the


camera


maintains


a


charge


with


exposure


to


sunlight.


A


battery


status


indicator


is


provided


on


the


monitor


when


the


camera


is


in


use.


If


you


store


your


car


etc in


a


garage


(or


don’t expose


the


camera


to


sunlight


on


a


regular


basis)


for


more


than


one


month,


you


may


need


to


recharge


the camera via


the


DC


charging


port.


Install


the


number


plate


holder


using


self-tapping


screws,


or


double-


sided


number


plate


adhesive


tape.

Remove


the


cover


strip


from


the


number


plate


holder.

Insert


the


number


plate


into


the


holder,


side clips first and then 

slide down under the bottom clips.

Insert


the


top


cover


strip's


clips


into


the


relative


holes


of


the


number


plate


holder


then


press


firmly to secure.


First press both ends of the cover plate, then press 


the


middle to secure.

Small


clip


During


DC


charging,


the


red


LED


will


stay


eluminated


until  charging


is


completed,  it  will 

then extinguish.

1. Connect the USB charging lead to the 
camera.

1. Move the camera (to trigger the built-in movement sensor).

The camera is ‘woken up’ by movement/vibration.

The Monitor will turn off after 10 seconds if the camera is in sleep mode 
- movement/vibration will cancel the camera sleep mode.

Charge for approx 4-5 hours.

Summary of Contents for Digi-Lite Solar A1070

Page 1: ...Stand Vent Windshield RoHS Digi Lite Solar Solar Powered Wireless Reversing Camera Digi Lite Solar Solar Powered Digital Wireless Camera System www trailervision co uk www trailervision co uk...

Page 2: ...anual carefully before using this product 1 Number Plate Holder with Camera and Solar Panels The Digi Lite Solar digital wireless reversing camera system can display the rear view image when reversing...

Page 3: ...tall the number plate holder using self tapping screws or double sided number plate adhesive tape Remove the cover strip from the number plate holder Insert the number plate into the holder side clips...

Page 4: ...e place on the windscreen and mount the suction cup mount to the windscreen With the suction lever in the released position press the suction cup against the windscreeen Press the suction lever toward...

Page 5: ...m the monitor the monitor will switch off automatically and the camera will stop working If you want the camera to continue working after auto switch off for example if you haven t finished reversing...

Page 6: ...press ADD or DEC button to adjust the contract as shown bellow Select Color icon press ADD or DEC button to adjust the color as shown bellow Pairing Image Paramete Image Mirror Software Information Pa...

Page 7: ...ing Guideline Position Adjustment A B C D E 08 09 E43 When the monitor is powered on and still stay standby mode the Red indicator Light doesn t work When touching Touch Switch the Light will blink qu...

Page 8: ...hing the Touch Switch in a quiet environment no vibration at all such as when testing inside Vibrate the camera touch the powered Monitor Touch Switch quickly within 3 minutes of vibrating the camera...

Page 9: ...cially persons By installing and or using the Digi Lite Solar Wireless Backup Camera you agree that you are solely responsible for the operation of your vehicle and are also responsible for any proper...

Page 10: ...Regions Regions 15 The Supplier Please contact Support trailervision co uk 01733 246473 Please Contact Us to discuss any faults or problems with Digi Lite Solar www trailervision co uk...

Reviews: