45
z
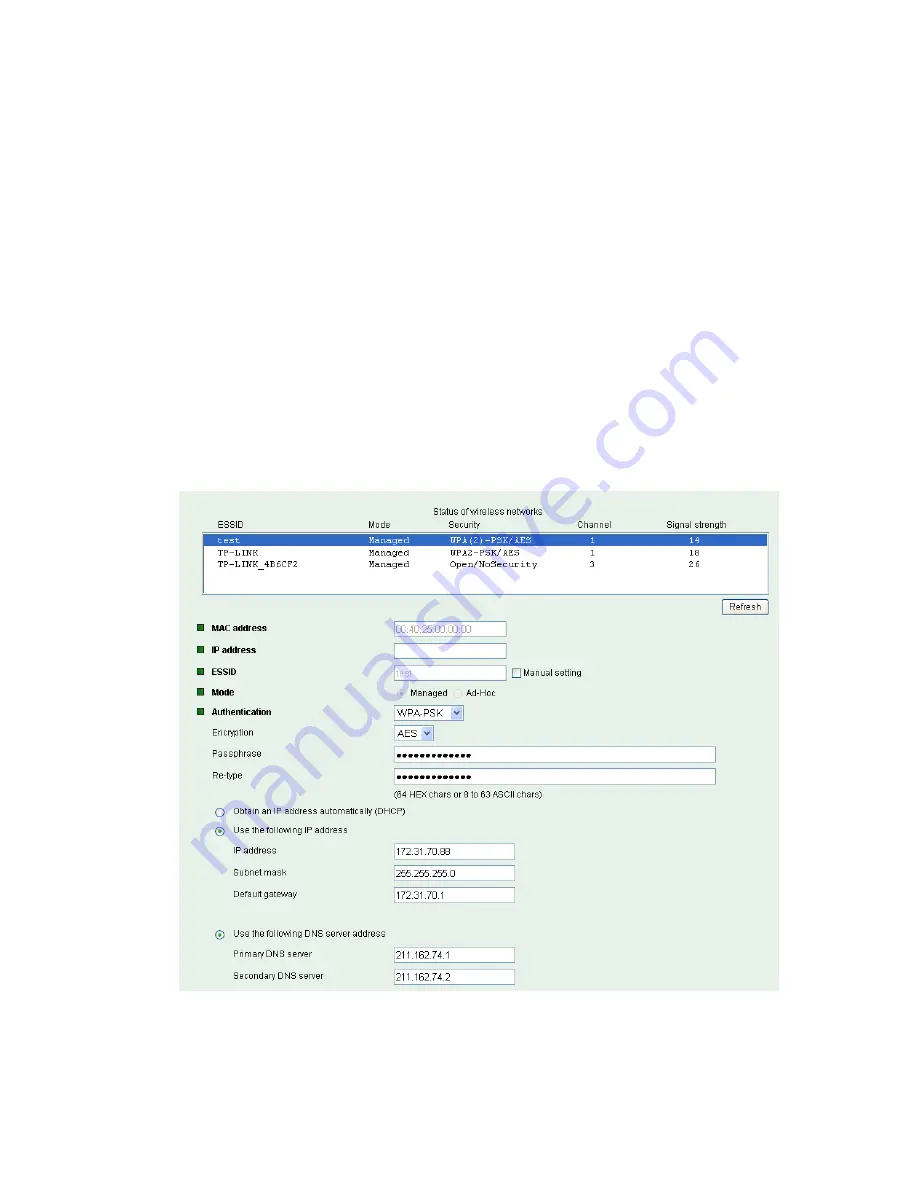
ESSID (ESSID is sometimes written as SSID)
- This is the name of the wireless network to
which the Camera is ready to connect. The field accepts up to 32 alphanumeric characters. The
name must be exactly the same as that used in the wireless access point; otherwise, the
connection will not be established.
Leaving this field blank means the Camera will attempt to access the nearest unsecured
network. There are two methods to enter the ESSID field.
9
Method 1: Click the desired wireless network in the network list above, then the field will
display the ESSID of that network.
9
Method 2: Tick the box “Manual Setting” behind the field, then enter the ESSID.
z
Mode
– The Managed option means the Camera will attempt to connect to an access point.
The Ad-hoc option allows the Camera to connect to other wireless device clients.
z
Authentication
– The authentication of the wireless network. All the parameters for
authentication must be the same as that of the desired AP or Router.
64/128-bit WEP
,
WPA-PSK
and
WPA2-PSK
encryption security are supported by the Camera. Click the desired
wireless network in the network list above, the corresponding option will be selected as same
as that of the desired AP or Router automatically. Here we select the first item in the network list
above for example to introduce how to join in a wireless network.
Select the first item, the figure will display as shown below:
9
Encryption
– Keep this option the same with that of network
test
.
9
Passphrase
-
Enter the desired AP/ Router’s password here.
9
Re-type
–
Enter the password above again to confirm it.


