


TD-W8950N
150M bps Wireless N ADSL2+ M odem Router User Guide
11
Note:
1) The Quick Setup Wizard will guide you to configure the WAN Service over ATM interface.
2) If you are unwilling to configure WAN Service now, you can click the
Skip WAN
button. Then
you can configure WAN service referring to
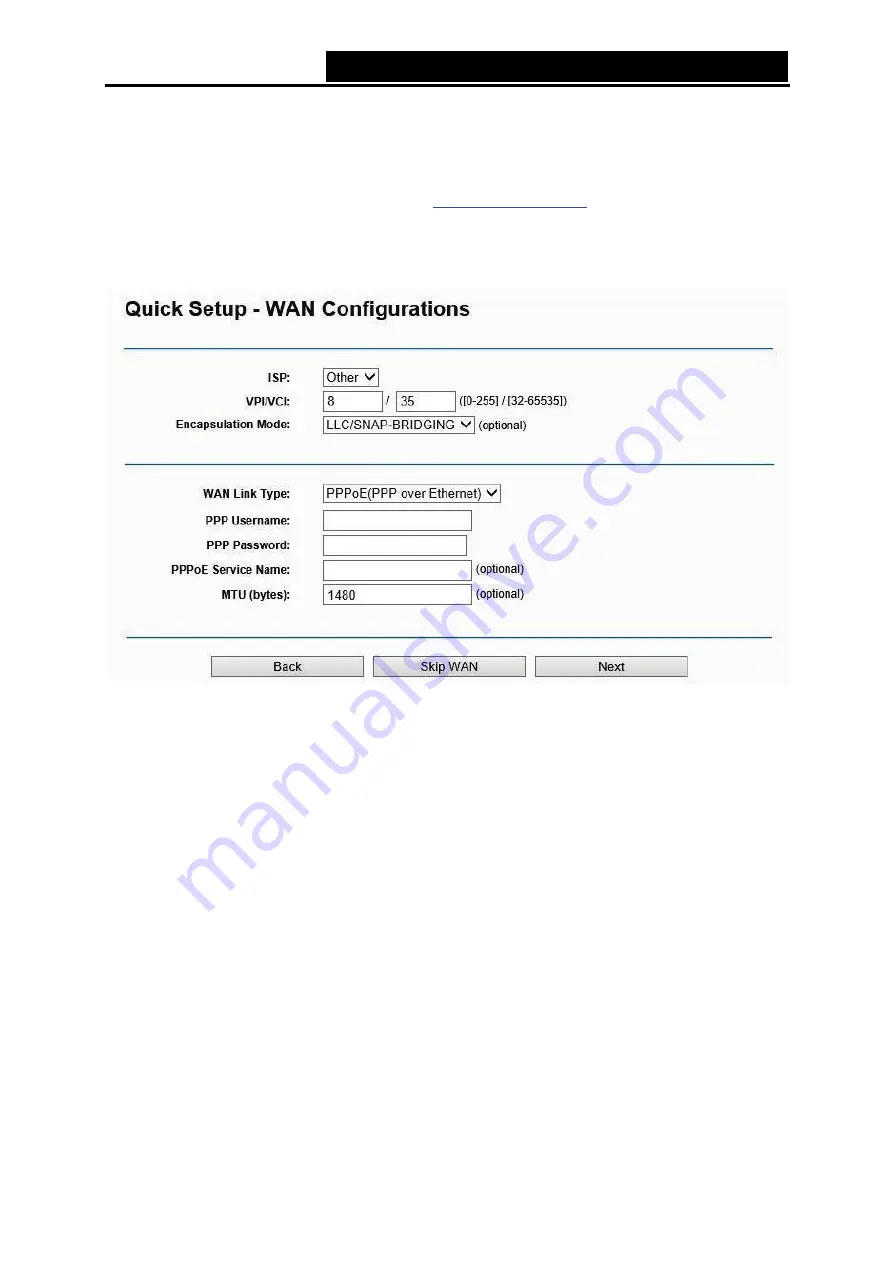
4. If
ADSL WAN
is chosen, please select your
ISP
from the drop-down list. Select
WAN Link
Type
provided by your ISP and enter the related parameters, and then click
Next
. Here we
use PPPoE as an example.
Figure 3-7
Note:
If your ISP is not listed, please select
Other
. Then you can manually enter the VPI/VCI values and
select
WAN Link Type
provided by your ISP.
If
Ethernet WAN
is chosen, please select
WAN Link Type
provided by your ISP and enter the
related parameters, then click
Next
. Here we use PPPoE as an example.


