background image

TOYO PUMPS EUROPE                                                                                          

                    Edition 03.11.2009 

- 10 - 

3.  Other seals 

Renew all seals after disassembling.  


4.  Clearance between impeller and impeller disc 

Unscrew the cap nuts (76C). Push the impeller disc (73) against the impeller (72) with the 
adjust bolts (85). Unscrew the adjust bolts (85) with half a turn. Fasten the cap nuts (76C) 
and  the  adjust  bolts  (85).  Measure  the  clearance  between  the  impeller  disc  and  the 
impeller. This clearance has to be between 1.0 and 1.5 mm. Verify the clearance with a 
gauge.  Turn  the  shaft  of  the  pump  by  hand.  No  friction  is  admitted  at  all.  If  necessary, 
repeat the operation. 


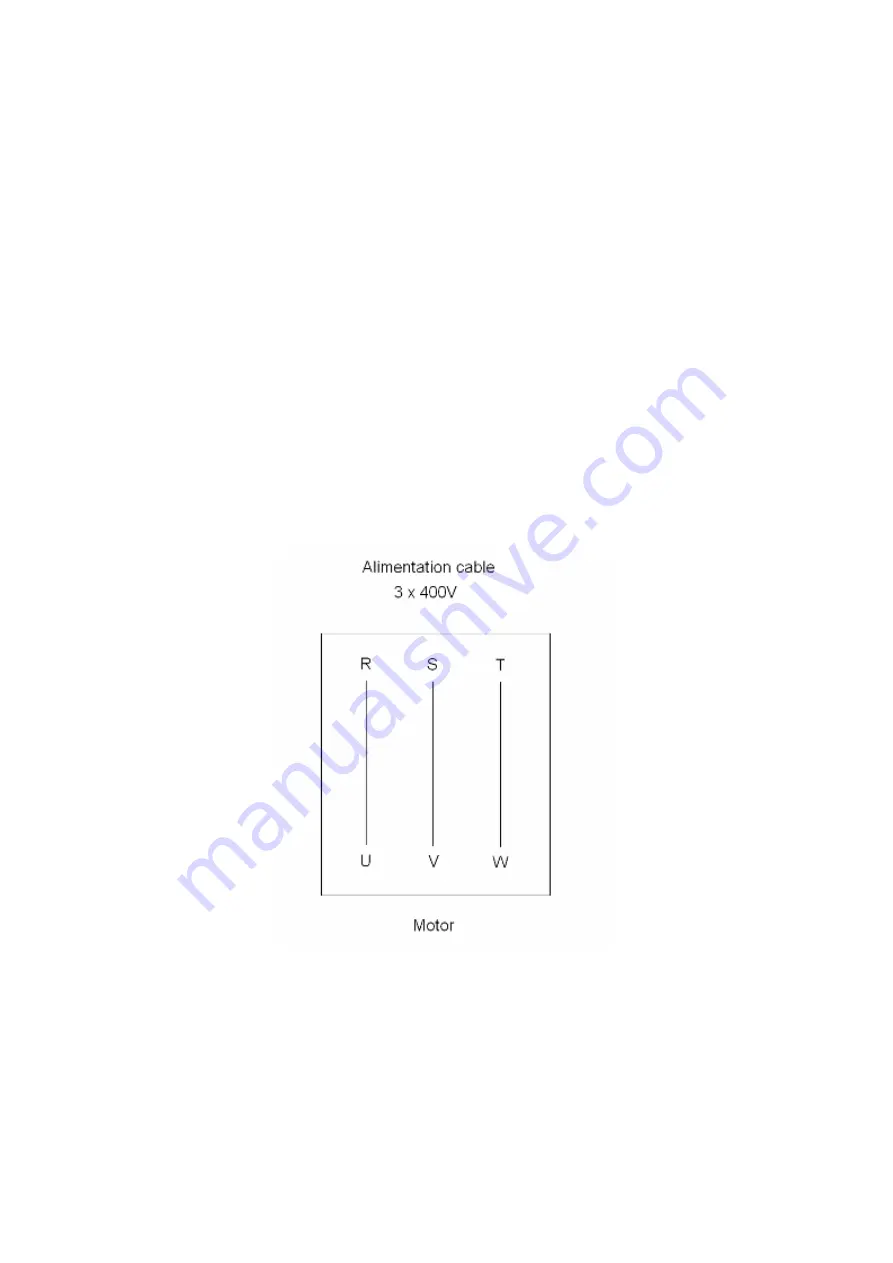
5.  Electric connection 

Connect the pump as shown on the drawing here below. 


N.B. : Do not forget to fill up the under cover with oil. Therefore, use the opening into the 

under cover. Type and oil quantity is mentioned in the technical specifications sheet 
of the pump.


Summary of Contents for DP 6 30-40HP Series

Page 1: ...TOYO PUMPS EUROPE Edition 27 07 2007 USERS MANUAL Heavy duty slurry pumps...

Page 2: ...TOYO PUMPS EUROPE Edition 03 11 2009 SAFETY INSTRUCTIONS...

Page 3: ...for future reference Take note of the serial number which you can find on the identification plate of your pump The manufacturer reserves the right to modify specifications and concept of these produc...

Page 4: ...operating 1 Notes on driving 2 Maintenance and troubleshooting 3 Points to be attentive 4 Troubleshooting list 5 Disassembling procedures 7 Assembling procedures 9 Technical specifications 11 Pump pe...

Page 5: ...ing The rotation direction is mentioned on the identification plate of the pump After connecting the pump let it turn out of the liquid to be pumped for an instant in order to check the direction of t...

Page 6: ...ected and never pass underneath the pump while it is suspended b When the pump is in duty it has to be immersed until the level indicated on the schema representing the dimensions of the pump c If pos...

Page 7: ...sistance of the motor has to be verified at least once a month If the resistance of the motor is inferior to 100M Ohm the winding of the electric motor has to be dried and the tightness of the cables...

Page 8: ...terials ex mud are sticked on the motor part of the pump This can provoke an abnormal heating of the motor Clean the pump if this occurs c If air occurs in the discharge hose it happens that the liqui...

Page 9: ...ween impeller and impeller disc Remove the foreign body The impeller disc is blocked against the impeller Adjust the space between the two parts as indicated in the technical characteristics A bearing...

Page 10: ...ier Insufficient discharge pressure Consult your supplier The thermal protection disconnects The density of the pumped liquid is to important Lower the density by lifting the pump and or by diluing th...

Page 11: ...packings 4 2 Disassembling of the pump section a Place the pump horizontally and fix it in such way that it can not move during the disassembling procedure b The cutter fan 81 is screwed normal right...

Page 12: ...h Remove the oil seals 41 49 the Rareflon seals 43 52 and the space rings 42 50 from the housings 58 61 4 Disassembling of the motor section a Set up the pump up side down posed on the upper cover b U...

Page 13: ...ation or lithium grease 2 Seals in under cover a Verify the condition of the shaft sleeves A and B 44 51 and the oil seal housing A and B 58 61 before beginning the assembly of the pump Replace the sh...

Page 14: ...st bolts 85 Measure the clearance between the impeller disc and the impeller This clearance has to be between 1 0 and 1 5 mm Verify the clearance with a gauge Turn the shaft of the pump by hand No fri...

Reviews: