7
❏
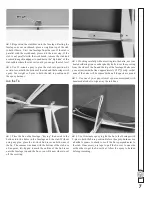
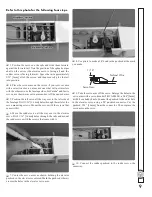
5. Reposition the stabilizer onto the fuselage. Resting the
fuselage on your workbench, place a weight on top of the stab
to hold it down. View the fuselage from the rear. If the stab is
parallel with the workbench, proceed to the next step. If the
stab is not parallel with the workbench, remove the stab and
use medium-grit sandpaper to sand down the “high side” of the
stab saddle where the stab rests until you can get the stab level.
❏
6. Use 30-minute epoxy to glue the stab into position–be
certain to coat both the bottom of the stab and the fuselage with
epoxy. Use weight or T-pins to hold the stab in position until
the epoxy hardens.
Join the Fin
❏
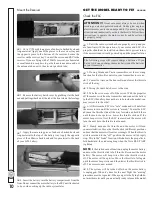
1. Place the
fi
n on the fuselage, “keying” the dowels in the
bottom into the holes in the fuselage and the stab. Without
using any glue, place the tri-stock
fi
n braces on both sides of
the
fi
n. The same as was done with the bottom of the stab, use
a
fi
ne-point, felt-tip pen to mark the outline of the
fi
n braces
onto the fuselage top and the
fi
n so you will know where to cut
off the covering.
❏
2. Working carefully without cutting into the balsa, use your
heated soldering iron or a sharp hobby knife to cut the covering
from the sides of the
fi
n and the top of the fuselage. Make sure
you cut just inside the lines–approximately 1/32" [.5mm]–so that
none of the balsa will be exposed when all the parts are joined.
❏
3. Use one of your paper towel squares moistened with
denatured alcohol to wipe away the ink lines.
❏
4. Use 30-minute epoxy to glue the
fi
n to the fuselage with
T-pins to hold the
fi
n in position. Before the epoxy hardens use
a builder’s square to check to see if the
fi
n is perpendicular to
the stab. If necessary, use tape to pull the
fi
n over to one side
or the other to get the
fi
n vertical. Allow the epoxy to harden
before proceeding.

