background image

13

Connections

Connections

Notes
• If Auto is selected, it follows preference HDMI aspect ratio of TV.
• Refer to the owner’s manual of the connected TV as well.
• When you connect the DVD player to your TV, be sure to turn off the power and unplug both units from the wall outlet before making

any connections.

• If you have a HDMI (with HDCP) equipped monitor or display, you can connect it to this player using a HDMI cable.
• The HDMI connector outputs uncompressed digital video, as well as almost every kind of digital audio that the player is compatible

with, including DVD-Video, Video CD/Super VCD, CD, WMA MP3 and DivX

®

.

• This unit has been designed to be compliant with HDMI (High Definition Multimedia Interface) depending on the component you

have connected. Using a HDMI connection may result in unreliable signal transfers.

• Because HDMI is an evolving technology, it is possible that some devices with an HDMI input may not operate properly with this

DVD player.

• When using HDMI cable, do not connect to other analog video outputs.
• No sound will be output from the HDMI cable if the digital out is not set to PCM.
• HDMI output is only available when the Video Output is set to “HDMI”. Otherwise the HDMI button is invalid.

Notes
• DO NOT connect the OPTICAL OUT or COAXIAL DIGITAL AUDIO OUT jack of the DVD player to the AC-3 RF input of a Dolby

Digital Receiver.  This input on your A/V Receiver is reserved for Laser disc use only and is incompatible with the OPTICAL OUT
/COAXIAL DIGITAL AUDIO OUT jack of the DVD player.

• Connect the COAXIAL DIGITAL AUDIO OUT jack of the DVD player to the “DIGITAL (COAXIAL)” input of a Receiver or Processor.
• Connect the OPTICAL OUT jack of the DVD player to the “DIGITAL (OPTICAL)” input of a Receiver or Processor.
• Refer to the owner’s manual of the connected equipment as well.
• When you connect the DVD player to other equipment, be sure to turn off the power and unplug all of the equipment from the wall

outlet before making any connections.

• The output sound of the DVD player has a wide dynamic range. Be sure to adjust the receiver’s volume to a moderate listening

level. Otherwise, the speakers may be damaged by a sudden high volume sound.

• Turn off the amplifier before you connect or disconnect the DVD player’s power cord. If you leave the amplifier power on, the

speakers may be damaged.

• For connection to your TV, see “Connecting to a TV” .
• This section uses the following reference marks.

: Front speaker

: Rear speaker

: Sub woofer

: Center speaker

: Signal flow

Connecting to Optional Equipment

You can enjoy high quality dynamic sounds by connecting the DVD player to optional audio equipment.

Warning
• When you are connecting (via the OPTICAL OUT or COAXIAL

DIGITAL AUDIO OUT jack) an AV decoder that does not have
Dolby Digital, Digital Theater Systems (DTS) or MPEG2
decoding function, be sure to set “Digital Output” to “PCM”
from the on-screen displays. Otherwise, high volume sound
may damage your hearing as well as the speakers.

• When playing DTS-encoded discs (DVDs and audio CDs),

excessive noise may be output from the analog audio output
jacks.  To avoid possible damage to the audio system, you
should take proper precautions when the analog audio output
jacks of the DVD player are connected to an amplification
system. To enjoy DTS Digital Surround™ playback, an external
5.1 channel DTS Digital Surround™ decoder system must be
connected to the OPTICAL OUT or COAXIAL DIGITAL AUDIO
OUT jack of the DVD player.

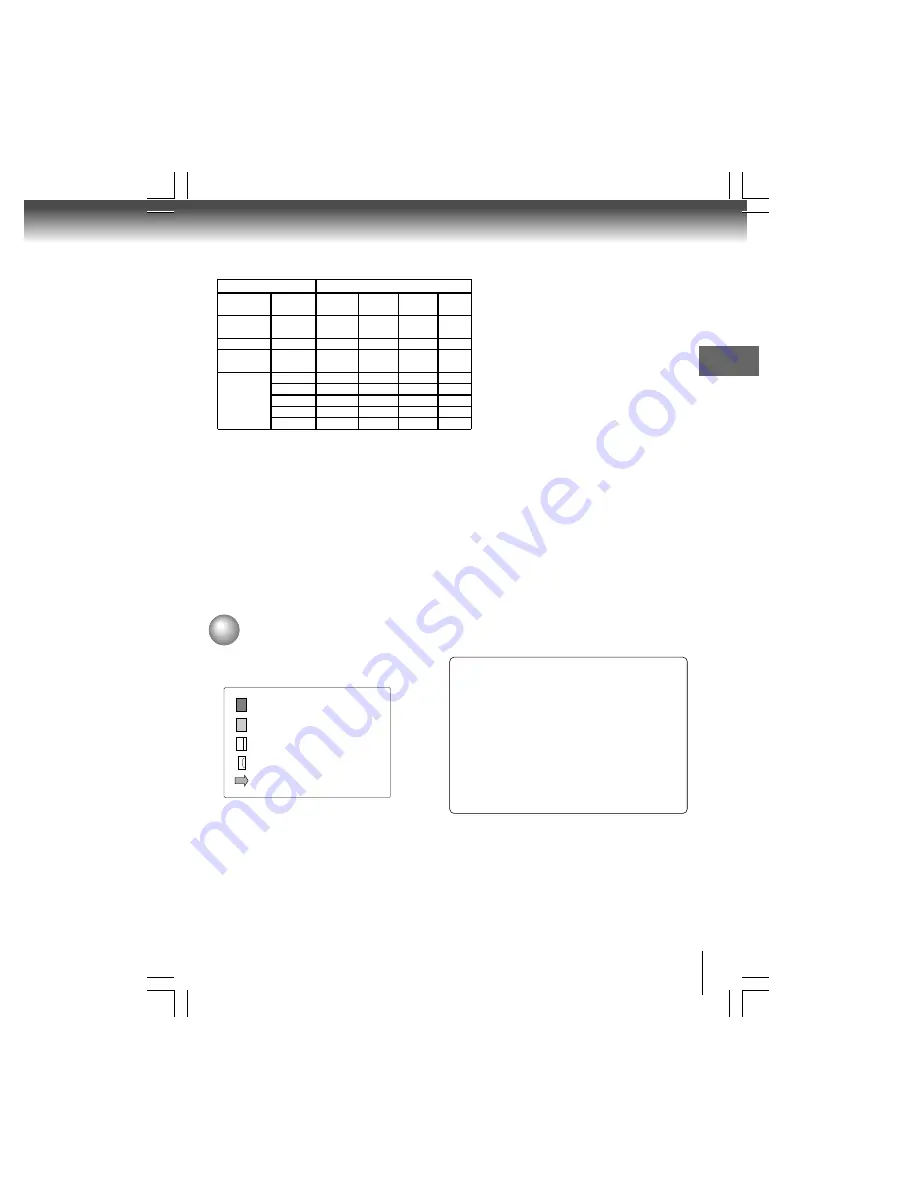
Content of the output for each output jack is shown in the following

table and differ depending on the On-Screen Display Setting:

"Video Output" HDMI Output

HDMI

Video

Component S-Video

Setting

Setting *

Output

Output

Output

Output

Component Invalid

-

Composite

480i

-

(Interlaced)

S-VIDEO

Invalid

-

Composite

-

S-Video

P-Scan Invalid

-

Composite

480p

-

(Progressive)

480p

480p

Composite

480i

-

HDMI

720p

720p

Composite

480i

-

1080i

1080i

Composite

480i

-

1080p

1080p

Composite

480i

-

1080p/24F 1080p/24F Composite

480i

-

Settings for HDMI output format are performed using the 

HDMI

 button


on the remote control.

Content of output for each output jack

On-Screen Display Setting

Summary of Contents for XD-E500KC

Page 1: ...on setup Others 480p 720p 24F 1080p 1080i 2008 Toshiba Corporation Owner sRecord The model number and serial number are on the back of your DVD Player Record these numbers in the spaces below Refer to these numbers whenever you communicate with your Toshiba dealer about this DVD Player Model number Serial number OWNER S MANUAL ...

Page 2: ...ich can be determined by turning the equipment off and on the user is encouraged to try to correct the interference by one or more of the following measures Reorient or relocate the receiving antenna Increase the separation between the equipment and receiver Connect the equipment into an outlet on a circuit different from that to which the receiver is connected Consult the dealer or an experienced...

Page 3: ... or objects have fallen into the apparatus the apparatus has been exposed to rain or moisture does not operate normally or has been dropped Portable Cart Warning 15 Do not overload wall outlets extension cords or integral convenience receptacles as this can result in a risk of fire or electric shock 16 Never expose the apparatus to dripping or splashing or place items such as vases aquariums any o...

Page 4: ...k or shake when carrying Do not use volatile liquids such as insect spray near the DVD player Do not leave rubber or plastic products in contact with the DVD player for a long time They will leave marks on the finish The top and rear panels of the DVD player may become warm after a long period of use This is not a malfunction When the DVD player is not in use be sure to remove the disc and turn of...

Page 5: ...wners Use of this copyright protection technology must be authorized by Macrovision Corporation and is intended for home and other limited viewing uses only unless otherwise authorized by Macrovision Corporation Reverse engineering or disassembly is prohibited On handling discs Do not touch the playback side of the disc Do not attach paper or tape to discs On cleaning discs Fingerprints and dust o...

Page 6: ...ictures It depends on DivX quality 8 cm 12 cm About this owner s manual This owner s manual explains the basic instructions of this DVD player Some DVDs are produced in a manner that allows specific or limited operation during playback As such the DVD player may not respond to all operating commands This is not a defect in the DVD player Refer to instruction notes of discs may appear on the TV scr...

Page 7: ...e same location 17 Locating a Desired Section 18 Locating a title using the top menu 18 Locating a specific chapter or track 18 Advanced playback AccessingaSpecificLocationDirectly 19 Locating a specific title chapter time 19 Repeating a Specific Segment 20 Repeating a specific segment 20 Playing in a Varied Order 20 Playing titles chapters or tracks in a varied order 20 Playing in a Favorite Orde...

Page 8: ...14 15 Rear panel Chapter Track number Indicator The indicators vary depending on the kinds of discs you play Multifunctional indicator indicates operating status or messages etc Bad disc During playback Example During playback Example During playback Example Some discs may only display chapter numbers Some discs may only display track numbers Some discs may only display track numbers LOAD CLOSE No...

Page 9: ...e using the top menu 18 RETURN button Return to menu display for VCD 2 0 discs with menu 16 HDMI button 19 22 23 24 17 18 17 18 18 20 19 21 29 12 16 19 17 23 24 16 16 18 17 18 25 16 25 16 16 20 22 12 PIC MODE button T SEARCH button Remote control The instructions in this manual describe the functions on the remote control See the page in for details ...

Page 10: ...D player to a strong light source such as direct sunlight or other illumination If you do so you may not be able to operate the DVD player via the remote control Notes on the remote control Direct the remote control at the remote sensor of the DVD player When using the remote control press the buttons at intervals of about 1 second to ensure the correct mode of operation Do not drop or give the re...

Page 11: ...OUT R red L white Connections Make the following setting On screen display Select Page Off PCM or Bitstream Digital Output Video Output Component S VIDEO P Scan HDMI 31 32 Interlaced outputs ColorStream Some TVs or monitors are equipped with component video inputs Connecting to these inputs allows you to enjoy higher quality picture playback Actual labels for component video inputs may vary depend...

Page 12: ...d In this case place the DVD player away from the tuner and radio The output sound of the DVD player has a wide dynamic range Be sure to adjust the receiver s volume to a moderate listening level Otherwise high volume sound may damage your hearing as well as the speakers Turn off the amplifier before you connect or disconnect the DVD player s power cord If you leave the amplifier power on the spea...

Page 13: ... making any connections The output sound of the DVD player has a wide dynamic range Be sure to adjust the receiver s volume to a moderate listening level Otherwise the speakers may be damaged by a sudden high volume sound Turn off the amplifier before you connect or disconnect the DVD player s power cord If you leave the amplifier power on the speakers may be damaged For connection to your TV see ...

Page 14: ... cable not supplied Connecting to Optional Equipment Continued Dolby Digital Dolby Digital is the surround sound technology used in theaters showing the latest movies and is now available to reproduce this realistic effect in the home You can enjoy motion picture and live concert DVDs with this dynamic realistic sound by connecting the DVD player to a 6 channel amplifier equipped with a Dolby Digi...

Page 15: ...gital cable not supplied Amplifier equipped with a digital audio input To COAXIAL type digital audio input T o wall outlet Connect either Optical digital cable not supplied 75 Ω Ω Ω Ω Ωcoaxial cable not supplied 32 32 Digital Theater Systems DTS DTS is a high quality surround technology used in theaters and now available for home use on DVDs or audio CDs If you have a DTS decoder or processor you ...

Page 16: ...tton on the remote control to turn PBC on or off anytime during Video CD playback When switching from PBC off to PBC on mode playback will start from the beginning of the disc To turn on the menu display again press the RETURN button To pause playback still mode Press PAUSE STEP during playback To resume normal playback press the PLAY button The sound is muted during still mode To stop playback Pr...

Page 17: ...till playback Each time you press the PAUSE STEP button the picture advances one frame To resume normal playback Press PLAY Note The sound is muted during frame by frame playback Playing frame by frame Resuming playback from the same location Notes There may be a difference in the location where playback resumes depending on the disc Settings you changed using the on screen displays while the DVD ...

Page 18: ...arts from chapter 1 of the selected title 1 2 3 Notes The instructions above describe basic procedures which may vary depending on the contents of the DVD If different instructions appear on theTV screen follow those instructions If you display the top menu during playback and press the TOP MENU button again without selecting any title the DVD player may resume playback from the point where you fi...

Page 19: ...nu by pressing the or button Press T again to remove this display To cancel the Bookmark Follow step 1 then press the CLEAR button to cancel the bookmark Move through the menu by pressing the or button to cancel other bookmarks Notes Some discs may not work with marking operation The marking is canceled when you open the disc tray or turn the power off Some subtitles recorded around the marker may...

Page 20: ...eat playback of the selected segment A B 2 1 A B RPT Playing in a Varied Order You can play titles chapters within a title or tracks in a varied order For Audio CD please see Playing MP3 WMA files 26 Playing titles chapters or tracks in a varied order Press PLAY MODE Press button to select desired features and then press ENTER button to toggle desired mode 1 e g Shuffle Playbacks in random order P...

Page 21: ...ghlighted bar to the item you want to change then press CLEAR 2 Press number buttons to input the new title chapter track number To cancel the programmed selections 1 While the display appears on the TV screen press to move the highlighted bar to the item you want to cancel 2 Press CLEAR To resume normal playback from memory playback Press MEMORY button Press to move the highlighted bar to Clear A...

Page 22: ...epending on the picture size you select e g ZOOM 2 1 2 3 Off Zooming a picture Selecting the Sound Enhancement E A M You can easily switch a preferred audio enhancement E A M Enhanced Audio Mode 3D To obtain expansive virtual surround sound effects from two speakers To use this enhancement on sounds output from the ANALOG AUDIO OUT jacks be sure to set Digital Output to PCM Effective in playback o...

Page 23: ...playback The current subtitle setting is displayed 1 2 e g SUBTITLE e g Press SUBTITLE while the subtitle setting is displayed on the TV screen Each time you press the SUBTITLE button the subtitle languages included on the DVD change To turn off the subtitle setting display press the SUBTITLE button repeatedly until Off is displayed Notes Some DVDs are set to display subtitles automatically and yo...

Page 24: ... angle you selected If no button is pressed within 10 seconds playback continues without changing the current angle 2 Selecting a Language You can select a preferred language and sound recording system from those included on the DVD Press AUDIO during playback The current audio setting is displayed Recorded audio format number changes sequentially The maximum number of possible audio formats is 8 ...

Page 25: ...ck Remaining time of the current title or track NAVI Select by pressing then press ENTER to access the feature Title number Chapter number Remaining time 00 30 34 01 00 52 1 1 5 12 Elapsed time On screen display operation 3 To turn off the display press DISPLAY again Bit rate Mbit s Amount of picture sound and subtitle data in the DVD transferred per second The larger the value is the more data pr...

Page 26: ...ic Intro Only playbacks the first 10 seconds of all the files on the current folder or all tracks on the disc Edit mode Memory operation works only when Edit mode is selected After finish storing the files tracks you want into the Program view list select Edit mode again and press ENTER to release edit mode Program view To view tracks files in the Program view list It is disabled when the Program ...

Page 27: ...pear to be horizontally expanded For details refer to the owner s manual of your TV 1 Press OPEN CLOSE to close the disc tray A list of folders files will appear on the screen A list of files in the disc appears Selection mode e g Press button to select your desired file and then press ENTER or PLAY button to start slide show playback 31 Press STOP to display a folder list Note When you press butt...

Page 28: ...vX AC3 Enhance video GMC Qpel Progressive B frames Frame rate 8 to 25 fps CD physical format Mode 1 Mode 2 X A Form 1 File system ISO9660 Level 1 2 or Joliet File name A file name should be in alphabet and numerals only and must incorporate MPG or AVI extension e g MPG AVI Total number of folders Less than 256 Total number of files Less than 1000 JPEG files compatibility Discs whose compatibility ...

Page 29: ... in Spanish 1 Press SETUP button 2 Press button to select OSD language 3 Press ENTER button then use the button to select a preferred language 4 Press ENTER button 5 Press SETUP button to exit the menu Language Español OSD language DVD menu Subtitle English To display subtitles in English French To display subtitles in French Spanish To display subtitles in Spanish Auto To display subtitles in dif...

Page 30: ... Video 3 Press button then use the button to select Aspect Ratio 4 Press ENTER button then use the button to shift and change the TV type 5 Press ENTER button 6 Press SETUP button to exit the menu 4 3 Select when a standard 4 3 TV is connected Displays pictures cropped to fill your TV screen Either or both sides of the picture are cut off 16 9 Select when a 16 9 TV is connected Notes The displayab...

Page 31: ...TV which has component video inputs that support progressive scan HDMI High Definition Multimedia Interface Select if you connect the DVD toTV via HDMI input Aspect Ratio 4 3 HDMI Resolution Original P Scan HDMI Video out S VIDEO JPEG Interval PICTURE JPEG Interval 1 Press SETUP button 2 Press button to select Video 3 Press button then use the button to select JPEG Interval 4 Press ENTER button th...

Page 32: ...output Off PCM Bitstream Selects the output sound format corresponding to your system connection 1 Press SETUP button 2 Press button to select Audio 3 Press button then use the button to select Digital Output 4 Press ENTER button then use the button to select the output sound format Off PCM or Bitstream 5 Press ENTER button 6 Press SETUP button to exit the menu PCM Select when connected to a Multi...

Page 33: ...hen press ENTER 6 Press ENTER button again New Password screen will appear Press the number buttons to input the new password 7 Press ENTER button Confirm Password screen will appear Enter the same password again for confirmation 8 Press ENTER button Now your new password has been set Be sure to remember this number If you forget the password you can erase your current password by pressing number ...

Page 34: ...he Video Output is not set to HDMI HDMI Control will not work Other components must be compatible with HDMI Control in order to use this function Off To deactivate HDMI Control On To activate HDMI Control DivX Registration Some DivX Video On Demand files required registration code please get the code of your DVD player as follow 1 Press SETUP button 2 Press button to select Misc 3 Press button the...

Page 35: ...SO SQ SR SS ST SU SV SW TA TE TG TH TI TK TL TN TO TR TS TT TW UK UR UZ VI VO WO XH YO ZU Guarani Gujarati Hausa Hindi Croatian Hungarian Armenian Interlingua Interlingue Inupiak Indonesian Icelandic Hebrew Yiddish Javanese Georgian Kazakh Greenlandic Cambodian Kannada Kashmiri Kurdish Kirghiz Latin Lingala Laotian Lithuanian Latvian Lettish Malagasy Maori Macedonian Malayalam Mongolian Moldavian ...

Page 36: ...f theDVDplayer Operatetheremotecontrolwithinabout7m Replacethebatterieswithnewones Page 11 12 16 16 11 12 3 1 11 12 1 2 16 11 15 16 3 2 5 1 1 16 6 16 16 5 32 1 0 1 0 1 0 Symptoms and correction Cause The power plug is disconnected The automatic power off function turned the unit off The TV is not set to receive DVD signal output The video HDMI cable is not connected securely Mismatch setting betwe...

Page 37: ... output 1 0 V p p 75 Ω negative sync pin jack x 1 S Video output Y 1 0V p p 75 Ω negative sync Mini DIN 4 pin x 1 C 0 286 V p p 75 Ω Component video output Y 1 0 V p p 75 Ω negative sync pin jack x 1 PB PR 0 7 V p p 75 Ω pin jack x 2 Audio output COAXIAL DIGITAL 0 5V p p 75 Ω pin jack x 1 Audio output ANALOG 2 0 V rms 680 Ω pin jacks L R x 1 Audio output OPTICAL DIGITAL Optical connector x 1 HDMI ...

Page 38: ...ranty Reception problems caused by inadequate antenna systems are your responsibility 5 Warranties extend only to defects in materials or workmanship as limited above and do not extend to any DAV Product or parts that have been lost or discarded by you or to damage to the DAV Product or parts caused by fires misuse accident Acts of God such as lightning or fluctuations in electric power improper i...

Page 39: ...an those authorized by TCL to service the DAV Product b Replacement of missing discarded or lost parts the provision of retrofits or preventive maintenance c Repair of damage that is cosmetic only or does not affect the DAV Product functionality such as wear and tear scratches and dents d Service on Toshiba branded accessory items such accessory items may be covered by their own warranty e Service...

Page 40: ...rum and in the manner as agreed to between you and TCL Failing such agreement the arbitration will be conducted by one arbitrator pursuant to the laws and rules relating to arbitration generally in force in the jurisdiction in which you reside at the time that the Dispute arises To the extent not precluded by law no claim dispute controversy or disagreement of any other person may be joined or com...

Reviews: