Connecting Components
Adding an IDE hard disk drive
39
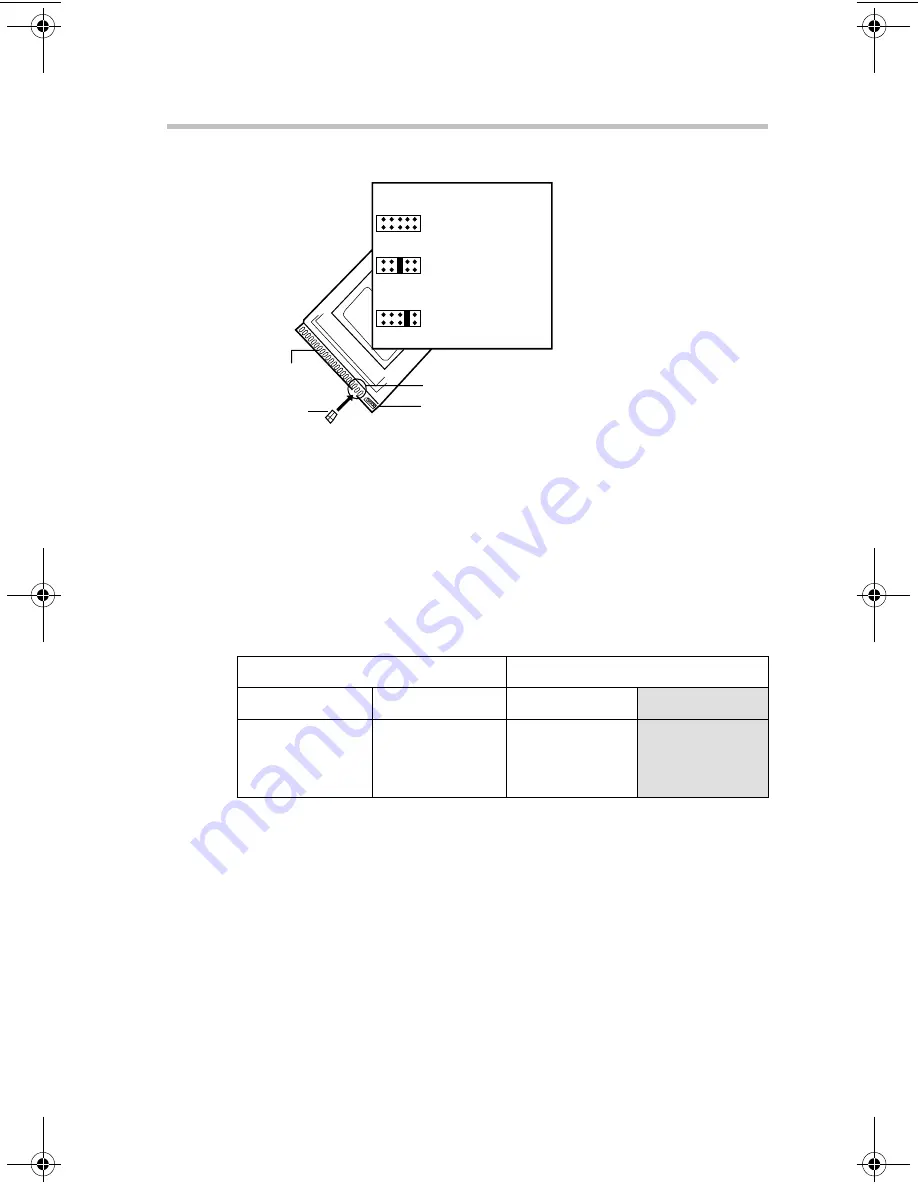
Drive ID jumper setting for Western Digital IDE hard disk drives
When adding IDE devices, set the devices according to the
following table:
To add a second (slave) device to the secondary IDE interface you
will need to purchase a new cable with an additional connector for
connecting the slave device.
Installing IDE HDDs
1
Remove the bezel and side panel. For instructions, see
“Removing and installing the bezel and side panel” on
page 24.
2
Disconnect the power and signal cables from the hard disk
and floppy disk drives.
3
Remove the two screws securing the drive carrier.
Primary IDE interface
Secondary IDE interface
Master
Slave
Master
Slave
HDD
connected.
First additional
HDD
connected.
CD-ROM drive
connected.
Second
additional HDD
connected.
40-pin IDE
connector
Jumper shunt
J8 Jumper block
Power connector
10-pin drive J8 jumper settings
Single(Standard installation)
9 7 5 3 1
10 8 6 4 2
Dual (Master)
9 7 5 3 1
10 8 6 4 2
Dual (Slave)
9 7 5 3 1
10 8 6 4 2
00-000.book Page 39 Tuesday, January 18, 2000 2:56 PM
Summary of Contents for Satellite M500D
Page 17: ...xvii ...
Page 35: ...Getting Started Keyboard comfort 17 ...
Page 85: ...Connecting Components System startup 67 ...
Page 86: ...Chapter 3 Setup 69 How to return to the Toshiba defaults 103 ...
Page 123: ...System Configuration Setup How to return to the Toshiba defaults 105 ...
Page 124: ...Chapter 4 Troubleshooting 107 Hardware Diagnostic Program 113 Toshiba Technical Support 136 ...
Page 155: ...If Something Goes Wrong Toshiba Technical Support 137 ...
Page 156: ...Appendix A Model specifications 139 Interrupt levels 142 ...
Page 161: ...Appendix A 143 ...
Page 173: ...Appendix B 155 ...
Page 174: ...Appendix C ...
Page 178: ...Appendix D ...
Page 182: ...Appendix E ...
Page 185: ...Appendix E 167 ...
Page 186: ......


