background image

Page 6

User Manual

Sa

fe

ty

Precautions

WARNING

This symbol shows that this appliance used a fl ammable refrigerant. 
If the refrigerant is leaked and exposed to an external ignition source, 
there is a risk of fi re. 

CAUTION

This symbol shows that the operation manual should be read carefully.

CAUTION

This symbol shows that a service personnel should be handling this 
equipment with reference to the installation manual.

CAUTION

This symbol shows that information is available such as the operating 
manual or installation manual.

EXPLANATION OF SYMBOLS DISPLAYED ON THE UNIT

•  Do not try to accelerate the defrosting process or methods of cleaning that are not 

recommended by the manufacturer.

•  The appliance shall be stored in a room without a continuously operating ignition source (for 

example, open fl ames or an operating gas appliance) or an ignition source (for example, an 
operating electric heater) close to the appliance. The appliance shall also be stored in a room 
without ignition sources.

•  Do not pierce or burn.

•  Be aware that the refrigerants may not contain an odor.

•  Keep ventilation openings clear of obstruction.

•  Unit is only to be serviced by a Toshiba authorized servicer, please call Customer Service at 

1-855-204-5313 for support.

•  Flammable refrigerant R32 is used within air conditioner.  Please follow the instructions carefully 

to handle, install, clean, and service the air conditioner to avoid damage or hazard.  Do not 
dispose of air conditioner in regular trash. Contact qualifi ed agency for proper disposal.

•  No open fi re or devices that generate spark/arcing shall be around the air conditioner to avoid 

causing ignition of the fl ammable refrigerant used. Please follow the instructions carefully to 
store or maintain the air conditioner to prevent mechanical damage from occurring.

WARNING

Summary of Contents for RAC-WK1513ESCWRU

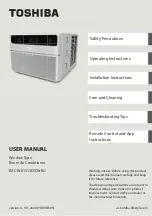
Page 1: ...ndow Type Room Air Conditioner Warning notices Before using this product please read this manual carefully and keep it for future reference The design and specifications are subject to change without prior notice for product improvement Consult with your dealer or the manufacturer for details version A 07 2020 us toshiba lifestyle com Saf Op Ins version A 09 2020 PREVIEW05 ...

Page 2: ... s Manual Safety Precautions 3 Operating Instructions 8 Installation Instructions 12 Care and Cleaning 21 Troubleshooting Tips 22 Remote Control and App Instructions 24 This appliance is not intended for use by persons including children with reduced physical sensory or mental capabilities or lack of experience and knowledge unless they have been given supervision or instruction concerning use of ...

Page 3: ...cess heat generation Do not modify power cord length or share the outlet with other appliances as it may cause electric shock or fire due to overheating Always ensure effective grounding Incorrect grounding may cause electric shock Unplug the unit if you notice unusual sounds or smells or smoke coming from it A damaged product may cause fire and electric shock Ventilate room before operating the a...

Page 4: ...ded wall receptacle If the wall receptacle you intend to use is not adequately grounded or protected by a time delay fuse or circuit breaker have a qualified electrician install the proper receptacle Ensure the receptacle is accessible after the unit installation Be sure the electrical service is adequate for the model you have chosen This information can be found on the serial plate which is loca...

Page 5: ...danger of fire or electric shock If water is spilled on the unit turn off the unit and switch off the circuit breaker Isolate supply by taking the power plug out and contact a qualified service technician Do not use near gas stove or other gas burning appliances as air flow may affect gas combustion Do not use for any purpose other than room comfort Do not use this air conditioner to preserve prec...

Page 6: ...ames or an operating gas appliance or an ignition source for example an operating electric heater close to the appliance The appliance shall also be stored in a room without ignition sources Do not pierce or burn Be aware that the refrigerants may not contain an odor Keep ventilation openings clear of obstruction Unit is only to be serviced by a Toshiba authorized servicer please call Customer Ser...

Page 7: ... Grounding type wall receptacle Do not under any circumstances cut remove or bypass the grounding prong Power supply cord with 3 prong grounding plug and current detection device The power supply cord contains a current measuring device that detects damage to the power cord Test your power supply cord as follows 1 Plug in the air conditioner 2 The power supply cord will have TWO buttons on the plu...

Page 8: ...und during cooling cycle All the pictures in this manual are for illustrative purposes only The actual appearance of the air conditioner you purchased may vary slightly but its operation and functions will be similar NOTICE Air Conditioner Features general This air conditioner is designed to be operated under the following conditions Cooling Operation Outdoor temp 64 109 F 18 43 C Indoor temp 62 9...

Page 9: ...me models throughout the room as needed Move the Levers from side to side until the desired LEFT RIGHT direction is obtained You can also move the LEFT lever to adjust air flow UP DOWN as needed Levers Air Direction Always wait 3 minutes when turning the unit off and then on again or when changing from cool to fan and back to cool This prevents damage from occurring to the compressor NOTICE The Fr...

Page 10: ...lled at any time during operation by pressing the Sleep button again CHECK FILTER FEATURE The Check Filter feature is a reminder to clean the air filter for a more efficient operation The light will illuminate after 250 hours of operation After cleaning the filter press the Filter button to reset the Check Filter function turning the light off ENERGY SAVER FEATURE ECO Press Energy Saver button to ...

Page 11: ...cating the Auto stop feature has been activated When the unit is off press the Timer button The Timer on LED indicator light will illuminate indicating the Auto start feature has been activated When the time of TIMER ON is displayed press the Timer button again The TIMER OFF indicator light illuminates It indicates the Auto Stop program has initiated Press or hold the UP or DOWN button to change t...

Page 12: ...ems consult a qualified electrician When handling the unit be careful to avoid cuts from sharp metal edges and aluminum fins on front and rear coils Please wear cut resistance gloves Installation Instructions WARNING Save carton and these Installation Instructions for future reference The carton is the best way to store the unit when not in use NOTICE INSTALLATION INSTRUCTIONS Perform a preliminar...

Page 13: ...ame as that shown on the unit serial nameplate Power cord is 48 in long The outlet should be within reach of the power cord 5 Carefully unpack air conditioner Remove all packing material Protect floor or carpet from damage Two people should be used to move and install unit SASH Storm Window Frame or Other Obstruction 19 MIN 1 2 MIN Fig D Preliminary Instructions cont Hardware Packed with the unit ...

Page 14: ...sh metal cabinet side to release plastic tabs on each side of front panel see Fig 3 E Gently lift front panel off unit see Fig 3A F Disconnect the connector plug of the display panel from the unit and place front panel to one side see Fig 4 G Remove shipping screws from top of unit and also on the side by the base if installed see Fig 5 H Hold the cabinet while pulling on the base pan handle and c...

Page 15: ...il and side retainers to cabinet as shown in Fig 8 10 screws Fig 8 5 16 long hex head Plastic Frame Side Retainer Window Accordion Panel Fig 9 D Slide 1 section of window accordion panel into side retainer on the side of the cabinet see Fig 9 Fig 10 Do both sides E Insert top and bottom legs of window accordion panel frame into channel in the top rail and bottom rail Do both sides F Insert washer ...

Page 16: ...holes For Vinyl Clad window Place two safety locks into the holes located in the bottom of the cabinet and drive two 10X1 4 pan head Phillips locking screws through the safety locks into the cabinet as shown Fig 13B A 10 X 1 4 pan head Phillips screws B Safety Lock Only for Vinyl Clad Window C Bottom Rail Foam Seal E Remove protective strip from adhesive side of Bottom Rail Foam Seal Apply Seal ov...

Page 17: ... 17 C Close window behind top rail Fig 16 1 2 Long Screws and Locknuts Fig 17 7 16 Locking Screw and Washer Locking Screw Check that air conditioner is tilted back about 1 1 4 in to 1 5 8 in tilted about 3 to 4 downward to the outside After proper installation condensate should not drain from the overflow drain hole during normal use Adjust the slope if otherwise Fig 15 NOTICE 5 Secure Accordion P...

Page 18: ...a 1 8 drill bit to drill a starter hole through the hole in the top leg of each accordion panel frame into the window sash Fig 18 and Fig 18A Connect with one 3 4 or 1 2 long hex head screw G Attach the Lock Frames to the window sill using two 3 4 19mm screws Fig 18B on some models Window Sash Seal Fig 19 Safety Lock 3 4 or 1 2 Long Hex head Screws Fig 19A Weather seal A A 3 4 or 1 2 long hex head...

Page 19: ... the instructions below A After the unit is installed in the window measure the inner width of the side curtain as shown Fig 20 Measure the inner width of the side curtain Fig 20 Fig 21 or B Mark a line on the provided accordion panel insulation that is 1 8 3 mm less than the measured width in step 1 then cut the Accordion Panel Insulation along the line Fig 21 Fig 22 C Slide the accordion panel i...

Page 20: ...r by adding a piece of wood as shown in Fig 24 SASH 19 MIN Storm Window Frame or Other Obstruction Board thickness as required Mount along entire sill by adequately fastening with nails or screws 1 2 MIN 1 2 MIN Fig 24 Turn AC off and disconnect power cord Remove sash seal from between windows and unscrew safety lock Remove screws installed through frame and frame lock Remove the accordion panel i...

Page 21: ...ont may be dusted with an oil free cloth or washed with a cloth dampened in a solution of warm water and mild liquid dishwashing detergent Rinse thoroughly and wipe dry Never use harsh cleansers wax or polish on the cabinet front Be sure to wring excess water from the cloth before wiping around the controls Excess water in or around the controls may cause damage to the air conditioner Plug in air ...

Page 22: ... in the COOL mode Check for potential obstructions blocking the outdoor intake exhaust Clear any obstructions Air conditioner cooling but room is too warm ice forming on cooling coil behind air filter Outdoor temperature below 64 F 18 C To defrost the coil set to FAN ONLY mode Air filter may be dirty Clean filter Refer to Care and Cleaning section To defrost set to FAN ONLY mode Thermostat set too...

Page 23: ...r drainage Refer to installation instructions check with installer Water dripping OUTSIDE when unit is cooling Unit removing large quantity of moisture from humid room This is normal during excessively humid days Remote sensing deactivating prematurely some models Remote control not located within range Place remote control within 16 4 feet 180 radius of the front of the unit and pointed in the ge...

Page 24: ...heat If the infrared signal receiver on the indoor unit is exposed to direct sunlight the air conditioner may not function properly Use curtains to prevent the sunlight from falling on the receiver If other electrical appliances react to the remote control either move these appliances or consult your local dealer NOTICE CR 2025 CR2025 1 2 1 2 A B Insulation piece Complete the following steps simul...

Page 25: ...L ECO button Press this button to activate the Energy saving mode Press it again to stop the function on some models TEMP DOWN button Press this button to decrease the indoor temperature setting FAN DOWN button Press this button to decrease the desired fan speed TIMER button Press this button to activate the Auto Start or Auto Stop program ON OFF button Operation starts when this button is pressed...

Page 26: ...splayed on the LED window of the air conditioner it indicates the Auto Stop setting program is initiated 2 Press or hold the TEMP UP DOWN to change the Auto time The control will count down the time remaining until start stop 3 The selected time will register in 5 seconds and the air conditioner will automatically revert back to display the previous temperature setting 4 Turning the unit ON or OFF...

Page 27: ...play 10 on the LED display of the unit 5 Wait for 5 seconds until the previous display appears in LED window AUTO START AUTO STOP Off Start Stop operation This feature is useful when you want to start the air conditioner before you wake up and stop it after you leave the house Example To start the air conditioner 5 hours after setting and stop it 8 hours after setting 1 Press the TIMER button unti...

Page 28: ...ing of the QR code your smart phone must have at least a 5 megapixel camera 5 Due to unstable network connectivity requests may time out If this happens re run the network configuration 6 Due to unstable network connectivity commands may time out If this happens the smartphone app and the actual product may display conflicting information The information displayed on the actual product is always t...

Page 29: ...LOAD AND INSTALL THE APP Android QR code Apple QR code Scan to download app You can also go to Google Play or App Store and search for Toshiba NA AC For more information please refer to Toshiba Lifestyle website us toshiba lifestyle com All the images in this manual are for reference only your product and app may look slightly different The actual product and app instructions have to be considered...

Page 30: ...over your password by email Operating Instructions With Remote 6 1 Press Sign Up 6 2 Enter your email address and password 6 3 Press Registration 6 4 If you forget your password press Forgot password on the main menu and enter your email address Then press Reset Password Make sure your smartphone is able to connect to the wireless network which will be used Make sure also that the device is not co...

Page 31: ...anual Page 31 ADDITIONAL APP AND SMART HOME FUNCTIONS Operating Instructions With Remote For additional instructions regarding the features of the app and Smart Home skill capabilities scan the QR code below ...

Page 32: ...Page 32 User Manual ...

Page 33: ... de Ventana Pared Aire Acondicionado de Cuarto Avisos de advertencia antes de usar este producto lea atentamente este manual y consérvelo para futuras referencias El diseño y las especificaciones están sujetos a cambios sin previo aviso para la mejora del producto Consulte con su distribuidor o fabricante para obtener más detalles versión A 09 2020 us toshiba lifestyle com Pre Ins Ins versión A 09...

Page 34: ...ario Precauciones de Seguridad 35 Instrucciones de Operación 40 Instrucciones de Instalación 47 Mantenimiento y Limpieza 53 Soluciones de Problemas 54 Instrucciones del Control Remoto y del App 56 Para obtener asistencia llame el Central de Servicio Técnico al 1 855 204 5313 Este aparato no está diseñado a ser utilizado por personas incluidos niños con capacidades físicas sensoriales o mentales re...

Page 35: ...un incendio debido a la excesiva generación de calor No modificar la longitud del cable de alimentación ni comparta la tomacorriente con otros aparatos ya que puede provocar una descarga eléctrica o un incendio debido al sobrecalentamiento Asegúrese siempre de una conexión a tierra eficaz Una conexión a tierra incorrecta puede provocar una descarga eléctrica Desenchufar la unidad si nota sonidos e...

Page 36: ... realizar una conexión a tierra adecuada El cable de alimentación está equipado con un enchufe de conexión a tierra de tres clavijas para la protección contra los riesgos de choque Su acondicionador de aire debe utilizarse en una tomacorriente de pared correctamente conectado a tierra Si la tomacorriente de pared que tiene intención de utilizar no está adecuadamente conectada a tierra o protegida ...

Page 37: ...e posibles quedas No conecte objetos pesados en el cable de alimentación y asegúrese de que el cable no esté comprimido De lo contrario hay peligro de incendio o descarga eléctrica Si hay agua derramada en la unidad apague la unidad y apague el disyuntor Aísle el suministro tomando el enchufe y contacte un personal de servicio técnico cualificado No lo use cerca de estufas de gas o otros aparatos ...

Page 38: ... fuentes de ignición comunes por ejemplo un calentador eléctrico en funcionamiento cerca del aparato El aparato también debe ser ubicado en una habitación sin cualquer otra fuente de ignición No perforar ni quemar Tenga en cuenta que los refrigerantes pueden no contener olor Mantenga las aberturas de ventilación libres de obstrucciones La unidad solo debe ser atendida por un centro de asistencia a...

Page 39: ...stances cut remove or bypass the grounding prong Power supply cord with 3 prong grounding plug and current detection device El cable de energía contiene un dispositivo de medición que detecta daños en el proprio cable Pruebelo de la siguiente manera 1 Enchufe el acondicionador de aire 2 El cable de energía tendrá DOS botones en el cabezal del enchufe Pulse el botón TEST Notará un clic a medida que...

Page 40: ... normal operación Todas las ilustraciones de este manual son para explicar sólo La apariencia real del acondicionador de aire que compró puede variar ligeramente pero su operación y funciones serán similares AVISO Instrucciones de Operación Características del condicionador de aire general Este acondicionador de aire está diseñado para funcionar en las siguientes condiciones Operación de enfriamie...

Page 41: ...s palancas de lado a lado hasta que la dirección deseada IZQUIERDA DERECHA sea obtenida También puede mover la palanca IZQUIERDA para ajustar el flujo de aire hacia ARRIBA ABAJO según sea necesario Por favor espere siempre por 3 minutos entre apagado y encendido de la unidad y cuando cambie de modo frío a ventilador y de vuelta Esto evitará que el compresor se sobrecaliente AVISO Levers Air Direct...

Page 42: ...s de 30 minutos adicionales Esta nueva temperatura se mantendrá durante 7 horas antes de que vuelva a la temperatura seleccionada originalmente El programa de modo de suspensión se puede cancelar en cualquier momento durante el funcionamiento pulsando de nuevo el botón SLEEP FUNCIÓN DE REVISIÓN DEL FILTRO La función Revisión del Filtro es un recordatorio para limpiar el filtro de aire para una ope...

Page 43: ...iluminará indicando que se ha activado la función de inicio automático Cuando aparecer la hora en el TIMER ON pulse de nuevo el botón TIMER La luz indicadora TIMER OFF va a iluminarse Esto indica que se ha iniciado el programa Parada Automática Mantenga pulsado el botón UP o DOWN para cambiar la hora automática en incrementos de 0 5 horas hasta 10 horas y luego en incrementos de 1 hora hasta 24 ho...

Page 44: ... el equipo tenga el cuidado de evitar cortes en los bordes metálicos afilados o aletas de aluminio que se encuentran en los serpentines delanteros y traseros ADVERTENCIA Guarde la caja y estas instrucciones de instalación para futuras referencias La caja es la mejor manera de almacenar el equipo cuando no está en uso AVISO Realice una comprobación preliminar de su instalación a través de los pasos...

Page 45: ...lcance del cable de alimentación 5 Desempaquete cuidadosamente el acondicionador de aire Retire todo el material del empaque Proteja el suelo o la alfombra de posibles daños Se aconseja utilizar dos personas para mover e instalar la unidad Instrucciones preliminares cont Hardware Embalado con la unidad El aislamiento del panel de acordeón y la banda adesiva son solo para los modelos ENERGY STAR AV...

Page 46: ...a liberar las pestañas de plástico en ambos lados del panel frontal véase la Fig 3 E Levante suavemente el panel frontal de la unidad véase la Fig 3A F Desconecte de la unidad el conector del panel de visualización y coloque el panel frontal a un lado véase la Fig 4 G Retire los tornillos de la parte superior de la unidad y también en el lado por la base caso estea instalada véase la Fig 5 H Sujet...

Page 47: ...véase la Fig 9 y Fig 10 Hacer en ambos lados E Inserte las piernas superior e inferior del marco del panel de acordeón de la ventana a través del canal y en el carril superior y el carril inferior Hacer en ambos lados Plastic Frame Side Retainer Window Accordion Panel Fig 9 Marco de plástico Retenedor lateral Panel de relleno de ventana Fig 10 TOP VIEW Air Conditioner Cabinet Plastic Frame Locking...

Page 48: ...e dos bloqueos de seguridad en los orificios situados en la parte inferior del gabinete y conduzca dos tornillos Phillips Panhead 10X de 1 4 a través de los bloqueos de seguridad en el gabinete como se muestra Fig 13B A Tornillos Phillips Panhead 10X de 1 4 B Bloqueo de seguridad solo para ventanas de vinilo C Sello de espuma del carril inferior E Retire la tira protectora del lado adhesivo del se...

Page 49: ...ón marcada Fig 14A Apriete a mano temporalmente así que los ajustes finales se puedan hacer más tarde C Instale los soportes de ventana con los soportes de angulares de alféizar conectados para emparejar el orificio en la parte inferior del gabinete como se muestra en la Fig 16 D Apriete los 6 tornillos de forma segura Fig 14A Right Left Locknut Sill Angle Bracket Flathead Bolt 2 Each Required For...

Page 50: ... 19mm Fig 18B en algunos modelos Safety Lock 3 4 or 1 2 Long Hex head Screws Fig 19A Weather seal A A Tornillo largo de cabeza hexagonal 3 4 o 1 2 Bandas Adesivas Fig 18A A Recorte la Faja selladora para ajustar con el ancho de la ventana Insertar en el espacio entre los marcos superior e inferior Fig 19 B Fije el bloqueo de seguridad a un ángulo adecuado Fig 19A 6 Instalación de la Faja Selladora...

Page 51: ... lateral Siga las instrucciones que se indican a continuación A Después de instalar la unidad en la ventana mida el ancho interior de la cortina lateral como se muestra Fig 20 B Marque una línea en el aislamiento del panel de acordeón que sea 1 8 3 mm menor que la anchura medida en el paso 1 luego corte el Aislamiento del Panel de Acordeón a lo largo de la línea Fig 21 Fig 22 C Deslice el aislamie...

Page 52: ...e alimentación Retire el sello de espuma de la hoja entre las ventanas y desenrosque el bloqueo fijado Retire los tornillos instalados a través de los marcos de la hoja superior y del panel lateral Retire el aislamiento del panel de acordeón solo modelos ENERGY STAR Cierre deslice los paneles de acordeón en los carriles para cerrar Manteniendo un agarre firme en el acondicionador de aire levante l...

Page 53: ...desempolvados con un paño sin aceites o lavados con un paño humedecido en una solución de agua tibia y detergente líquido neutro Enjuagar bien y secar Nunca utilice limpiadores agresivos cera o esmalte en la parte delantera del gabinete Asegúrese de escurrir el exceso de agua del paño antes de limpiar alrededor de los controles El exceso de agua dentro o alrededor de los controles puede causar dañ...

Page 54: ...se los modos de temperatura Espere aproximadamente 3 minutos y escuche si el compresor se reinicie cuando se establece en el modo COOL Compruebe si hay posibles obstrucciones que bloqueen la entrada salida al aire libre Limpie cualquier obstrucción El acondicionador de aire se enciende y apaga rápidamente Filtro de aire sucio o flujo de aire restringido Limpie el filtro de aire Temperatura exterio...

Page 55: ...ado fuerte ajuste el modo FAN a una configuración más lenta Vibración de la ventana mala instalación Consulte las instrucciones de instalación o consulte al instalador El agua gotea en el interior cuando la unidad se está enfriando Instalación incorrecta Incline el aire acondicionado ligeramente hacia el exterior para permitir el drenaje del agua Consulte las instrucciones de instalación o consult...

Page 56: ...directa ni al calor Si el receptor de señal infrarroja de la unidad interior está expuesto a la luz solar directa es posible que el acondicionador de aire no funcione correctamente Utilice cortinas para evitar que la luz del sol caiga sobre el receptor Si otros aparatos eléctricos reaccionan al control remoto mueva estos aparatos o consulte a su distribuidor local PRECAUCIÓN Complete los siguiente...

Page 57: ...este botón para activar el modo de ahorro de energía Púlselo de nuevo para detener la función en algunos modelos Botón TEMP DOWN Pulse este botón para reducir la configuración de la temperatura interior Botón FAN DOWN Pulse este botón para reducir la velocidad deseada del ventilador Botón TIMER Pulse este botón para activar el programa Inicio Automático o Parada Automática Botón ON OFF La unidad s...

Page 58: ...er en el visor LED del acondicionador de aire indica que se ha iniciado el programa de ajuste de parada automática 2 Mantenga pulsado el TEMP UP DOWN para cambiar la hora automática El control contará el tiempo restante hasta el inicio parada 3 El tiempo seleccionado se registrará en 5 segundos y el acondicionador de aire volverá automáticamente a mostrar el ajuste de temperatura anterior 4 Encend...

Page 59: ...dicador LED de la unidad 5 Espere 5 segundos hasta que la indicación anterior aparezca en el visor LED INICIO AUTOMÁTICO PARADA AUTOMÁTICA Desactivado Iniciar Detener operación Esta función es útil cuando se desea iniciar el acondicionador de aire antes de despertar y detenerlo después de salir de la casa Ejemplo Para iniciar el acondicionador de aire 5 horas después de la configuración y detenerl...

Page 60: ...o QR su smart phone debe tener al menos una cámara de 5 megapíxeles 5 Debido a la conectividad de red inestable las solicitudes pueden agotar el tiempo de espera Si esto sucede vuelva a ejecutar la configuración de red 6 Debido a la conectividad de red inestable los comandos pueden agotar el tiempo de espera Si esto sucede la aplicación del Smartphone y el producto actual pueden presentar informac...

Page 61: ...R E INSTALAR LA APLICACIÓN Código QR de Android Código QR de Apple Escanear para descargar la aplicación También puede ir a Google Play o App Store y buscar Toshiba NA AC Para obtener más información consulte la página web de Toshiba Lifestyle us toshiba lifestyle com Todas las imágenes de este manual son solo para referencia su producto y aplicación pueden tener un aspecto ligeramente diferente L...

Page 62: ...el control remoto y del App 6 1 Pulse Registrarse 6 2 Introduzca su dirección de correo electrónico y contraseña 6 3 Pulse Registro 6 4 En caso de que olvide su contraseña pulse Olvidó su contraseña en el menú principal e introduzca su dirección de correo electrónico A continuación pulse Restablecer contraseña Asegúrese de que su Smartphone es capaz de conectarse a la red inalámbrica que se utiliz...

Page 63: ...NALES DE LA APLICACIÓN Y SMART HOME Instrucciones del control remoto y del App Para obtener instrucciones adicionales sobre las características de la aplicación y las capacidades del sistema Smart Home escanee el código QR a continuación ...

Page 64: ...of the body seek immediate medical attention ADVERTENCIA PELIGRO DE QUEMADURA QUÍMICA MANTENGA LAS PILAS ALEJADAS DE LOS NIÑOS Este producto contiene una batería de celda tipo moneda botón Si una batería de celda tipo moneda botón nueva o usada llegara a ser ingerida o que se la han colocada dentro de alguna parte del cuerpo causaría quemaduras internas graves en solo 2 horas y puede causar la mue...

Reviews: