4 Replacement Procedures
4.1 General
Safety Precautions
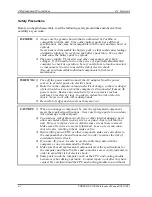
Before you begin disassembly, read the following safety precautions and observe them
carefully as you work.
DANGER:
1) Always use the genuine battery that is authorized by Toshiba or
compatible with the unit. Since other battery packs have different
specifications, they may be incompatible with the unit, and may burst or
explode.
Never heat or disassemble the battery pack, as that could cause leakage
of alkaline solution. Never throw the battery pack into a fire, as that
could cause the battery pack to explode.
2) The power supply, FL inverter and other components carry high
voltages. If you need to turn on the power of a partially disassembled
computer to check its operation, be very careful not to touch connectors
or components, in order to avoid the risk of electric shock.
Also, do not disassemble individual components in first-level
maintenance.
WARNING:
1) Turn off the power and disconnect the AC adaptor from the power
source, to avoid exposure to electric shock.
2) Batteries in the computer retain an electrical charge, so there is danger
of electrical shock even when the computer is disconnected from an AC
power source. Remove any metal jewelry or accessories such as
necklaces, bracelets or rings, in order to reduce the risk of electric
shock. Never work with wet or damp hands.
3) Be careful of edges and corners as these may cut.
CAUTION:
1) When you change a component, be sure the replacement component
meets the required specifications. Never use foreign parts, to avoid any
risk of damage to the computer.
2) To avoid any risk of short-circuit, fire or other internal damage, never
allow any metal objects such as screws or paper clips to fall into the
unit. Be sure to replace screws with the same size as those removed.
Make sure all screws are securely fastened. Loose screws can cause
short circuits, resulting in heat, smoke or fire.
3) Before lifting out an FRU or other component, make sure all cables to
the component have been disconnected, in order to reduce the risk of
accidental electric shock.
4) If you use AC power, be sure to use the cable that came with the
computer or one recommended by Toshiba.
5) Make sure that all replacement components meet the specifications for
the computer and that all cables and connectors are securely fastened, in
order to avoid the risk of electric shock.
6) Some parts inside the computer, such as the CPU and cooling module,
become very hot during operation. Conduct repair work after they have
cooled. Be careful around the CPU and cooling module to avoid burns.
4-2
PORTEGE S100 Maintenance Manual (960-508)
Summary of Contents for Portege S100 Series
Page 10: ...x PORTEGE S100 Maintenance Manual 960 508 ...
Page 11: ...Chapter 1 Hardware Overview ...
Page 12: ...1 Hardware Overview 1 ii PORTEGE S100 Maintenance Manual 960 508 ...
Page 25: ...1 2 2 5 inch Hard Disk Drive 1 Hardware Overview PORTEGE S100 Maintenance Manual 960 508 1 11 ...
Page 36: ...Chapter 2 Troubleshooting Procedures ...
Page 37: ...2 Troubleshooting Procedures 2 ii PORTEGE S100 Maintenance Manual 960 508 ...
Page 41: ...2 Troubleshooting Procedures 2 vi PORTEGE S100 Maintenance Manual 960 508 ...
Page 92: ...Chapter 3 Tests and Diagnostics ...
Page 93: ...3 Tests and Diagnostics 3 3 ii PORTEGE S100 Maintenance Manual 960 508 ...
Page 199: ...3 31 SETUP 3 Tests and Diagnostics PORTEGE S100 Maintenance Manual 960 508 3 101 ...
Page 212: ...3 Tests and Diagnostics 3 31 SETUP 3 114 PORTEGE S100 Maintenance Manual 960 508 ...
Page 213: ...Chapter 4 Replacement Procedures ...
Page 214: ...4 Replacement Procedures 4 ii PORTEGE S100 Maintenance Manual 960 508 ...
Page 218: ...4 Replacement Procedures 4 vi PORTEGE S100 Maintenance Manual 960 508 ...
Page 310: ...4 Replacement Procedure 4 29 Fluorescent Lamp 4 92 PORTEGE S100 Maintenance Manual 960 508 ...
Page 311: ...Appendices ...
Page 312: ...Appendices App ii PORTEGE S100 Maintenance Manual 960 508 ...
Page 318: ...Appendices App viii PORTEGE S100 Maintenance Manual 960 508 ...
Page 324: ...Appendices Appendix A Handling the LCD Module A 6 PORTEGE S100 Maintenance Manual 960 508 ...
Page 330: ...Appendices Appendix B Board Layout B 6 PORTEGE S100 Maintenance Manual 960 508 ...
Page 356: ...Appendices Appendix C Pin Assignments C 26 PORTEGE S100 Maintenance Manual 960 508 ...
Page 366: ...Appendices Appendix E Key Layout E 2 PORTEGE S100 Maintenance Manual 960 508 ...
Page 368: ...Appendices Appendix F Wiring diagrams F 2 PORTEGE S100 Maintenance Manual 960 508 ...
Page 370: ...Appendices Appendix G BIOS rewrite procedures G 2 PORTEGE S100 Maintenance Manual 960 508 ...
Page 372: ...Appendices Appendix H EC KBC rewrite procedures H 2 PORTEGE S100 Maintenance Manual 960 508 ...
Page 374: ...Appendices Appendix I Reliability I 2 PORTEGE S100 Maintenance Manual 960 508 ...


