background image

– 1 –

Air to Air Heat Exchanger with DX Coil Unit

Installation Manual

Air to Air Heat Exchanger with DX Coil Unit

Installation Manual

Original instruction

Contents

1 Precautions for safety  . . . . . . . . . . . . . . . . . . . . . . . . . . . . . . . . . . . . . . . . . . . . . . . . .  2

2 Accessory parts  . . . . . . . . . . . . . . . . . . . . . . . . . . . . . . . . . . . . . . . . . . . . . . . . . . . . . .  4

3 Restrictions on system construction . . . . . . . . . . . . . . . . . . . . . . . . . . . . . . . . . . . . .  5

4 Selection of installation place . . . . . . . . . . . . . . . . . . . . . . . . . . . . . . . . . . . . . . . . . . .  5

5 Installation of indoor unit . . . . . . . . . . . . . . . . . . . . . . . . . . . . . . . . . . . . . . . . . . . . . . .  6

6 Drain piping work . . . . . . . . . . . . . . . . . . . . . . . . . . . . . . . . . . . . . . . . . . . . . . . . . . . . .  8

7 Water supply piping for a humidifier (VNK type only). . . . . . . . . . . . . . . . . . . . . . . .  8

8 Installation of ducts  . . . . . . . . . . . . . . . . . . . . . . . . . . . . . . . . . . . . . . . . . . . . . . . . . . .  9

9 Refrigerant piping and vacuuming . . . . . . . . . . . . . . . . . . . . . . . . . . . . . . . . . . . . . . .  9

10 Electric wiring . . . . . . . . . . . . . . . . . . . . . . . . . . . . . . . . . . . . . . . . . . . . . . . . . . . . . . . 11

11 System configuration . . . . . . . . . . . . . . . . . . . . . . . . . . . . . . . . . . . . . . . . . . . . . . . . .  14

12 Advanced system . . . . . . . . . . . . . . . . . . . . . . . . . . . . . . . . . . . . . . . . . . . . . . . . . . . .  16

13 Advanced control . . . . . . . . . . . . . . . . . . . . . . . . . . . . . . . . . . . . . . . . . . . . . . . . . . . .  18

14 Fan characteristics . . . . . . . . . . . . . . . . . . . . . . . . . . . . . . . . . . . . . . . . . . . . . . . . . . .  22

15 Test run  . . . . . . . . . . . . . . . . . . . . . . . . . . . . . . . . . . . . . . . . . . . . . . . . . . . . . . . . . . . .  24

16 Maintenance  . . . . . . . . . . . . . . . . . . . . . . . . . . . . . . . . . . . . . . . . . . . . . . . . . . . . . . . .  25

17 Troubleshooting . . . . . . . . . . . . . . . . . . . . . . . . . . . . . . . . . . . . . . . . . . . . . . . . . . . . .  28

Please read this Installation Manual carefully before installing the Air to Air Heat Exchanger with DX Coil Unit.
• This Manual describes the installation method of the Air to Air Heat Exchanger with DX Coil Unit.
• For installation of the outdoor unit, follow the Installation Manual attached to the outdoor unit.

ADOPTION OF NEW REFRIGERANT

This Air Conditioner is a new type which adopts a new refrigerant HFC (R410A) instead of the conventional 
refrigerant R22 in order to prevent destruction of the ozone layer.

Thank you for purchasing this Toshiba Air to Air Heat Exchanger with DX Coil Unit
This Installation Manual describes the installation method of the Air to Air Heat Exchanger with DX Coil Unit. For installation of 
outdoor units, follow the Installation Manual supplied with the outdoor unit.
Moreover, as this installation manual includes the important articles concerning the “Machinery” Directive (Directive 2006/42/
EC), please read through the manual and make sure you understand it. After installation, give this Installation Manual, the 
Owner’s Manual and the Installation Manual supplied with the outdoor unit to the customer and tell the customer to keep them 
safe.
Prepare an exclusive power source for indoor units, independent to that for outdoor units.
Y-shaped branching joints or a branching header (separately purchased) are required for connecting pipes between indoor and 
outdoor units. Choose either of them considering the system capacity concerning piping. For installing branching pipes, refer to 
the installation manual of the Y-shaped branching unit or branching header (separately purchased). 
Outdoor connecting branching joints are required for connecting between outdoor units. 

Generic Denomination: Air conditioner (Air to Air Heat Exchanger with DX Coil Unit)

Definition of Qualified Installer or Qualified Service Person

The Air to Air Heat Exchanger with DX Coil Unit must be installed, maintained, repaired and removed by a qualified installer or 
qualified service person. When any of these jobs is to be done, ask a qualified installer or qualified service person to do them 
for you.
A qualified installer or qualified service person is an agent who has the qualifications and knowledge described in the table 
below.

Definition of Protective Gear 

When the Air to Air Heat Exchanger with DX Coil Unit is to be transported, installed, maintained, repaired or removed, wear 
protective gloves and ‘safety’ work clothing.
In addition to such normal protective gear, wear the protective gear described below when undertaking the special work detailed 
in the table below.
Failure to wear the proper protective gear is dangerous because you will be more susceptible to injury, burns, electric shocks 
and other injuries.

Agent

Qualifications and knowledge which the agent must have

 Qualified installer

• The qualified installer is a person who installs, maintains, relocates and removes the Air to Air Heat Exchanger with 

DX Coil Units made by Toshiba Carrier Corporation. He or she has been trained to install, maintain, relocate and 

remove the Air to Air Heat Exchanger with DX Coil Units made by Toshiba Carrier Corporation or, alternatively, he 

or she has been instructed in such operations by an individual or individuals who have been trained and is thus 

thoroughly acquainted with the knowledge related to these operations.

• The qualified installer who is allowed to do the electrical work involved in installation, relocation and removal has 

the qualifications pertaining to this electrical work as stipulated by the local laws and regulations, and he or she is 

a person who has been trained in matters relating to electrical work on the Air to Air Heat Exchanger with DX Coil 

Units made by Toshiba Carrier Corporation or, alternatively, he or she has been instructed in such matters by an 

individual or individuals who have been trained and is thus thoroughly acquainted with the knowledge related to 

this work.

• The qualified installer who is allowed to do the refrigerant handling and piping work involved in installation, 

relocation and removal has the qualifications pertaining to this refrigerant handling and piping work as stipulated 

by the local laws and regulations, and he or she is a person who has been trained in matters relating to refrigerant 

handling and piping work on the Air to Air Heat Exchanger with DX Coil Units made by Toshiba Carrier Corporation 

or, alternatively, he or she has been instructed in such matters by an individual or individuals who have been 

trained and is thus thoroughly acquainted with the knowledge related to this work.

• The qualified installer who is allowed to work at heights has been trained in matters relating to working at heights 

with the Air to Air Heat Exchanger with DX Coil Units made by Toshiba Carrier Corporation or, alternatively, he or 

she has been instructed in such matters by an individual or individuals who have been trained and is thus 

thoroughly acquainted with the knowledge related to this work.

Qualified service 

person

• The qualified service person is a person who installs, repairs, maintains, relocates and removes the Air to Air Heat 

Exchanger with DX Coil Units made by Toshiba Carrier Corporation. He or she has been trained to install, repair, 

maintain, relocate and remove the Air to Air Heat Exchanger with DX Coil Units made by Toshiba Carrier 

Corporation or, alternatively, he or she has been instructed in such operations by an individual or individuals who 

have been trained and is thus thoroughly acquainted with the knowledge related to these operations.

• The qualified service person who is allowed to do the electrical work involved in installation, repair, relocation and 

removal has the qualifications pertaining to this electrical work as stipulated by the local laws and regulations, and 

he or she is a person who has been trained in matters relating to electrical work on the Air to Air Heat Exchanger 

with DX Coil Units made by Toshiba Carrier Corporation or, alternatively, he or she has been instructed in such 

matters by an individual or individuals who have been trained and is thus thoroughly acquainted with the knowledge 

related to this work.

• The qualified service person who is allowed to do the refrigerant handling and piping work involved in installation, 

repair, relocation and removal has the qualifications pertaining to this refrigerant handling and piping work as 

stipulated by the local laws and regulations, and he or she is a person who has been trained in matters relating to 

refrigerant handling and piping work on the Air to Air Heat Exchanger with DX Coil Units made by Toshiba Carrier 

Corporation or, alternatively, he or she has been instructed in such matters by an individual or individuals who have 

been trained and is thus thoroughly acquainted with the knowledge related to this work.

• The qualified service person who is allowed to work at heights has been trained in matters relating to working at 

heights with the Air to Air Heat Exchanger with DX Coil Units made by Toshiba Carrier Corporation or, alternatively, 

he or she has been instructed in such matters by an individual or individuals who have been trained and is thus 

thoroughly acquainted with the knowledge related to this work.

1-EN

2-EN

+00ET99805001-2.book  Page 1  Tuesday, July 26, 2011  1:39 PM

Summary of Contents for MMD-VN1002HEXE-TR

Page 1: ...Heat Exchanger with DX Coil Unit Model name Model with a humidifier MMD VNK502HEXE TR MMD VNK802HEXE TR MMD VNK1002HEXE TR Model without a humidifier MMD VN502HEXE TR MMD VN802HEXE TR MMD VN1002HEXE TR Installation Manual For commercial use Ticari kullanım için 00ET99805001 2 book Page 1 Tuesday July 26 2011 1 39 PM ...

Page 2: ...iduals who have been trained and is thus thoroughly acquainted with the knowledge related to these operations The qualified installer who is allowed to do the electrical work involved in installation relocation and removal has the qualifications pertaining to this electrical work as stipulated by the local laws and regulations and he or she is a person who has been trained in matters relating to e...

Page 3: ...or electricians and from heat Failure to wear this protective gear may result in burn Before carrying out the installation maintenance repair or removal work be sure to set the circuit breaker for the Air to Air Heat Exchamger Unit to the OFF position Otherwise electric shocks may result Place a Work in progress sign near the circuit breaker while the installation maintenance repair or removal wor...

Page 4: ...noid valve or pipes are damaged and water leakage may result Do not install the unit in a place where the outside temperature especially around the unit or the air grill falls below 0 C Otherwise water in the pipes in the humidifying element or in the solenoid valve freezes and a breakdown or water leakage may result If the ducts pass through a fire protection zone use a noncombustible duct and in...

Page 5: ...gned for R410A and please care so that water or dust does not enter To Disconnect the Appliance from Main Power Supply Means for disconnection having a contact separation in all poles at least 3 mm must be incorporated in the fixed wiring in accordance with the wiring rules The installation fuse All Types Can Be Used must be used for the power supply line of this Air to Air Heat Exchanger with DX ...

Page 6: ... the water will leak VNK type only Places where air pipes are installed in the ceiling cavity Place exposed to air with high salt content seaside area Place exposed to large quantities of sulfide gas hot spring Should the unit be used in these places special protective measures are needed A restaurant kitchen where a lot of oil is used or place near machines in a factory Oil adhering to the heat e...

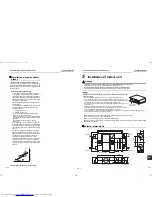
Page 7: ...e using the unit Do not install the unit near a water heater A B C C B Dry bulb temperature C Absolute humidity kg kg S a t u r a t io n C u r v e 5 Installation of indoor unit WARNING Install the air conditioner at enough strong place to withstand the weight of the unit If the strength is not enough the unit may fall down resulting in injury To provide against strong wind or an earthquake install...

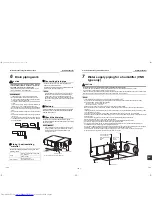
Page 8: ...o the unit using the six screws supplied for each connector Attaching the washers and nuts 1 Procure the hanging bolts nuts and washers locally 2 Attach the washers and nuts to the hanging bolt M12 as shown in the figure on the right Fixing the unit 1 Fit the hanging bracket on the hanging bolt then adjust the position of the unit so that it is level 2 Tighten the bolts securely using a double nut...

Page 9: ...yl chloride pipe VP25 The figure shows an example of VNK type 7 Water supply piping for a humidifier VNK type only CAUTION Install the water supply pipes after washing the inside of them with water Install a drain valve on the water supply pipe then drain the water until the drained water runs clear Do not to allow cutting fluid or detergent to enter the pipes The water quality of the humidifiers ...

Page 10: ... hood to a place where rain may fall directly In this case using a rectangle hood is recommended Stuff the cracks in the pipe penetration part with a noncombustible material such as mortar 1 Excessive bending 2 Multi times bending 3 Making the connecting duct smaller 4 Bending near the exhaust air duct Heat insulator Insulates the adapter and the aluminium tape Outside air intake duct air discharg...

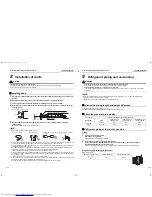
Page 11: ...oor unit should be turned on perform vacuuming from both the liquid side and the gas side Opening the valve fully Open the valves of the designated outdoor unit fully Outer dia of copper pipe A 0 0 4 In case of flaring for R410A with the conventional flare tool pull it out approx 0 5 mm more than that for R22 to adjust to the specified flare size The copper pipe gauge is useful for adjusting proje...

Page 12: ...anger with DX Coil Unit 1 Power supply Wiring for the power supply Air to Air Heat Exchanger with DX Coil Unit VNK502HEXE TR VN502HEXE TR VNK802HEXE TR VN802HEXE TR VNK1002HEXE TR VN1002HEXE TR I phase 50 Hz 220 240 V Current rating Fuse rating of circuit breaker switch for indoor units should be selected by the accumulated total current values of the indoor units cable 3 core 2 5 mm2 in conformit...

Page 13: ...cuit board MCC1615 Connector White Connector Black External output 220 240 V under 1 A each 5 External input sold separately No voltage a contact input Voltage DC 12 V 24 V input Operation output White White Red Connector White 6 Yellow Connector Red 6 White Red Red Red Blue Orange Red Blue Orange White Yellow Blue Purple Red 1 Common 2 Remote controller operation 3 Fan speed 5 Operation Pink Powe...

Page 14: ...t Common External damper output 3 4 Abnormal Bypass mode output 3 5 Cord clamp 40 60 10 10 R L S N Earth wire Wiring for the remote controller Wiring between indoor and outdoor unit Earth Screw 2 mm or less Power supply wire Remote controller wiring Wiring diagram Use a 0 5 mm2 to 2 mm2 wire Address setting Refer to the Installation Manual of the outdoor unit for address setting When the Air to Ai...

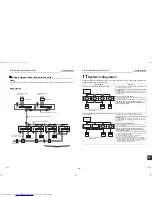
Page 15: ...ion mode If two remote controllers are used the latter operation overrides the former and their indications always reflect the result of the latter operation B Air to Air Heat Exchanger with DX Coil Unit system linked with air conditioners You can use the remote controller to ON OFF running Air conditioners and Air to Air Heat Exchanger with DX Coil Unit Remote controller for the Air to Air Heat E...

Page 16: ...Exchanger with DX Coil Unit in the system using NRC 01HE For this operation it is necessary to change the settings Setting modifications are required for separate control Refer to 13 Advanced control on page 20 When the Air to Air Heat Exchanger with DX Coil Unit system linked with indoor air conditioners is used set the Air to Air Heat Exchanger with DX Coil Unit as Follower referring to Setting ...

Page 17: ...ly 220 240 V For remote command For remote reply TCB IFCB 4E2 Error display Operating display Power supply maximum 240 VAC 0 5 A No voltage ON OFF Continuous signal 2 Switching the remote controller between invalid valid or low high from an external device separately sold External Input Perform connection with one of the units in the group Static signal only Insert the remote ON OFF adapter NRB 1H...

Page 18: ... RN F or 60245 IEC 66 1 0 mm2 to 2 5 mm2 Contact is on during normal operation as factory default Contact is off during nighttime heat purge operation or while fan operation is off to protect the unit The operation output settings can be changed Refer to Setting for changing the operation output on page 21 4 Connecting an electric damper electric shutter External Output Connect to the terminal blo...

Page 19: ...perations on the outdoor interface circuit board While the automatic addresses are being set up no remote controller operations can be performed Setup takes up to 10 minutes usually about 5 minutes When the power is turned on after automatic address setup It takes up to 10 minutes usually about 3 minutes for the outdoor unit to start operating after the power has been turned on Before the Air to A...

Page 20: ...tion Fan speed 0000 Normal 0001 SA High EA Low active 0002 SA Low EA High active High may be Extra High 0000 Normal Adjusting this setting is necessary for all the Air to Air Heat Exchanger with DX Coil Units in the group 4C Nighttime heat purge 0000 Invalid 0001 0048 Start after Setting value x 1 hour s Setting for the time before the nighttime heat purge operation starts 0000 Nighttime heat purg...

Page 21: ...t Exchanger with DX Coil Unit Setting for the header air conditioner Single operation of the Air to Air Heat Exchanger with DX Coil Unit is possible when operation of the Air to Air Heat Exchanger with DX Coil Unit is linked with that of the air conditioners Use the button of the wired remote controller While the Air to Air Heat Exchanger with DX Coil Unit is in operation is displayed on the remot...

Page 22: ...to start operation Code SET DATA 0001 0002 EA Changing the ventilation mode Heat Exchange mode Automatic mode Factory default Ventilation Fan speed setting The setting of the ventilation Fan speed can be changed when using the remote controller for air conditioners RBC AMT32E RBC AMS41E or using the system without the remote controller Adjusting this setting is necessary for the header unit when u...

Page 23: ... detected 0000 Signal transfer is on when an abnormal signal output is detected 0001 Signal transfer is on when the bypass mode signal output is detected Signal transfer is on during nighttime heat purge operation Signal transfer is off when the nighttime heat purge operation is on standby paused before the monitoring operation of the nighttime heat purge operation starts 14Fan characteristics MMD...

Page 24: ...l static pressure Pa Air volume m3 h Current A Low High Extra High Low High Extra High MMD VNK1002HEXE TR Standard air volume 950 m3 h Lower limit air volume 640 m3 h Upper limit air volume 1140 m3 h MMD VN1002HEXE TR Standard air volume 950 m3 h Lower limit air volume 640 m3 h Upper limit air volume 1140 m3 h REQUIREMENT Use the unit between the minimum and maximum range of ventilation 0 100 200 ...

Page 25: ...d test run is released after 60 minutes have passed and returns to the usual operation CAUTION Do not use the forced test run for cases other than the test run because it applies an excessive load to the devices Wired remote controller NRC 01HE 1 When the TEST button is pressed and held for at least 4 seconds TEST appears on the display and the test run mode is established While the test run is un...

Page 26: ...R 4 0 2 MMD VNK1002HEXE TR MMD VN1002HEXE TR 4 0 2 Inspection cover Fixing lever Fixed part of Inspection cover Filters High efficiency filter 3 Remove the filters Remove the filters from the frame of the heat exchanger element 4 Clean the filters Clean the filters by dusting them or using a vacuum cleaner If the filters are badly clogged wash them by pressing them down in lukewarm water with a ne...

Page 27: ...e of the O ring Replace the ring if it is damaged Water leakage Humidification element VNK type only Water leakage from the surface of humidification element Replace the humidification element if water squirts out of the surface of element Water leakage Dust and dirt on the surface of humidification element Vacuum the element if the air way is blocked with dust Take care not to damage the surface ...

Page 28: ...nly 1 Open the service valve as necessary 2 In winter the season for using the humidifier check whether the antifreeze heater is turned on 3 Perform a test run and ensure that there is no water leakage NOTE When the humidifier is not used drain off water from the cistern tank and water supply pipe Model name Quantity of the humidification element MMD VNK502HEXE TR 1 MMD VNK802HEXE TR 2 MMD VNK1002...

Page 29: ...it Error code list The table below shows the error codes See the table for details of error codes To confirm the code from the remote controller see Wired remote controller display in the table To confirm the code from the outdoor unit see 7 segment display on the outdoor unit in the table Wired remote controller display Check code Check code name Judging device 7 segment display on the outdoor un...

Page 30: ...error 02 TK2 sensor error 03 TK3 sensor error 04 TK4 sensor error 05 TK5 sensor error Oil level detection temperature sensor error I F H15 H15 Miswiring of outdoor discharge temperature sensor TD2 I F H16 H16 01 TK1 oil circuit error 02 TK2 oil circuit error 03 TK3 oil circuit error 04 TK4 oil circuit error 05 TK5 oil circuit error Oil detection circuit error I F H25 H25 Miswiring of outdoor disch...

Page 31: ...Advanced control in this manual Code 12 for the system 13 for indoor units and 14 for groups Line Indoor Group Line Indoor Group Line Indoor Group Line Indoor Group Settings Settings Settings Settings Did you change the setting for the lighting up hours of the Filter Sign If you did not put a tick against No change If you did put a tick against the item you selected For details see Advanced contro...

Page 32: ...roup Line Indoor Group Line Indoor Group Settings Settings Settings Settings Indoor unit Indoor unit Indoor unit Indoor unit Model name Model name Model name Model name Check the addresses of the indoor units For details see Advanced control in this manual Code 12 for the system 13 for indoor units and 14 for groups Line Indoor Group Line Indoor Group Line Indoor Group Line Indoor Group Settings S...

Page 33: ...s 0 3 kg m3 NOTE 1 If there are 2 or more refrigerating systems in a single refrigerating device the amounts of refrigerant should be as charged in each independent device For the amount of charge in this example The possible amount of leaked refrigerant gas in rooms A B and C is 10 kg The possible amount of leaked refrigerant gas in rooms D E and F is 15 kg NOTE 2 The standards for minimum room v...

Reviews: