– 9 –
Air to Air Heat Exchanger with DX Coil Unit
Installation Manual
Air to Air Heat Exchanger with DX Coil Unit
Installation Manual
8
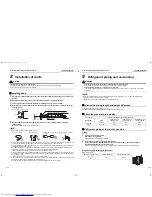
Installation of ducts
CAUTION
Insulate the ducts to prevent condensation.
Inappropriate installation results in water leaking into the room and furniture may be damaged.
Suction duct length must be longer than 850 mm.
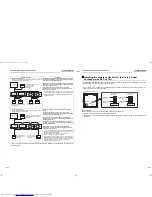
Installing ducts
1
Insert the duct into the duct connector, then fix the duct using aluminum tape to prevent air from
leaking.
2
Hang the duct from the ceiling so that excessive force is not applied to the unit.
3
Leave sufficient space between the room air discharge and the room air intake.
4
Install 2 ducts to the outside inclined downward between 1/100 and 1/50 so that water does not
enter the ducts.
5
Insulate 2 ducts to the outside and the SA (supply air) using a heat insulator to prevent
condensation.
(Material of insulator: glass wool, 25 mm thick)
NOTE
• Refrain from the following duct installation works.
• When metallic ducts pass through a wooden construction covered with a metal lath, wire lath, or metal plate, install
the ducts so that they are not electrically in contact with the metal parts of wooden construction.
• Keep the temperature in the ceiling cavity at 5 °C or more; otherwise, freezing and water leakage may occur due to
the built-in humidifier. (VNK type only)
• Even while the unit is not in operation, outside air may enter the room due to a pressure difference between the
outside air and inside air, or outside wind. Using an electric damper is recommended.
• Install a ventilator in the ceiling cavity when it is hot and the humidity is high.
• When the outdoor hood for the air intake is located near a window and small insects gather around the light, they may
get through the pipes and enter the room. Before installation, consider countermeasures such as setting up a filter
box (Locally procured).
• Arrange the pipes so that supply air and exhaust air are not mixed.
• When a vent cap or a round hood for an outdoor hood is used, do not attach the hood to a place where rain may fall
directly. In this case, using a rectangle hood is recommended.
• Stuff the cracks in the pipe penetration part with a noncombustible material such as mortar.
1) Excessive bending
2) Multi-times bending
3) Making the connecting duct
smaller
4) Bending near the exhaust air
duct
Heat insulator
(Insulates the adapter and the aluminium tape)
Outside air intake duct, air discharge duct
Duct connector
Aluminium tape
Aluminium tape
Aluminium tape
Slope
(1/100 to 1/50)
Heat insulator
Duct
Unit
9
Refrigerant piping and vacuuming
WARNING
•
Ventilate the room if a refrigerant gas is leaking during the installation work.
If the leaking refrigerant gas comes in contact with fire, a toxic gas is generated.
•
After installation, confirm that no refrigerant gas is leaking.
If the leaking refrigerant gas comes in contact with fire from a fan heater, a stove, or a gas range, a toxic gas is
generated.
NOTE
When the refrigerant pipe is long, provide support brackets at intervals of 2.5 - 3 m to clamp the refrigerant pipe.
Otherwise, abnormal sound may be generated.
Use the flare nut attached with the indoor unit or R410A flare nut.
Permissible piping length and height difference
They vary depending on the outdoor unit.
For details, refer to the Installation Manual attached to the outdoor unit.
About the pipe material and size
Refrigerant piping at the liquid / gas side
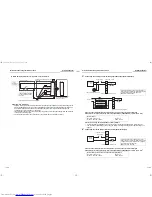
Flaring
1
Cut the pipe with a pipe cutter.
Remove burrs completely.
Remaining burrs may cause gas leakage.
2
Insert a flare nut into the pipe, and flare the pipe.
As the flaring sizes of R410A differ from those of refrigerant R22, the flare tools newly
manufactured for R410A are recommended.
However, the conventional tools can be used by adjusting projection margin of the copper pipe.
Projection margin in flaring: B (Unit: mm)
Rigid (Clutch type)
Pipe material
Seamless phosphorous-deoxidized copper pipe
Model name
MMD-
VNK502HEXE-TR
VN502HEXE-TR
VNK802HEXE-TR
VN802HEXE-TR
VNK1002HEXE-TR
VN1002HEXE-TR
Pipe size
(mm)
Gas side
Ø9.5
Ø12.7
Ø12.7
Liquid side
Ø6.4
Ø6.4
Ø6.4
Outer dia. of copper pipe
R410A tool used
Conventional tool used
6.4, 9.5
0 to 0.5
1.0 to 1.5
12.7
B
17-EN
18-EN
+00ET99805001-2.book Page 9 Tuesday, July 26, 2011 1:39 PM


