2.GA-1211-EX/GA-1310-EX SPECIFIC FUNCTIONS
Operations From the Control Panel 33
2 GA-1211-EX/GA-1310-EX SPECIFIC FUNCTIONS
4
Continue the operation as required.
y
To store the scan in a network folder, proceed to step 5.
y
To store the scan in an FTP server, proceed to step 6.
y
To store the scan in the hold queue in the controller, proceed to step 7.
y
To store the scan in a mailbox in the controller, proceed to step 8.
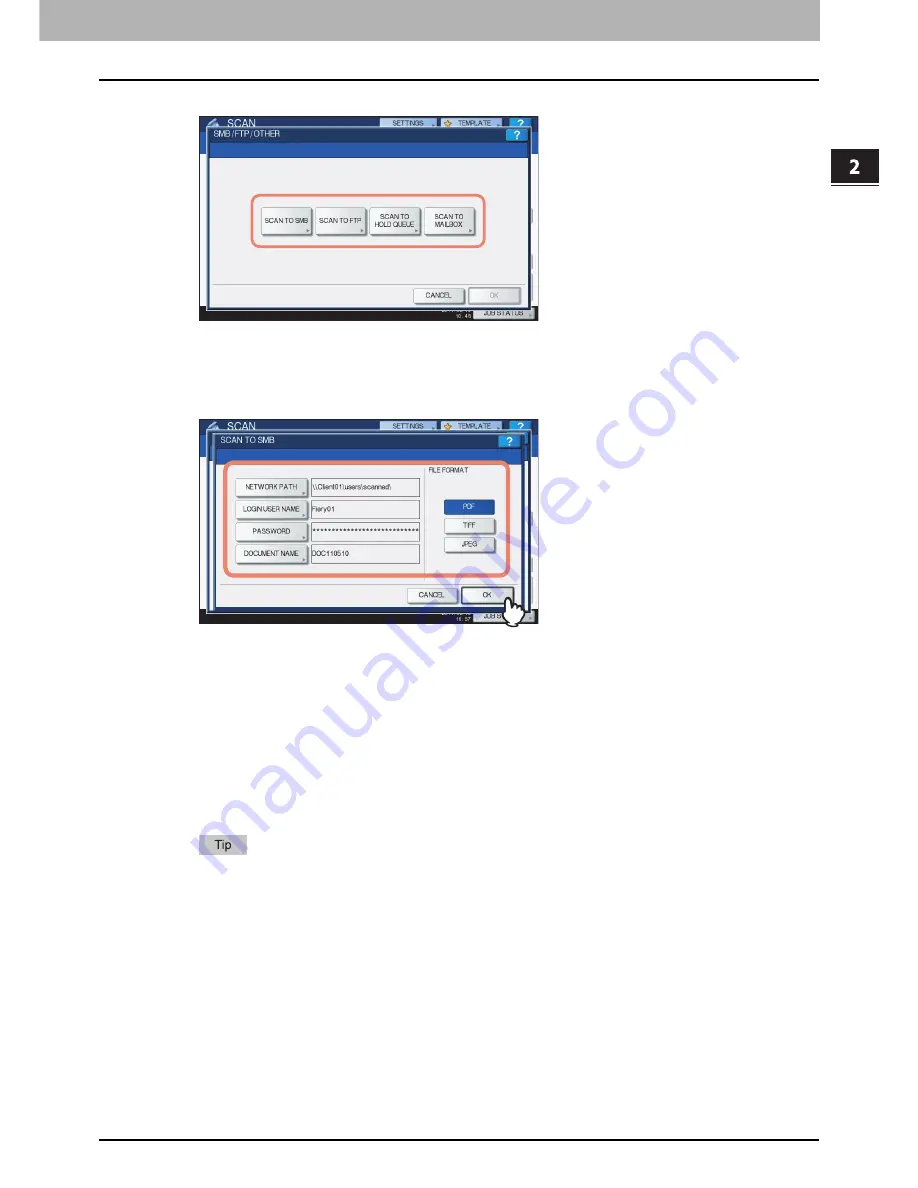
5
Specify the following items as required and press [OK].
When you specify the setting items, proceed to step 9.
[NETWORK PATH]
— Press this button to enter the network path to the folder where you want to store the
scanned data. For example, to specify the “users\scanned” folder in the computer named “Client01”, enter
“\\Client01\users\scanned\”.
Up to 128 characters can be entered for the network path.
[LOGIN USER NAME]
— Press this button to enter the user name to access the network folder if required.
Up to 32 characters can be entered for the login user name.
[PASSWORD]
— Press this button to enter the password for accessing the network folder if required.
Up to 32 characters can be entered for the password.
[DOCUMENT NAME]
— Press this button to change the document name. The document name can consist of a
maximum of 31 characters.
When you press each button, the on-screen keyboard is displayed. Enter a value using the keyboard and digital
keys, and press [OK] to set the entry.
FILE FORMAT
y
[PDF]
— Press this button to store your scan as a PDF file.
y
[TIFF]
— Press this button to store your scan as a TIFF file.
y
[JPEG]
— Press this button to store your scan as a JPEG file. This option is available when [FULL COLOR],
[AUTO COLOR] or [GRAY SCALE] is selected for the color mode setting.
Summary of Contents for e-studio 4540c
Page 4: ......
Page 6: ...4 CONTENTS ...
Page 56: ......
Page 60: ......
Page 62: ...60 INDEX ...
Page 63: ...FC 5540C 6540C 6550C FC 2040C 2540C 3040C 3540C 4540C OME10013700 ...


