e-STUDIO2330C/2820C/2830C/3520C/3530C/4520C
© 2008 TOSHIBA TEC CORPORATION All rights reserved
3-52
* This adjustment will have an effect only on Auto or Color mode printing.
(3) Open the property page of the printer driver. Press the [Setting] button in the "Image Quality" tab.
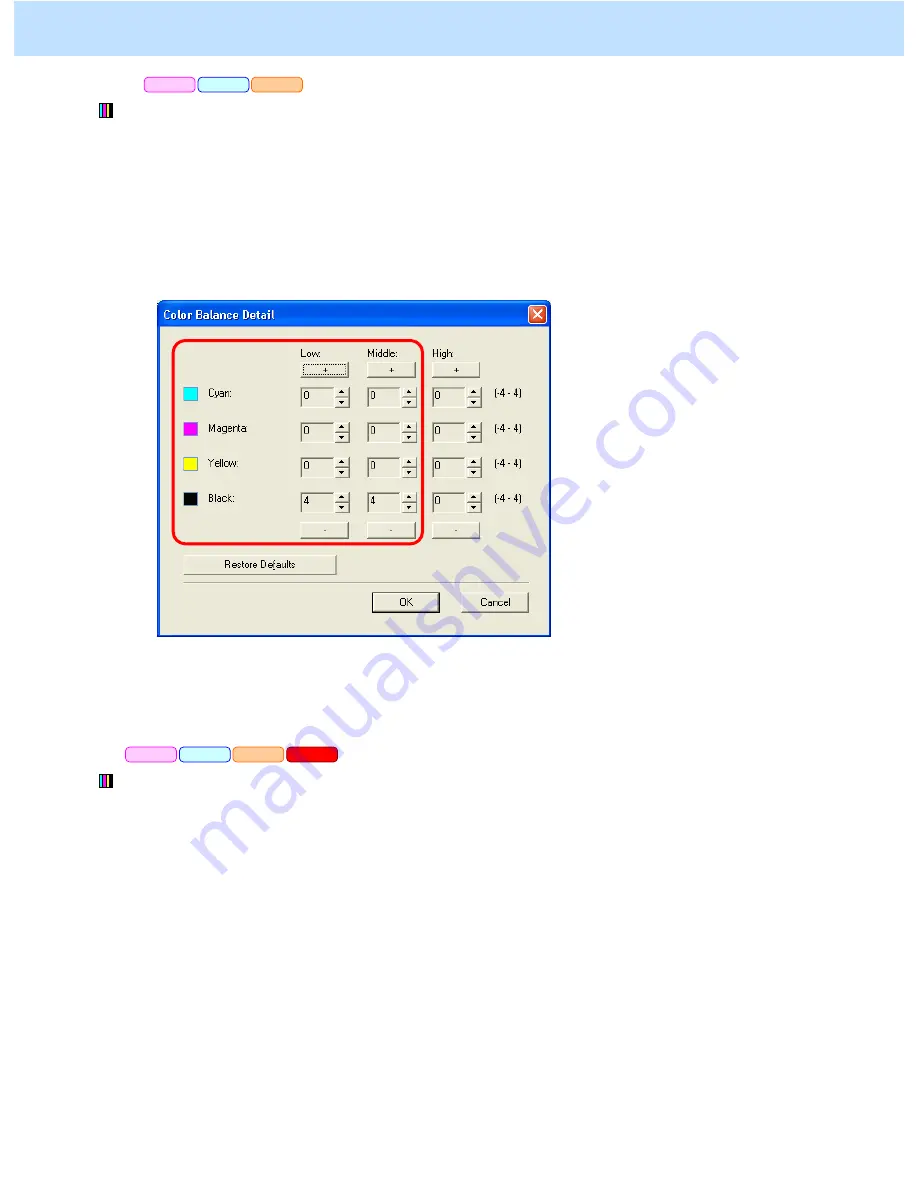
Mark the "Detail" checkbox in the "Color Balance" tab. Press the [Edit] button.
Set the value for the Low/Middle density of the color you would like to adjust, within a range of "1" to "4"
in the "Color Balance Details" option.
*This adjustment will have an effect only on printing on the Windows PCL6 or PS3 emulation printer driver.
(This adjustment cannot be performed on a Macintosh printer driver.)
* Initially, set "4" and check the printout.
After changing the option on the printer driver, print and check the print image quality.
If further image quality adjustments are still necessary, use the next procedure.
* This adjustment will have an effect only on Auto or Color mode printing.
(4) Enter adjustment mode [05]. Adjust the color balance.
•
Use steps (a) to (b) to adjust the color balance.
(a) Enter adjustment mode [05]. Select code [396]. Press the [START] button.
•
Image quality control will be forcibly performed to correct variations in image contrast.
(b) Enter adjustment mode [05]. Change the values for codes [8054 to 8057] or [8062 to 8065] or [8046
to 8049] to adjust the color balance and increase the color density.
• Adjust the value for [05] code corresponding to the print option to be applied (PDL and Halftone).
PCL6
PS3
XPS
PCL6
PS3
Mac
XPS
3. Printer-specific Adjustments


