3-1
3. REPLACING THE IMPORTANT PARTS
Lubrication
Any machine is generally in its best condition when delivered; therefore, it is necessary
to try to keep this condition. Unexpected failure occurs due to lack of oil, debris, or
dust. To keep its best condition, periodically clean the machine and apply proper
kinds of oil to each part in which lubrication is needed. Although the frequency of
lubrication varies according to how much the machine is used, at least it is necessary
to lubricate before the machine becomes dry. It is also necessary to wipe off
excessive oil as it collects dirt.
WARNING!
1. Turn off the power switch and disconnect the DC plug of the AC Adapter and the cables
before replacing any parts.
2. Follow all manual instructions. Failure to do so could create safety hazards such as fire
or electrocution.
NOTES:
1. Manual instructions must be followed when installing option kits or adding cables to
avoid system failures and to insure proper performance and operation.
2. Failure to follow manual instructions or any unauthorized modifications, substitution or
change to this product will void the limited product warranty.
CAUTION!
1. To protect the connector pins or component from static discharge, do not touch them
with bear hand.
2. Use electrostatic free form and the original carton for transportation.
3. Keep your work environment static free to avoid damage to the printer.
4. Do not remove any connectors from the printer within 10 sec. after unplugging the
power cord.
CAUTION!
1. Lubrication:
During parts replacement
2. Kinds of oil:
FLOIL G-488: 1kg can (part No.: 19454906001)
WARNING!
Summary of Contents for B-SV4T
Page 15: ...2 3 2 2 MCU Circuit and MCU PIN Description Fig 5 MCU PIN Description Diagram ...
Page 16: ...2 4 2 2 1 MCU PIN Description ...
Page 17: ...2 5 ...
Page 18: ...2 6 ...
Page 19: ...2 7 ...
Page 23: ...2 11 2 5 Decoder Circuit Fig 8 Decode Circuit Diagram ...
Page 32: ...2 20 2 12 USB Circuit Fig 14 USB Circuit Diagram ...
Page 33: ...2 21 2 12 1 USB PIN Function The standard USB 1 1 PIN function is as following ...
Page 34: ...2 22 ...
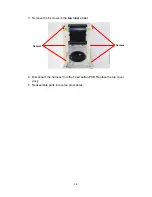
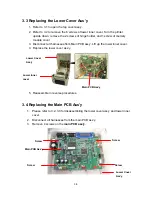
Page 46: ...3 6 4 Replace the main PCB ass y 5 Reassemble parts in reverse procedures ...
Page 59: ...4 2 4 Revert the memory module cover 5 Reassemble parts in reverse procedures ...
Page 71: ...E PRINTED IN JAPAN EO18 33019 ...


