background image

105

Using the TV’s features

Displaying TV status information

Digital signal strength indicator (bar graph in lower right 
corner of box; for ATSC signals only)

Stereo, Mono, or SAP audio status (when in HDMI

®

 input 

mode, Dolby

®

 Digital, or PCM)

Video resolution

Aspect ratio of incoming video signal (4:3 or 16:9)

V-Chip rating status

GameTimer

®

 (if set)

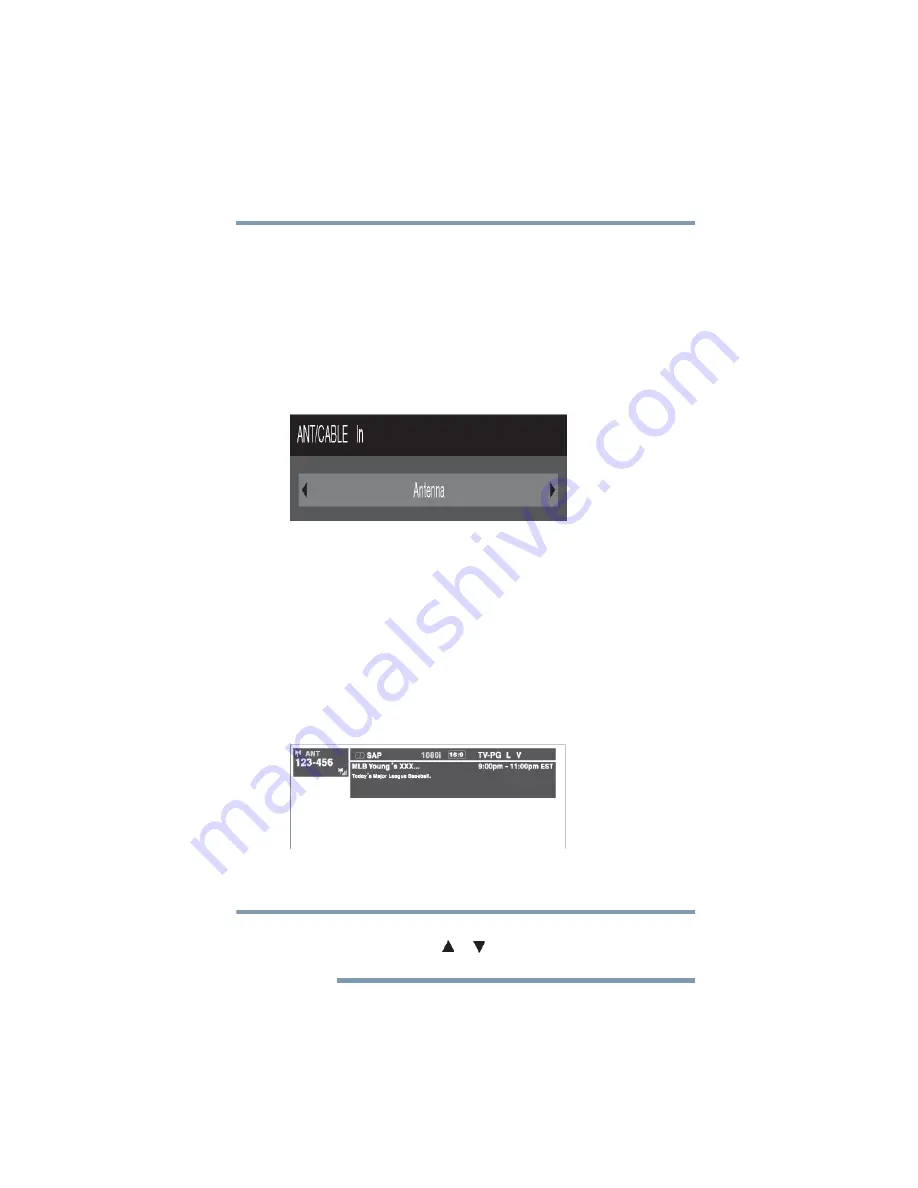
(Sample Illustration) Recall banner

To close the Recall screen, press the 

RECALL

 button again.

To display TV status information using INFO:

Press the 

INFO

 button.

The following additional information will display for off air digital 
channels, if applicable:

Title

Duration

Detailed description

(Sample Illustration) Info banner

To close the INFO screen, press the 

INFO

 button again.

The location of the banner can be moved to the top or bottom of the 
screen by pressing   or   while the RECALL or INFO display is 
on-screen.

NOTE

Summary of Contents for 32C120U

Page 1: ...ll Toshiba Customer Support Center Within the United States at 800 631 3811 Outside the United States at 949 583 3050 For more information see Troubleshooting on page 112 in this guide Owner s Record The model number and serial number are on the back and side of your TV Record these numbers in the spaces below Refer to these numbers whenever you communicate with your Toshiba dealer about this TV s...

Page 2: ...20 40 of the U S NEC which provides guidelines for proper grounding and in particular specifies that the cable ground shall be connected to the grounding system of the building as close to the point of cable entry as practical For additional antenna grounding information see 33 and 34 on page 4 WARNING If you decide to wall mount this television always use a mounting bracket that has been Listed b...

Page 3: ...void possible electric shock or fire NEVER allow your body to come in contact with any broken glass or liquid from the damaged television The LCD panel inside the TV contains glass and a toxic liquid If the liquid comes in contact with your mouth or eyes or your skin is cut by broken glass rinse the affected area thoroughly with water and contact your doctor immediately ALWAYS contact a service te...

Page 4: ... VAC 60Hz power source 33 Always make sure the antenna system is properly grounded to provide adequate protection against voltage surges and built up static charges see Section 810 of the National Electric Code 34 DANGER RISK OF SERIOUS PERSONAL INJURY OR DEATH Use extreme care to make sure you are never in a position where your body or any item you are in contact with such as a ladder or screwdri...

Page 5: ... used TV by the approved method for your area or ask a qualified service technician to properly dispose of the TV Note The lamp s inside this product contain mercury Disposal may be regulated due to environmental considerations For disposal or recycling information contact your local authorities or the Electronics Industries Alliance www eiae org Choosing a location for your LCD TV To Display your...

Page 6: ...in the below diagram This will allow removal of the pedestal stand 3 Once you have removed all four screws holding the pedestal stand in place remove the pedestal stand from the TV 32 TV 40 TV CAUTION Always place the TV on the floor or a sturdy level stable surface that can support the weight of the unit To secure the TV use a sturdy strap from the hook s on the rear of the TV to a wall stud pill...

Page 7: ... permanent and will disappear in a short period of time 2 The LCD panel contained in this TV is manufactured using an extremely high level of precision technology however there may be an occasional pixel dot of light that does not operate properly does not light remains constantly lit etc This is a structural property of LCD technology is not a sign of malfunction and is not covered under your war...

Page 8: ...LIED WARRANTIES OF MERCHANTABILITY OR FITNESS FOR ANY PARTICULAR PURPOSE WITH REGARD TO ANY OF THE FOREGOING TOSHIBA ASSUMES NO LIABILITY FOR ANY DAMAGES INCURRED DIRECTLY OR INDIRECTLY FROM ANY TECHNICAL OR TYPOGRAPHICAL ERRORS OR OMISSIONS CONTAINED HEREIN OR FOR DISCREPANCIES BETWEEN THE PRODUCT AND THE MANUAL IN NO EVENT SHALL TOSHIBA BE LIABLE FOR ANY INCIDENTAL CONSEQUENTIAL SPECIAL OR EXEMP...

Page 9: ...anel connections 19 Chapter 2 Connecting Your TV 21 Overview of cable types 21 Coaxial F type cable 21 Standard A V cables red white yellow 22 Component video cables red green blue 22 HDMI cable 22 Optical audio cable 23 Analog RGB 15 pin computer cable 23 3 5mm Stereo to RCA Y cable 23 About the connection illustrations 23 Connecting a VCR antenna cable TV or camcorder 24 ...

Page 10: ...Chapter 3 Using the Remote Control 35 Installing batteries 35 Remote control effective range 36 Learning about the remote control 37 Chapter 4 Menu Layout and Navigation 40 Main menu layout 40 Menu setup installation layout 42 Navigating the menu system 42 Chapter 5 Setting up your TV 44 Initial Setup 44 Storing channels in memory optional 46 Auto Tuning 46 Setting channel skip 48 Setting AV Input...

Page 11: ...annel programmed or unprogrammed 62 Switching between two channels using Channel Return 63 Switching between two channels using SurfLock 63 Selecting the picture size 64 Full 65 TheaterWide 1 65 TheaterWide 2 66 TheaterWide 3 66 Native 66 4 3 67 Normal 67 Dot by Dot 68 Scrolling the TheaterWide picture TheaterWide 2 and 3 only 68 Using the Auto Aspect feature 69 Selecting the cinema mode 70 Using ...

Page 12: ...ing parental controls for USA region 82 Blocking TV programs and movies by rating V Chip 82 Downloading an additional rating system 83 Displaying ratings 86 Unlocking programs temporarily 86 Using the input lock feature 87 Locking channels 87 Using the GameTimer 88 Using the panel lock feature 89 Using the PC settings feature 90 Setting the PC Audio 91 Using the Media Player 92 Auto Start function...

Page 13: ...Features 107 Using the advanced picture settings 107 Dynamic Contrast 107 Static Gamma 108 Color temperature 108 CableClear digital Noise Reduction 109 MPEG Noise Reduction 110 Game Mode 110 Chapter 8 Troubleshooting 112 General troubleshooting 112 Picture problems 113 Sound problems 115 Remote control problems 115 Channel tuning problems 115 Closed caption problems 116 Rating blocking V Chip prob...

Page 14: ...er 119 Speaker type 119 Video audio terminals 119 Video audio input 119 ColorStream component video HD input 120 HDMI input 120 Digital audio output 120 PC input 120 Dimensions 120 Mass weight 120 Operating conditions 121 Supplied accessories 121 Acceptable signal formats for PC IN HDMI 121 PC IN signal formats 121 HDMI signal formats 122 Appendix B License Agreement 123 Index 127 ...

Page 15: ...and icons highlight these instructions as follows Indicates an imminently hazardous situation which if not avoided will result in death or serious injury Indicates a potentially hazardous situation which if not avoided could result in death or serious injury Indicates a potentially hazardous situation which if not avoided may result in minor or moderate injury Indicates a potentially hazardous sit...

Page 16: ...Connecting a digital audio system on page 30 CableClear digital picture Noise Reduction see CableClear digital Noise Reduction on page 109 PC IN Analog RGB Computer terminal see Connecting a computer to the TV s PC IN terminal on page 32 REGZA LINK Allows control of external devices from the TV remote via HDMI connection Media Player Allows you to view photo files and play music see Using the Medi...

Page 17: ...in the remote control see Installing batteries on page 35 7 See Learning about the remote control on page 37 for an overview of the buttons on the remote control 8 After connecting all cables and devices plug in the power cords for your TV and other devices Then press the Power button on the TV control panel or remote control to turn on the TV If the TV stops responding to the buttons on the remot...

Page 18: ...annot turn off the TV press and hold the POWER button on the TV control panel for a few seconds to reset the TV 5 CHANNEL When no menu is on screen these buttons change the channel programmed channels only see Storing channels in memory optional on page 46 6 VOLUME buttons When no menu is on screen these buttons adjust the volume level 7 MENU ENTER Accesses the on screen menus When a menu is displ...

Page 19: ...ion Multimedia Interface input receives digital audio and uncompressed digital video from an HDMI device or uncompressed digital video from a DVI device HDMI connection is necessary to receive 1080p signals 3 PC HDMI 1 Audio IN PC audio input terminal is shared with an HDMI 1 analog audio input terminal and its use can be configured in the Audio Setup menu see Setting the PC Audio on page 91 4 ANT...

Page 20: ...th optical audio input 6 Fixed Audio Output Fixed audio output to connect external amplifiers 7 ColorStream HD High resolution component video input and shared composite video input see Connecting a DVD player with ColorStream component video a VCR and a satellite receiver on page 25 Component Standard composite video cables carry only video information separate audio cables are required for a com...

Page 21: ...e connector types your devices require You can purchase cables from most stores that sell audio video devices Coaxial F type cable Sample Illustration Coaxial cable Coaxial F type cable connects to your antenna cable TV service and or cable converter box to the ANT CABLE input on your TV ...

Page 22: ...omponent video cables come in sets of three and are connects video devices with component video output ColorStream is Toshiba s brand of component video These cables are typically color coded red green and blue Separate audio cables are required for a complete connection Component video cables provide better picture quality than composite video cables HDMI cable Sample Illustration HDMI cable Use ...

Page 23: ...PC IN terminal see Connecting a computer on page 32 Separate audio cables are required 3 5mm Stereo to RCA Y cable Sample Illustration 3 5mm Stereo to RCA Y cable 3 5mm Stereo to RCA Y cable connects an audio signal from DVI device to TV About the connection illustrations You can connect different types and brands of devices to your TV in several different configurations The connection illustratio...

Page 24: ...r cable signal Select ANT CABLE video input source on the TV To view basic and premium cable channels Turn OFF the VCR Select the ANT CABLE video input source on the TV Tune the TV to channel 3 or 4 whichever channel the Cable box output is set to Use the Cable box controls to change channels To view the VCR or camcorder video Turn ON the VCR or camcorder video Select VIDEO input source on the TV ...

Page 25: ... a mono VCR connect L MONO on the TV to your VCR s audio out terminal using the white audio cable only Standard audio cables Component video cables You can connect the component video cables plus audio cables from the DVD player or satellite receiver to the COLOR STREAM HD terminal in the TV The COLOR STREAM HD terminal can be used to display Progressive 480p 720p and Interlaced 480i 1080i scan sy...

Page 26: ...ram while watching a DVD Turn On the VCR Tune the VCR to the channel to record Select the ColorStream HD video input source on the TV to view the DVD To select the video input source press the INPUT button on the remote control see Selecting the video input source on page 54 The unauthorized recording use distribution or revision of television programs videotapes DVDs and other materials is prohib...

Page 27: ...p 60Hz 1080i 60Hz and 1080p 24Hz 60Hz signal formats For detailed signal specifications see HDMI signal formats on page 122 Supported Audio format Linear PCM sampling rate 32 44 1 48 kHz To connect a computer to the HDMI input see Connection to the TV s HDMI terminal on page 33 To connect an HDMI device you will need one HDMI cable type A connector per HDMI device For proper operation it is recomm...

Page 28: ...d not exceed 9 8 ft 3m The recommended length is 6 6 ft 2m 3 5mm Stereo to RCA Y cable An HDMI to DVI adapter cable transfers video only Separate analog audio cables are required see illustration For more information see Setting the HDMI audio mode on page 50 Sample Illustration Connecting to a DVI device To ensure that the HDMI or DVI device is reset properly When turning on your electronic compo...

Page 29: ...vice see Overview of cable types on page 21 If several devices are connected REGZA LINK feature may not operate properly For proper operation it is recommended that you use an HDMI cable with the HDMI Logo Before controlling the device s After completing the above connections configure the REGZA LINK Setup menu with the desired settings see REGZA LINK input source selection on page 103 The connect...

Page 30: ...inal outputs a Dolby Digital or 2 channel down mixed PCM pulse code modulation signal for use with an external Dolby Digital decoder or other external audio system with optical audio input You will need an Optical audio cable Use an optical audio cable that has the larger TosLink connector and not the smaller mini optical connector Sample Illustration Connecting a digital audio system To control t...

Page 31: ...mage Digital Output Format screen 6 To save the new settings highlight Done and then press the ENTER button To revert to the factory defaults highlight Reset and then press the ENTER button Some audio systems may not be compatible with Dolby Digital bitstream signals Older audio systems that are not compatible with standard optical out signals may not work properly creating a high noise level that...

Page 32: ... TV use an analog RGB 15 pin computer cable and a PC audio cable For more information see Overview of cable types on page 21 Sample Illustration Computer connections To use a computer set the monitor output resolution on the computer before connecting it to the TV The supported signal formats are VGA SVGA XGA WXGA and SXGA For detailed signal specifications see Acceptable signal formats for PC IN ...

Page 33: ...t playback and the computer s specifications some scenes may be skipped or you may not be able to pause during multi angle scenes Signal names for mini D sub 15 pin connector Connection to the TV s HDMI terminal When connecting a computer to an HDMI terminal on the TV use an HDMI to DVI adapter cable and analog audio cables When connecting a computer to an HDMI terminal use an HDMI cable type A co...

Page 34: ...p 24Hz 60Hz For signal specifications see Acceptable signal formats for PC IN HDMI on page 121 The edges of the picture may be hidden If receiving a 480i HDMI 480p HDMI 720p 1080i or 1080p signal program Native mode scales the video to display the entire picture within the borders of the screen i e no overscanning TV back panel Computer PC audio cable PC audio output HDMI to DVI adapter cable NOTE...

Page 35: ...om the back of the remote control Sample Illustration Removing the remote back cover 2 Insert the batteries corresponding to the and markings on the battery compartment Sample Illustration Installing the batteries 3 Replace the battery cover Do not expose batteries to excessive heat such as sunshine fire etc ...

Page 36: ... batteries with new ones Never mix battery types or use new and used batteries together Always remove batteries from the remote if they are dead or if the remote control is not to be used for an extended period of time This prevents battery acid from leaking into the battery compartment Remote control effective range For optimum performance aim the remote control directly at the TV and make sure t...

Page 37: ... playback device DVD player etc control on page 101 Sample Illustration Remote control overview The error message NOT AVAILABLE may appear if you press a button for a function that is not available 1 The POWER button turns the TV On and Off When the TV is on the power LED indicator on the TV front glows green 2 The PIC SIZE button cycles through the picture sizes see Selecting the picture size on ...

Page 38: ...e 59 8 The FAV button accesses the Favorites List in the Channel Browser see Favorites browser on page 59 9 The RECALL button displays TV status information 10 The CH arrow buttons cycle through programmed channels 11 The C CAPTION accesses closed captions see Using closed captions on page 73 12 The MUTE button reduces or turns off the sound see Muting the sound on page 76 13 The VOL buttons adjus...

Page 39: ...he STOP button stops playback of the loaded DVD or tape 22 The PLAY button begins playback of the loaded DVD or tape 23 The SKIP forward button skips forward to locate later DVD chapters 24 The FF button fast forwards the DVD or tape Press during play mode to view the picture moving rapidly forward 25 The EJECT button ejects the DVD or tape 26 The PAUSE button suspends play or record temporarily P...

Page 40: ...mote control or TV control panel Icon Item Option Picture Mode Dynamic Standard Movie PC Preference Picture Settings Opens the Picture Settings menu Noise Reduction Opens the Noise Reduction menu Game Mode Off On Theater Settings Opens the Theater Settings menu Sound Digital Audio Selector Launches the temporary Audio Selector Audio Settings Opens the Audio Settings menu Audio Setup Opens the Audi...

Page 41: ...trol menu Energy Saving Settings Opens the Energy Saving Settings menu Locks Enable Rating Blocking Off On for USA region Edit Rating Limits Opens the Edit Rating Limits menu for USA region Input Lock Off Video Video Panel Lock Off On GameTimer Off 30 min 60 min 90 min 120 min New PIN Code Opens the New PIN Code entry screen Setup Installation Opens the Installation menu REGZA LINK Setup Enable RE...

Page 42: ...on screen menu system 1 Press the MENU button to open the menu system Sample Image Navigating the menu system 2 When a menu is open use the arrow buttons on the remote control or the arrow buttons on the TV control panel to move in the corresponding direction in the menu Icon Item Option Terrestrial Input Configuration Opens the Input Configuration menu Channel Program Start Scan Scans for new cha...

Page 43: ...ifferent color in the menu 4 All menus close automatically if you do not make a selection within approximately 60 seconds except the signal meter menu which closes automatically after a few minutes 5 To close a menu instantly press the EXIT button The menu background may sometimes appear black depending on the signal the TV is receiving This is not a sign of malfunction NOTE ...

Page 44: ...s window appears 3 For normal home use press the arrow buttons to select Home and then press the ENTER button The ANT CABLE In setup window appears 4 Press the arrow buttons to select the input source Cable or Antenna and then press ENTER 5 Press the ENTER button to select Start Scan and continue with the Auto Tuning You can stop the Initial Setup by pressing the EXIT button However if you do not ...

Page 45: ... open the Preferences menu and highlight Menu Language 2 Press the arrow buttons to select your preferred language Sample Image Selecting the menu language 3 Press the EXIT button to close the Preferences menu ANT CABLE IN This setting configures the input source for the ANT CABLE terminal 1 Press the MENU button to open the Setup menu 2 Highlight Installation and then press the ENTER button Sampl...

Page 46: ...Cable or Antenna Sample Image Input Configuration screen 5 To save your new settings highlight Done and then press the ENTER button To revert to your original settings highlight Cancel and then press the ENTER button Storing channels in memory optional To make sure your TV stops only on the channels you want when you press the CH arrow buttons on the remote control or the control panel store those...

Page 47: ...is configured for cable will take substantially longer than when the antenna input is configured for Antenna This is normal however once channel programming is finished you should not have to repeat the programming process again unless your cable TV service lineup changes significantly To program channels automatically 1 Configure the antenna input source if you have not already done so see ANT CA...

Page 48: ...e all active channels in the channel memory While the TV is cycling through the channels the message Scanning channels please wait appears 5 To cancel channel programming press the EXIT button on the remote control or highlight Cancel in the on screen display and then press the ENTER button When channel programming is complete press the CH Up Down arrow buttons to view the programmed channels Sett...

Page 49: ...ecific channels so that they cannot be tuned until you unlock them For information see Locking channels on page 87 To manually add digital sub channels on a physical channel Use the Channel Number buttons and the Dash 100 on the remote control to enter the channel number for example 56 1 If the channel is found the number will be added to the list and the box will be unchecked If the channel is no...

Page 50: ...input on your TV You can set this input for either ColorStream HD or video 1 From the Preferences menu highlight AV Input 2 Press the arrow buttons to select the desired setting Setting the HDMI audio mode To set the HDMI audio mode 1 Press the MENU button to open the Sound menu 2 Highlight Audio Setup and then press the ENTER button 3 Press the arrow buttons to select HDMI 1 Audio and then press ...

Page 51: ...ew set of Installation menu icons appears 3 Open the Terrestrial menu highlight Signal Meter and then press the ENTER button 4 Press the arrow buttons to select the antenna input and digital channel signal you wish to check The physical digital channel number listed in the Signal Meter screen may not correspond to a virtual TV channel number Contact your local broadcasters to obtain the RF channel...

Page 52: ...s the ENTER button After the time zone has been set you will be asked to set the current Daylight Saving Time status To set the Daylight Saving Time status Press the arrow buttons to select Yes or No highlight Done and then press the ENTER button Viewing the system status 1 Press the MENU button to open the Setup menu 2 Highlight Installation and then press the ENTER button A new set of Installati...

Page 53: ...TER button 4 Press the arrow buttons to scroll through the menu bar to select Factory Defaults 5 Highlight Yes and then press the ENTER button 6 If a PIN code has been set enter your PIN code 7 Press the arrow buttons to select Done and then press the ENTER button A warning message appears 8 Select Yes and then press the ENTER button The TV turns off automatically after a few seconds 9 After the T...

Page 54: ... the INPUT button on the remote control or TV control panel 2 Do one of the following Press 0 4 Repeatedly press the arrow buttons on the remote control and then press the ENTER button to change the input setting Repeatedly press the INPUT button on the remote control or TV control panel to change the input setting ...

Page 55: ...will appear randomly on the screen if no signal is received in video input mode If CEC device is connected to an HDMI input the REGZA LINK icon appears If a REGZA LINK device with HDMI switching capability e g Audio Receiver is connected to the HDMI input press the INPUT button on the remote control or TV control panel repeatedly to highlight HDMI 1 or HDMI 2 If the connected CEC device has any co...

Page 56: ...p window Labeling the video input sources You can label each video input source according to the type of device you have connected to each source Choose from the following preset list of labels default label Audio Receiver Cable Compact Disc DTV DVD Game Console HDMI Switch HDMI inputs only Laser Disc Satellite DSS VCR Video Recorder Hide to hide an unused input in the Input Selection screen and i...

Page 57: ... source you wish to label 4 Press the arrow buttons to select the desired label for that input source If a particular input is not used Hide can be selected as the label This will cause that input to be grayed out in the Input Selection screen and skipped over when you press the INPUT button on the remote control Sample Image Input Labeling screen 5 To save the new input labels highlight Done and ...

Page 58: ...3 Highlight Reset and then press the ENTER button Tuning channels using the Channel Browser The Channel Browser provides an easy navigation interface for all your channels and inputs This feature allows you to View and select entries from all of your inputs Keep a list of your favorite channels see Favorites browser on page 59 Quickly surf and tune your recently viewed channels inputs from the Cha...

Page 59: ...el or input to delete by pressing the BACK CB or NEXT CB arrow buttons 3 Press and hold the 100 button for a few seconds The channel input will be removed from the Favorites list To set up the Channel Browser 1 In the Preferences menu highlight Channel Browser Setup and then press the ENTER button 2 Press the arrow button to highlight Navigation and then press the arrow buttons to select either Br...

Page 60: ... to factory defaults highlight Reset and then press the ENTER button To open the Channel Browser Press the BACK CB or NEXT CB arrow buttons on the remote control Press the BACK CB arrow button to surf backward through the previously tuned channels in the History list the channels in the ANT CABLE channel list the inputs in the Inputs list the favorite channels inputs in the Favorites list or the R...

Page 61: ...regardless of the last selected list in the Channel Browser To tune to a channel or input in Browse mode 1 While watching TV press the BACK CB or NEXT CB arrow buttons to display the Channel Browser and surf back to a previous item or surf forward to the next item in the list In Browse mode when you stop on an item in the Channel Browser it is highlighted and the TV automatically tunes to the chan...

Page 62: ... the numeric buttons on the remote control All channels that are tuned using the CH Up CH Down buttons on the remote control Whenever an item is selected that cannot be tuned for various reasons the TV will automatically tune to the previously viewed channel or input Clearing channels from the History List Reconfiguring the ANT CABLE input will clear the History List see ANT CABLE IN on page 45 Tu...

Page 63: ...second channel using the Channel Number buttons and the 100 button if selecting a digital channel 3 Press the CH RTN button on the remote control The previous channel will display Each time you press the CH RTN button the TV will switch back and forth between the last two channels that were tuned If you press the CH RTN button from a non antenna input the TV will return to the last viewed input Sw...

Page 64: ...rogram in the way that looks best to you You can save separate picture size preferences for each input on your TV To select the picture size 1 Press the PIC SIZE button on the remote 2 With the Picture Size menu displayed do one of the following Repeatedly press the PIC SIZE button to cycle through the picture sizes Press the corresponding number button 0 5 while the Picture Size menu is displayed...

Page 65: ...l see Scrolling the TheaterWide picture TheaterWide 2 and 3 only on page 68 Full The Full 16 9 setting is for viewing in the 16 9 480i 480p source programs If receiving a squeezed 4 3 format program the picture is stretched horizontally to fill the width of the screen but not stretched vertically Sample Illustration Picture size Full 16 9 The Full setting is for viewing in 1080i 1080p and 720p pro...

Page 66: ...ox The picture s top and bottom edges may be hidden TheaterWide 3 This setting is for viewing letter box programs with subtitles Sample Illustration Picture size TheaterWide 3 letter box with subtitles The picture s top and bottom edges are hidden To view the hidden areas such as subtitles or captions see Scrolling the TheaterWide picture TheaterWide 2 and 3 only on page 68 Native These settings a...

Page 67: ... HDMI 1080i 1080p 720p 480i and 480p ColorStream 1080i and 720p and ANT CABLE digital inputs 1080i 1080p and 720p Depending on the input signal the picture s border may be hidden displayed in black or noisy 4 3 Sample Illustration Picture size 4 3 Some program formats will display with sidebars and or bars at the top and bottom Normal This setting is for viewing VGA SVGA XGA WXGA and SXGA sources ...

Page 68: ... TheaterWide picture TheaterWide 2 and 3 only You can set separate scroll settings for the TheaterWide 2 and TheaterWide 3 modes for each input To set the scroll settings 1 Press the MENU button and open the Picture menu 2 Highlight Theater Settings and then press the ENTER button Sample Image Picture menu Theater Settings selection 3 In the Picture Size field select either TheaterWide 2 or Theate...

Page 69: ... 1 or HDMI 2 input The auto aspect ratio feature is not applicable to the PC input To turn on the auto aspect ratio feature 1 Press the MENU button and open the Picture menu 2 Highlight Theater Settings and then press the ENTER button 3 In the Auto Aspect Ratio field select On 4 To save the new settings highlight Done and then press the ENTER button To revert to the factory defaults highlight Rese...

Page 70: ...4 In the Cinema Mode field select Film 5 To save the new settings highlight Done and press the ENTER button To revert to the factory defaults highlight Reset and press the ENTER button Using the FREEZE feature To use the FREEZE feature 1 When watching the TV press the FREEZE button to freeze the picture 2 To unfreeze the picture press the FREEZE button again or any other button Using the FREEZE fu...

Page 71: ...s To select the picture mode using the menu system 1 Press the MENU button and open the Picture menu 2 Highlight Mode and then press the ENTER button Sample Image Picture menu Mode selection Mode Description Dynamic Bright and dynamic picture factory setting Standard Standard picture settings factory setting Movie Lower contrast for darkened room factory setting PC Designed for viewing of PC table...

Page 72: ... 0 Settings are stored in memory DynaLight automatically strengthens the black coloring of dark areas in the video according to the level of darkness To adjust the picture quality 1 Press the MENU button and open the Picture menu 2 Highlight Picture Settings and then press the ENTER button 3 Press the arrow buttons to select the picture quality you wish to adjust Contrast Backlight DynaLight Brigh...

Page 73: ...e has two options Captions An on screen display of the dialogue narration and sound effects of TV programs and videos that are closed captioned usually marked CC in program guides Text An on screen display of information not related to the current program such as weather or stock data when provided by individual stations To view captions or text 1 Press the MENU button and open the Preferences men...

Page 74: ... weak When the signal reception is non standard Digital CC settings You can customize the closed caption display characteristics by changing the background color opacity text size type edge and color These settings are available for digital channels only You cannot set Caption Text and Background as the same color To customize closed captions 1 Press the MENU button and open the Preferences menu 2...

Page 75: ... next best service will be used To select closed captions 1 Press the MENU button and open the Preferences menu 2 Highlight CC Selector and then press the ENTER button 3 Press the arrow buttons to select Closed Caption and then press the arrow buttons to select the desired service Mode Description Caption size Auto Small Standard Large Caption text type Auto Default Mono with Serif Prop with Serif...

Page 76: ...tion feature becomes active if the TV program is closed captioned To mute the audio without activating the closed captioning press the VOL button to set the volume to 0 For more information see Using closed captions on page 73 If you modify items in the SOUND menu while Mute is active Mute is cancelled Using the digital audio selector You can use the Digital Audio Selector to conveniently switch b...

Page 77: ... provided by individual stations When the TV receives a stereo or SAP broadcast the Stereo mark and or word SAP appears when the INFO button is pressed The MTS feature is only available for analog signals on the ANT CABLE input To listen in stereo sound 1 Press the MENU button and open the Sound menu 2 Highlight Audio Setup and then press the ENTER button 3 In the MTS field select Stereo 4 To save...

Page 78: ...am the station s normal audio will be output However occasionally there is no sound at all in SAP mode If this happens set the MTS feature to Stereo mode Adjusting the audio quality You can adjust the audio quality by adjusting the bass treble and balance To adjust the audio quality 1 Press the MENU button and open the Sound menu 2 Highlight Audio Settings and then press the ENTER button 3 Press t...

Page 79: ...ENU button and open the Sound menu 2 Highlight Audio Settings and then press the ENTER button 3 Press the arrow buttons to highlight the Stable Sound field 4 Press arrow buttons to select On Selecting the optical audio output format You can select the optical audio output format when you connect a Dolby Digital decoder or other digital audio systems to the TV s Optical Audio Out terminal see Conne...

Page 80: ...puts with minimal compression 4 To save the new settings highlight Done and then press the ENTER button To reset the settings to the factory defaults highlight Reset and then press the ENTER button This feature is available when the TV is tuned to a digital RF channel with the Dolby Digital signal The Dolby Digital Dynamic Range Control will function in relation to Optical Output Format PCM mode U...

Page 81: ...t code and then press the ENTER button If the wrong PIN code is entered the message Incorrect PIN code please try again appears Highlight Retry and then press the ENTER button Enter the code again and then press the ENTER button When the correct PIN code is entered the Locks menu opens The PIN code cannot be set to 0000 Forgotten PIN code While the PIN code entering screen is displayed press the I...

Page 82: ...locking TV programs and movies by rating V Chip Some TV programs and movies include signals that classify the content of the program as unsuitable for younger viewers The V Chip feature in this TV detects the signals and blocks the programs according to the ratings you select 1 Press the MENU button and highlight the Locks menu icon 2 Press the arrow button to display the PIN code entering screen ...

Page 83: ...Done and then press the ENTER button The above blocking level selection is for the U S V Chip system For the Canadian Rating menu highlight Canada RS and then press the ENTER button Downloading an additional rating system In the future an additional rating system may become available for use in selectively blocking TV programs and movies The currently tuned station must be receiving a digital sign...

Page 84: ...For each desired selection press the arrow buttons to highlight the selection and then press the ENTER button to select it A box with an X is a rating that will be blocked 9 To save the new settings highlight Done and then press the ENTER button 10 In the Edit Rating Limits screen highlight Done and then press the ENTER button The additional rating system can only be downloaded one time You will n...

Page 85: ...program contains material parents may find unsuitable for younger children D Some suggestive dialogue L Infrequent coarse language S Some sexual situations V Moderate violence TV G General Audience Most parents would find this program suitable for all ages TV Y7 TV Y7FV Directed to Older Children This program is designed for children age 7 and above NOTE Programs in which fantasy violence may be m...

Page 86: ...ation is not provided no rating will appear in the INFO screen Sample Image Rating Info screens Unlocking programs temporarily If you try to tune to a program that exceeds the rating limits you have set the TV will enter program lock mode and a warning message appears on the screen Follow the instructions to temporarily unlock the program Sample Illustration Warning exceeded rating limit You can e...

Page 87: ...e arrow button to display the PIN code entering screen 2 Enter your four digit PIN code and then press the ENTER button 3 Press the arrow button to highlight Input Lock and then press the arrow button to select the level of video input locking you prefer 4 Press the EXIT button Locking channels With the Lock feature you can lock specific channels Locked channels can only be accessed by entering th...

Page 88: ... A check appears in the box 7 To remove the check press the ENTER button 8 Press the EXIT button Using the GameTimer You can use the GameTimer to set a time limit for playing a video game 30 120 minutes When the GameTimer expires the TV enters Input Lock mode and locks out the input source for the video game device To set the GameTimer 1 From the Locks menu press the arrow button to display the PI...

Page 89: ...on page 87 Using the panel lock feature You can lock the control panel to prevent your settings from being changed accidentally by children for example When Panel Lock is set to On none of the controls on the control panel operate except POWER To lock the control panel 1 Press the MENU button and highlight the Locks menu 2 Press the arrow button to display the PIN code entering screen 3 Enter your...

Page 90: ...ontal Position and Vertical Position If the picture is affected by interference readjust the Clock Phase and Sampling Clock To adjust the PC settings 1 Repeatedly press the INPUT button to select PC Input mode see Selecting the video input source on page 54 2 Press the MENU button and open the Setup menu 3 Press the arrow buttons to select PC Settings and then press the ENTER button Sample Image S...

Page 91: ...ere will be no audio Because the PC and HDMI 1 inputs share the same set of analog audio inputs the PC Audio menu setting influences the HDMI 1 Audio menu setting If PC Audio is set to No the HDMI 1 Audio setting changes to Auto If PC Audio is set to Yes the HDMI 1 Audio setting is set to Digital and is grayed out in the menu See also Setting the HDMI audio mode on page 50 Mode Description Horizon...

Page 92: ...JPEG EXIF ver 2 1 File format JPEG Maximum photo size 6 MB Maximum number of files 500 folder Maximum photo resolution 4096 x 4096 pixels Best photo resolution 1366 x 768 pixels C120U 1920 x 1080 pixels E220U Music Player specifications File format MP3 Sampling frequency 16 kHz 22 05 kHz 24 kHz 32 kHz 44 1 kHz 48 kHz Bit rate from 8 to 320 kbps Maximum number of files 500 folder Supported file sys...

Page 93: ...of U3 USB device are supported Therefore it is suggested that you not use U3 USB with Media Player Non supported characters will be replaced with a square Auto Start function When Auto Start is enabled you will be asked if you want to start the Media Player when a USB device is inserted If Auto Start is disabled you must manually start the Media Player from the menu To change the Auto Start settin...

Page 94: ... If Auto Start is set to off you can start the Media Player manually Manual Start 1 Press the MENU button and open the Setup menu 2 Press the arrow button to select Media Player and then press the ENTER button 3 Press the arrow buttons to highlight Photo or Music and then press the ENTER button Sample Image Media Play screen The viewer will open even if there are no photo or music files While the ...

Page 95: ...from the bottom right thumbnail the screen will move to the next page You can also use the CH Up CH down buttons to page up or down the in photo list when there are more photos than will fit on one screen 2 When you select a folder press the ENTER button to move to the next layer or press the CH RTN button to return to the previous layer 3 Press the ENTER button to view the selected photo in Singl...

Page 96: ...o set Interval Time and Repeat settings 1 Press the MENU button to open the Quick Menu 2 Press the arrow buttons to select either Interval Time or Repeat 3 Press the arrow buttons to adjust the setting and press the CH RTN button Zoom and Picture size functions are disable To close the Photo Viewer press the EXIT button The television will return to the last viewed channel or external input Playin...

Page 97: ...ack If playback finishes before STOP is pressed the next file will automatically start to play from the beginning Depending on the file size it may take some time for playback to begin During playback you can do the following Press PAUSE to pause To resume normal playback press PLAY To locate a specific file press the SKIP Reverse or SKIP Forward button repeatedly To adjust volume press the VOL VO...

Page 98: ...Sorting photo or music files From the photos Multi View or from the music list you can sort your photo or music folders and files To sort photo or music folders and files 1 From photo Multi View mode or from the music list press the MENU button to open the Quick Menu 2 Press the arrow buttons to select Sort 3 Press the arrow buttons to select Title New or Old to set the sorting rule Title File sor...

Page 99: ...ENTER button 3 Press the Number buttons to enter the length of time maximum of 12 hours and then press ENTER Or press the arrow buttons to increase or decrease in 10 minute increments maximum of 12 hours If a power failure occurs the sleep timer setting may be cleared To display the time remaining until the TV turns off press the SLEEP button A message will display on screen when there is one minu...

Page 100: ...TV switches to standby a warning message will appear When the following features are set the feature that is set for the nearest time will function Automatic Power Down Sleep Timer No signal auto power off after 15 minutes of no signal No Signal Power Down The TV will automatically turn itself off after 15 minutes when no signal is detected You can change the setting to Off for the following purpo...

Page 101: ...A LINK Setup menu is set to On see Setting up REGZA LINK on page 104 the REGZA LINK functions described below will be enabled REGZA LINK playback device DVD player etc control With your TV s remote control or using the REGZA LINK Player Control menu you can control the connected REGZA LINK playback device you are watching Available remote control button functions These functions depend on the devi...

Page 102: ...are connected The REGZA LINK Player Control item will be grayed out in the following conditions A non HDMI input is currently selected The Enable REGZA LINK item is set to Off The connected CEC device is not a playback or recording device Item Description Power Turns the select device on and off Root Menu Accesses the root menu of the selected device Contents Menu Accesses the contents list when y...

Page 103: ...the Audio Receiver input source These functions depend on the device connected Other REGZA LINK functions When the Enable REGZA LINK and each item in the REGZA LINK Setup menu are set to On the following functions will be enabled Item Description TV Auto Input Switch If a connected HDMI device starts playing video or audio the TV will automatically switch to the appropriate HDMI input TV Auto Powe...

Page 104: ...ill be grayed out 4 Press the arrow buttons to highlight the REGZA LINK Setup item you want to use and press the arrow buttons to select On or the desired mode TV Auto Input Switch On Off TV Auto Power On Off Device Auto Standby On Off Speaker Preference TV Speakers Audio Receiver 5 To save the new settings highlight Done and press the ENTER button To revert to the factory defaults highlight Reset...

Page 105: ...eTimer if set Sample Illustration Recall banner To close the Recall screen press the RECALL button again To display TV status information using INFO Press the INFO button The following additional information will display for off air digital channels if applicable Title Duration Detailed description Sample Illustration Info banner To close the INFO screen press the INFO button again The location of...

Page 106: ... the last mode memory feature If the AC power is cut off while you are viewing the TV the Last Mode Memory feature automatically turns on the TV when the AC power is resupplied If you know you will be away from the TV for an extended period of time you should unplug the power cord NOTE ...

Page 107: ... picture quality that affect the appearance of your contrast settings and then automatically adjusts the video To select Dynamic Contrast preference 1 From the Picture menu highlight Picture Settings and press the ENTER button Sample Image Dynamic Contrast screen 2 Highlight Advanced Picture Settings and then press the ENTER button ...

Page 108: ...just the Static Gamma The adjustment range is within 5 from center If the setting is decreased the detail of black colors is decreased If the setting is increased the detail of black colors is increased 4 To save the new settings highlight Done and then press the ENTER button To revert the factory defaults highlight Reset and then press the ENTER button If you select one of the factory set picture...

Page 109: ...he picture greenish The B Drive and G Drive settings are connected to the Color Temperature settings and will change based on which setting is selected in step 5 above 7 To save your new settings highlight Done and then press the ENTER button To revert to your original settings highlight Reset and then press the ENTER button If you select one of the factory set picture modes Dynamic Standard Movie...

Page 110: ...evert to your original settings highlight Reset and then press the ENTER button MPEG Noise Reduction The MPEG Noise Reduction feature allows you to reduce visible interference caused by MPEG compression Choices for MPEG Noise Reduction are Off Low Middle and High Off is automatically selected when this feature is disabled grayed out To select the MPEG Noise Reduction level 1 Press the MENU button ...

Page 111: ...t signals To use the Game Mode feature the current video input must be Video ColorStream HD HDMI 1 or HDMI 2 The Game Mode cannot be turned on when any other video input other than the above mentioned is selected To turn on Game Mode 1 Press the MENU button to open the Picture menu 2 Press the arrow buttons to select On To turn off Game Mode select Off in step 2 above change the video input or tur...

Page 112: ... box on screen The closed caption feature is set to one of the Text modes T1 T2 T3 or T4 Set the closed caption feature to Off see Using closed captions on page 73 TV stops responding to controls If the TV stops responding to the buttons on the remote control or TV control panel and you cannot turn off the TV press and hold POWER button on the TV control panel for several seconds to reset the TV I...

Page 113: ...ource on page 54 If no device is connected to an input on the TV no picture appears when you select that particular input source For device connection details see Connecting Your TV on page 21 Antenna reception may be poor Use a highly directional outdoor antenna if applicable The station may be having broadcast difficulties Try another channel Adjust the picture quality see Using the advanced pic...

Page 114: ...VD player video game system set top box etc try using a ColorStream or HDMI video connection instead Picture and sound are out of sync As with all products that contain a digital display this may occur in rare instances when viewing certain content e g television broadcasts video games DVDs The cause may include without limitation video processing within the TV video processing in an attached gami...

Page 115: ...al make sure that the audio setting is properly set see Connecting a digital audio system on page 30 Remote control problems Remove all obstructions between the remote control and the TV Replace the remote control s batteries see Installing batteries on page 35 Your TV s remote control may not operate certain features on your external devices Refer to the user s guide for your other device to dete...

Page 116: ... closed caption feature see Using closed captions on page 73 A closed caption signal may not display correctly under the following circumstances The videotape is dubbed The signal reception is weak The signal reception is non standard For additional information see Using closed captions on page 73 Rating blocking V Chip problems Forgotten PIN code When the PIN code screen appears press the INFO bu...

Page 117: ...d Server are connected correctly Incorrect functionality may occur when using a USB HUB connection Photo files that were processed and edited using the computer s application software may not be viewable The TV may select one format automatically and play it when contents that support two or more formats are played Confirm that the contents of the USB storage device are in formats that are support...

Page 118: ...not be compatible with features and or specifications that may be added in the future Television system Channel coverage NTSC standard ATSC standard 8VSB Digital Cable 64 QAM 256 QAM in the clear unencrypted VHF 2 through 13 UHF 14 through 69 Cable TV Mid band A 8 through A 1 A through I Super band J through W Hyper band AA through ZZ AAA BBB Ultra band 65 through 94 100 through 135 NOTE ...

Page 119: ...minals Video audio input 32C120U 1 6 A 40E220U 1 7 A 32C120U 1 6 A maximum current 0 6 W in Standby mode 40E220U 1 7 A maximum current 0 6 W in Standby mode 32C120U 7 W 7 W 40E220U 7 W 7 W 32C120U Two 5 5 8 x 1 1 5 x 4 5 142 x 30 x 20mm 40E220U Two 5 5 8 x 1 1 5 x 4 5 142 x 30 x 20mm Video 1 V p p 75 ohm negative sync Audio 200 mV rms 20dBFS 47K ohm or greater ...

Page 120: ...m Suggested formats 1080i 720p 480p 480i Audio 200 mV rms 20dBFS 47K ohm or greater HDMI compliant type A connector HDCP compliant HDMI Audio 2 channel Linear PCM 32 44 1 48 kHz sampling frequency 16 20 24 bits per sample 32C120U Width 2 7 1 4 inches 792 8mm Height 1 9 3 4 inches 553 6mm Depth 9 5 8 inches 245mm 40E220U Width 3 2 3 4 inches 984 9mm Height 2 2 inches 661 5mm Depth 11 5 8 inches 295...

Page 121: ...cur incorrect display false format detection picture position failure blur or judder But this is not a malfunction of your TV Temperature 32 95º F 0 35º C Humidity 20 80 no moisture condensation Format Resolution V Frequency H Frequency Pixel Clock Frequency VGA 640x480 59 940 Hz 31 469kHz 25 175MHz SVGA 800x600 60 317 Hz 37 879 kHz 40 000 MHz XGA 1024x768 60 004 Hz 48 363 kHz 65 000 MHz WXGA 1280...

Page 122: ...lution V Frequency H Frequency Pixel Clock Frequency VGA 640x480 59 940 Hz 31 469kHz 25 175MHz SVGA 800x600 60 317 Hz 37 879 kHz 40 000 MHz XGA 1024x768 60 004 Hz 48 363 kHz 65 000 MHz WXGA 1280x768 59 870 Hz 47 776 kHz 79 500 MHz 1360 x 768 60 015 Hz 47 712 kHz 85 500 MHz SXGA 1280x1024 60 020 Hz 63 981 kHz 108 000 MHz 480i 720 x 480i 59 940Hz 15 734kHz 27 000MHz 480p 720 x 480p 59 940Hz 31 469kH...

Page 123: ...SHIBA These software and accompanied documents are copyrighted by TOSHIBA and protected by Copyright Act an international treaty s articles and other governing laws The software components which are made or developed originally by TOSHIBA and not subject to EULAs are not a target of source code offering The Toshiba warranty provided in respect of the Digital TV is the only warranty provided and no...

Page 124: ...riginal text English as exactly written by the respective parties other than TOSHIBA For at least three 3 years from the date of distribution of the this product Toshiba will give to anyone who contacts Toshiba Consumer Solutions at 800 631 3811 for a charge of no more than our cost of physically performing source code distribution a complete machine readable copy of the complete corresponding GPL...

Page 125: ...this does not limit you more than the foregoing paragraphs do The Unix configuration script configure was produced with GNU Autoconf It is copyright by the Free Software Foundation but is freely distributable The same holds for its supporting scripts config guess config sub ltmain sh Another support script install sh is copyright by X Consortium but is also freely distributable The IJG distributio...

Page 126: ...covering The FreeType Project and assume no liability related to The FreeType Project Finally many people asked us for a preferred form for a credit disclaimer to use in compliance with this license We thus encourage you to use the following text Portions of this software are copyright 1996 2002 The FreeType Project www freetype org All rights reserved Exhibit C scalfact c Scalefactors for layer I...

Page 127: ...put format 79 stereo SAP broadcasts 77 Auto Aspect using 69 Auto Brightness sensor set 99 auto power down set 100 Auto Start function Media Player 93 AV Input mode setting 50 C cables 3 5mm to RCA Y cable 23 analog RGB 15 pin 23 coaxial F type 21 component video red white yellow 22 HDMI 22 optical audio 23 overview of cables 21 standard A V red white yellow 22 channel switching between two channel...

Page 128: ... 26 REGZA LINK 29 TV s HDMI 33 VCR and antenna 24 D digital audio selector using 76 digital signal meter viewing 51 F factory defaults reset 53 favorites browser 59 features 16 Freeze feature 70 G GameTimer using 88 H HDMI audio mode setting 50 History List adding clearing channels 62 adding clearing inputs 62 I icon safety 15 Initial setup 44 initial setup main menu layout 40 input lock feature u...

Page 129: ...ABLE IN 45 menu language 45 R rating system 85 downloading additional 83 REGZA LINK additional functions 103 using 101 volume mute buttons 103 S safety icons 15 scrolling TheaterWide picture 68 specifications acceptable signal formats 121 audio power 119 channel coverage 118 ColorStream HD input 120 Digital audio output 120 dimensions 120 HDMI input 120 HDMI signal formats 122 mass weight 120 oper...

Page 130: ...INK operation 116 picture problems 113 Rating blocking problems 116 remote control problems 115 sound problems 115 TV connections front 18 side 18 TV panel connections back 19 TV panel controls front 18 left side 18 side 18 TV remote functionality 37 install batteries 35 TV status information show 104 V video input source selecting 54 video input sources labeling 56 ...

Reviews: