background image

5

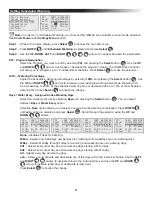
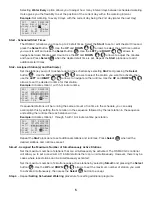
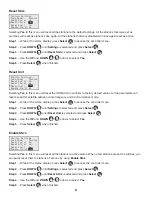
Selecting Water Every option allows you to adjust how many interval days between scheduled watering. 

It also gives you the flexibility to set the position of the current day within the watering interval. 

Example: Set watering to every 3 days with the current day being the 2nd day (water the next day). 

P01    100%  00:00:00

Water Every: 03 Days 

Today’s Day: 01

Start  :  01  05:00am

Sta#:  01–05  05 min

Simult : 06

02

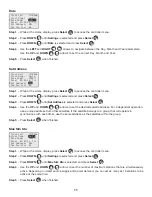
Start - Scheduled Start Times

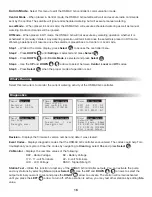
The OSMAC G3 allows you to set up to 24 start times. Select the Start: to set or edit the start time and 

press the Select button 

SELECT

SELECT

. Use the UP and DOWN 


 arrows to select the start time number 

you want to edit and press the Select button 

SELECT

SELECT

. Use the LEFT and RIGHT 


 arrows to 

navigate between Minutes and Hours. Use the UP and DOWN  


 arrows to adjust the minutes 

and hours. Press Select 

SELECT

SELECT

 when the desired start time is set. Repeat the Start procedure to add 

additional start times.

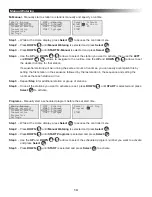
Sta# - Assigned Station(s) and Runtime(s)

Set the stations you want to activate during the schedule by selecting Sta# and pressing the Select 

button 

SELECT

SELECT

.  Use the UP and DOWN 


 arrows to select the station you want to activate, then 

use the LEFT and RIGHT 


 arrows to navigate to the runtime. Use the UP and DOWN 


arrows to set the desired runtime for that station.


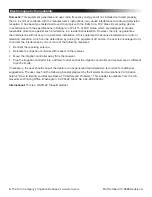
Example: Activate station 1 with 5-minute runtime.


P01    100%  00:00:00

Days:  SMTWTFSSMTWTFS

set>:  

Start  :  01  05:00am

Sta#:  01–01  05 min

Simult : 06

05


If sequential stations will be running the same amount of runtime in the schedule, you can easily 

accomplish this by setting the 1st station in the sequence followed by the last station in the sequence 

and setting the runtime that each station will run.


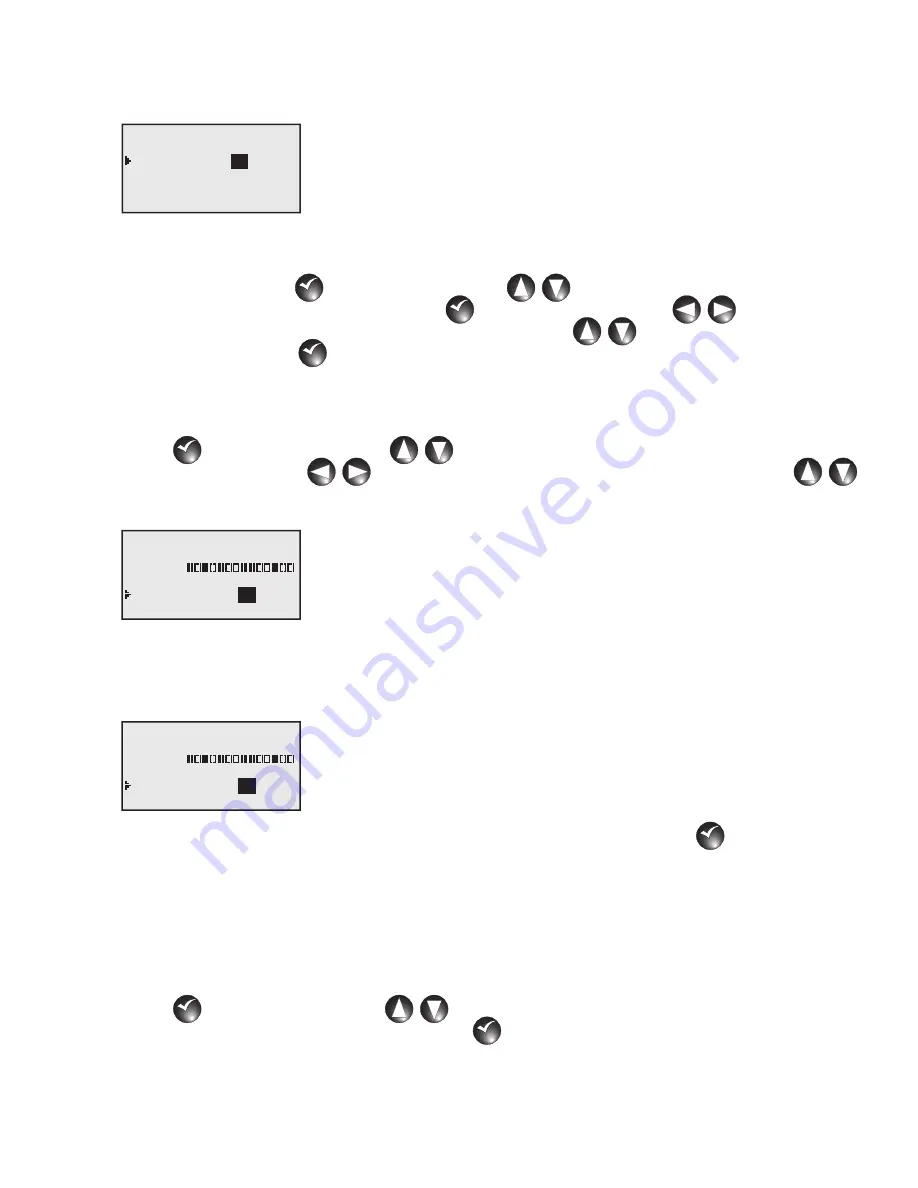
Example: Activate stations 1 through 5 with 10-minute runtime per station.


P01    100%  00:00:00

Days:  SMTWTFSSMTWTFS

set>:  

Start  :  01  05:00am

Sta#:  01–05  10 min

Simult : 06

10


Repeat the Sta# procedure to set additional stations and runtimes. Press Select 

SELECT

SELECT

 when all the 

desired stations and runtimes are set. 

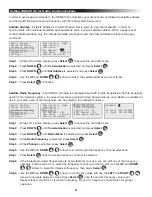
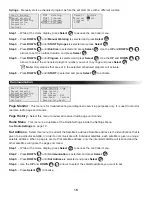
Simult - Assigned the Maximum Number of Simultaneously Active Stations


Set the maximum number of stations that can simultaneously be activated. The OSMAC G3 controller 

will allow you to set a maximum of 16 total stations that can run simultaneously. However, there may be 

cases where less stations can be simultaneously activated. 


Set the maximum number of simultaneously active stations by selecting Simult: and pressing the Select 

button 

SELECT

SELECT

. Use the UP and DOWN 


 arrows to set the maximum number of station you want 

to activate simultaneously, then press the Select 

SELECT

SELECT

 button to accept.

Step 4 –  Repeat Setting Scheduled Watering procedure for setting additional programs.

Summary of Contents for OSMAC G3

Page 1: ...SMAC satellites 16 to 64 stations in 8 station increments Field programmable for future upgrades Operates as a stand alone controller or under the management of a central computer Supports radio commu...

Page 2: ...Settings Menu Station Settings 7 Comm Mode 8 Reset Prg s 8 Reset Sta s 9 Reset Unit 9 Enable Sta s 9 Clock Set 10 Clock Mode 10 Date Mode 10 Date 11 Sat Address 11 Max Sim Sta 11 Display Adj 12 Radio...

Page 3: ...arrow to access the menus and settings from the home screen 11 30am Central 04 20 16 Wed Page Mode OSMAC G3 Address 001 7540 10 17 54 26 Current Time Satellite Operating Mode Watering Operation Indic...

Page 4: ...e satellite is placed in Off mode Watering operations will resume once the satellite is placed back to Central or Local mode Setting the Clock and Mode Clock Set What s Running Manual Watering Schedul...

Page 5: ...T SELECT to edit Step 4 Use the LEFT and RIGHT buttons to navigate between the DAY MONTH and YEAR To edit the values use the UP and DOWN buttons to increase or decrease until the correct DAY MONTH and...

Page 6: ...ect SELECT SELECT to finalize the change Days Water Every Assigned Active Watering Days Select the watering interval by selecting Days and pressing the Select button SELECT SELECT You can select betwe...

Page 7: ...d DOWN arrows to set the desired runtime for that station Example Activate station 1 with 5 minute runtime P01 100 00 00 00 Days SMTWTFSSMTWTFS set Start 01 05 00am Sta 01 01 05 min Simult 06 05 If se...

Page 8: ...t suitable or available for use in your area each of the frequencies can be edited to the desired frequency What s Running Manual Watering Scheduled Watering Communication Diagnostics Settings Radio M...

Page 9: ...isabled the station will not activate for all scheduled and manual watering Watering activity will only resume once the station s Disable function is set back to No Use the UP and DOWN arrows to selec...

Page 10: ...ering operations will resume once the satellite is placed back to Central or Local mode Step 1 While at the Home display press Select SELECT SELECT to access the controller menu Step 2 Press DOWN unti...

Page 11: ...All the parameters will reset except for satellite address radio frequency and Communication mode Step 1 While at the Home display press Select SELECT SELECT to access the controller menu Step 2 Pres...

Page 12: ...1 While at the Home display press Select SELECT SELECT to access the controller menu Step 2 Press DOWN until Settings is selected and press Select SELECT SELECT Step 3 Press DOWN until Clock Mode is s...

Page 13: ...T Step 3 Press DOWN until Sat Address is selected and press Select SELECT SELECT Step 4 Use the UP and DOWN arrows to set the desired satellite address For independent operation use a unique address f...

Page 14: ...ngs is selected and press Select SELECT SELECT Step 3 Press DOWN until Display Adj is selected and press Select SELECT SELECT Step 4 Adjust the display contrast by using the UP arrow to increase and D...

Page 15: ...st RSSI information will be provided To access the radio module temperature input voltage and the current draw press the DOWN arrow and select Get Other then press Select SELECT SELECT To get the late...

Page 16: ...setting the first station in the sequence followed by the last station in the sequence and setting the runtimes that each station will run Step 5 Repeat Step 4 for additional station or group of stat...

Page 17: ...tion What s Running Manual Watering Scheduled Watering Communication Diagnostics Settings Page Monitor Sig Page History Radio Menu Sat Address 001 Comm Mode Central Receive Only Radio Page Monitor Thi...

Page 18: ...em to monitor the current watering activity of the OSMAC G3 controller Diagnostics Menu Revision 1 00 Rev Date 4 21 16 Revision Menu Clear log No Last code 02 002 01 02 16 17 34 08 Event Codes Menu RD...

Page 19: ...Current Draw no load 0 21A 115 120 V a c 60 Hz or 0 10A 230 240 V a c 50 Hz Current Draw maximum load 0 91A 115 120 V a c 60 Hz or 0 45A 230 240 V a c 50 Hz Secondary Voltage Output 24 V a c 50 60 Hz...

Page 20: ...urning the equipment off and on the user is encouraged to try to correct the interference by one or more of the following measures Reorient the receiving antenna Relocate the irrigation controller wit...

Reviews: