5
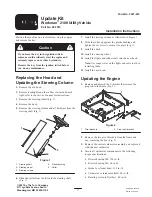
23. Secure any loose cables in the area to the torque arm
with cable ties (Fig. 5).
Installing the Box
1. Remove the latch assembly from the old box and
install it on the new box (Fig. 12).
1
2
7
8
3
6
5
4
9
3
Figure 12
1.
Box
2.
Latch assembly
3.
Pivot brackets
4.
Prop rod U-bracket
5.
Prop rod
6.
Prop rod bracket
7.
Braces
8.
Heat shield
9.
Rubber knob
2. Install the three braces and the heat shield to the
bottom of the box in the orientation illustrated in
Figure 12.
Note: In the center brace, use only the outside and
center holes. In the other braces, use the right holes
and the holes that line up with the heat shield.
3. Using the U-bracket as a template, line the bracket
with the edge of the frame and over the front hole
where the old U–bracket had been installed, marking
the location of the new front hole (Fig. 12).
4. Drill an 11/32 in. dia. hole at the marked location.
5. Install the prop rod bracket to the underside of the box
(Fig. 12).
6. Using a washer and pushnut, install the prop rod to the
slot in the prop rod bracket (Fig. 12).
7. Lay the box on the frame ensuring that it is centered
correctly and lays flat.
8. Install the 2 new pivot brackets to the box and frame
(Fig. 12).
9. Connect the prop rod to the frame using the U-bracket
(Fig. 12).
10. Slide the rubber knobs onto the tailgate latches
(Fig. 12).
Note: Use soapy water on the latches to aid in
installing the rubber knobs.
Installing the Decals and the
Serial Plate
1. Install the decals in the positions indicated in Figures
13, 14, and 15.
A. Thoroughly clean the area where you will install
the decal.
B. Dampen the area with water or mildly soapy water.
C. Peel the decal from the backing and install it in
place.
D. Apply pressure across the surface of the decal,
starting at the center of the decal and working
toward the edges using overlapping strokes.
1
1
2
Figure 13
1.
99-7959
2.
99-7337


