Outdoor Dome Series | Quick Guide
22
3.4
IP Finder
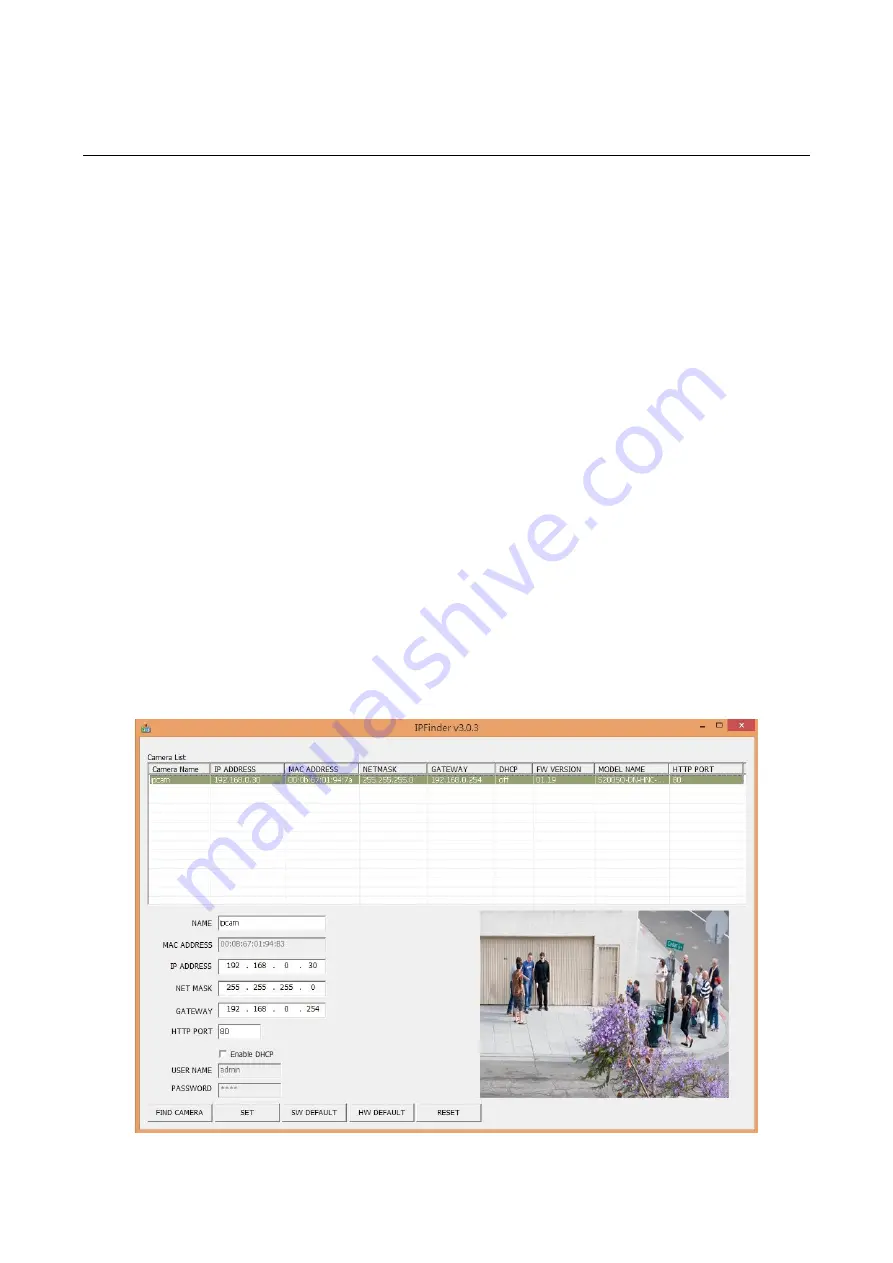
IP Finder is a utility program that helps users to locate the unit in local area network that computer is
connected to. Please note that IP Finder works only in Microsoft Windows XP, Microsoft Windows Vista, and
Microsoft Windows 7 or above. Steps to get the utility program running are listed below.
1.
Insert the CD-ROM in the optical drive.
2.
Copy the IP Finder’s folder on the CD-ROM to computer.
3.
Double click on
IPFinder.exe
in computer
’s IP Finder folder, and the IP Finder window should pop out.
4.
The window would list information of units in operation at present. Press
FIND CAMERA
to find more units.
5.
Locate and double-click one of the cameras in the list you want to configure the network settings. If you
have multiple cameras connected to your local network, locate the MAC address on the camera to
distinguish the target camera from others.
6.
Configure the following settings as needed.
NAME: Enter a descriptive name for the camera.
NETWORK SETTINGS: If you have a DHCP server on your network to assign IP addresses to
network devices, enable the DHCP option. Otherwise, manually enter the IP ADDRESS, NET MASK
and GATEWAY values.
USERNAME & PASSWORD: Manually setup preferred username and password.
SET: Whenever you make revision of camera settings, click
“SET” to take effect.
SW DEFAULT: To perform the factory defaults excluding network settings of the selected camera.
HW DEFAULT: To perform the factory defaults of the selected camera.
RESET: To reboot the selected camera.
Click Save to enable the settings and click Exit to exit the utility.
Figure 3 - 7: IP Camera Finder


