


Instruct the Patient to look straight ahead and find the Fixation Target
and to blink as normal until you are ready to press the trigger to capture.
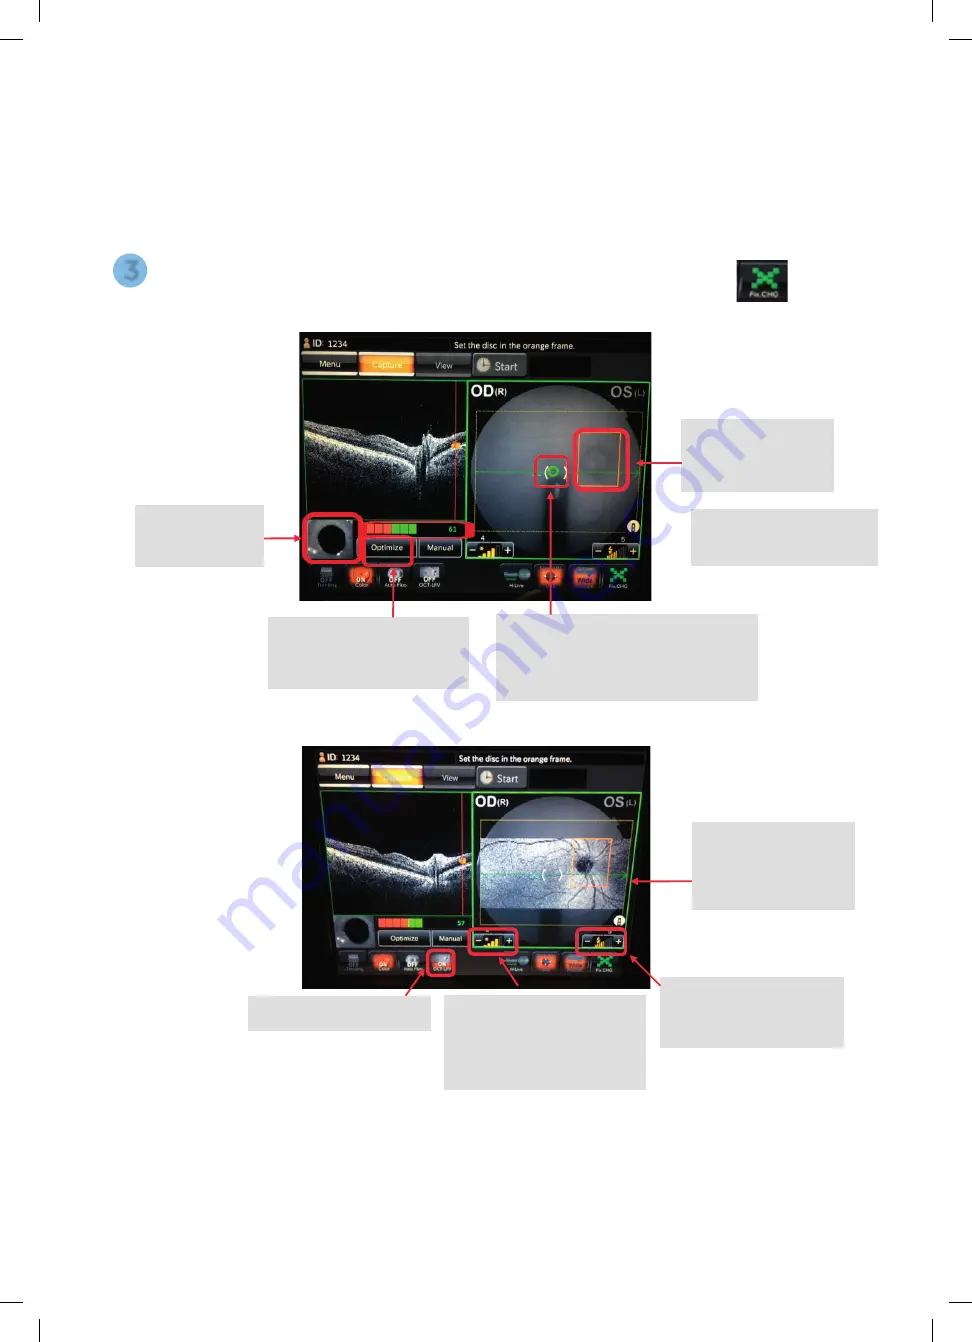
3
1. Move the machine
forwards until you
see the pupil align.
3. Make sure the optic
disc is centrally in the
box – Move the fixation
target if required.
Live Fundus View is a
live view of the OCT,
it will also enhance
contrast to distinguish
retinal structures.
4. If the B-Scan image quality
is poor and in the red in the
bar above, press
[Optimize]
to
enhance signal strength.
IR Illumination
If IR fundus image is noisy
or dark, please turn up the
illumination level.
Flash Intensity
Increase if Patient is poorly
dilated or has small pupils.
[Live Fundus View]
2) Ensure distance indicator circles are
green and overlapping and in the brackets.
Yellow = too close
Orange = too far away
Green line = Scan position
Blue cross = Fixation target
position
6
Topcon (Great Britain) Medical Limited
|
DRI OCT Triton | Quick Reference Guide |
Capturing OCT
Position the Patient.
Choose Scan Type.
Place the Patient's chin on the chinrest. Keep their chin and forehead stable.
Be sure to adjust the chinrest height to align the eye marker and the
corner of the eye.
Adjust the Patient’s height using the
[Up]
and
[Down]
chinrest buttons found next to
the joystick on the machine.
Once Scan Type is selected, the machine
will automatically go into capture mode.
You may need to use the
[Small Pupil]
setting for Patients
with small pupils or turn the
require the fundus photo.
Capturing OCT
1
2
[Small Pupil]
button
5
Topcon (Great Britain) Medical Limited
|
DRI OCT Triton | Quick Reference Guide |
Capturing OCT
[On]/[Off]
6
61647 Topcon quick start guide Triton.indd 6
27/03/2019 09:56


