


4 - Installation and Connections
You've unpacked your bruAPP Backup Appliance, now please locate the following components:
• The bruAPP system (Rackmount or Tower)
• Component Box containing:
• Power Cord (U.S. 120VAC 3 Prong)
• Front or rear panel keys (rear keys for tower systems & rack systems with faceplates)
• Documentation CD
• Rail Kit Box (rackmount Systems – may ship separately)
The documentation CD is being phased out in an effort to ensure that the most up-to-
date version of all documentation is being provided to customers. If your bruAPP
Backup Appliance did not come with a documentation CD, please visit the bruAPP
Backup Appliance documentation page on the web at http://www.tolisgroup.com/docs/.
Initial Connections
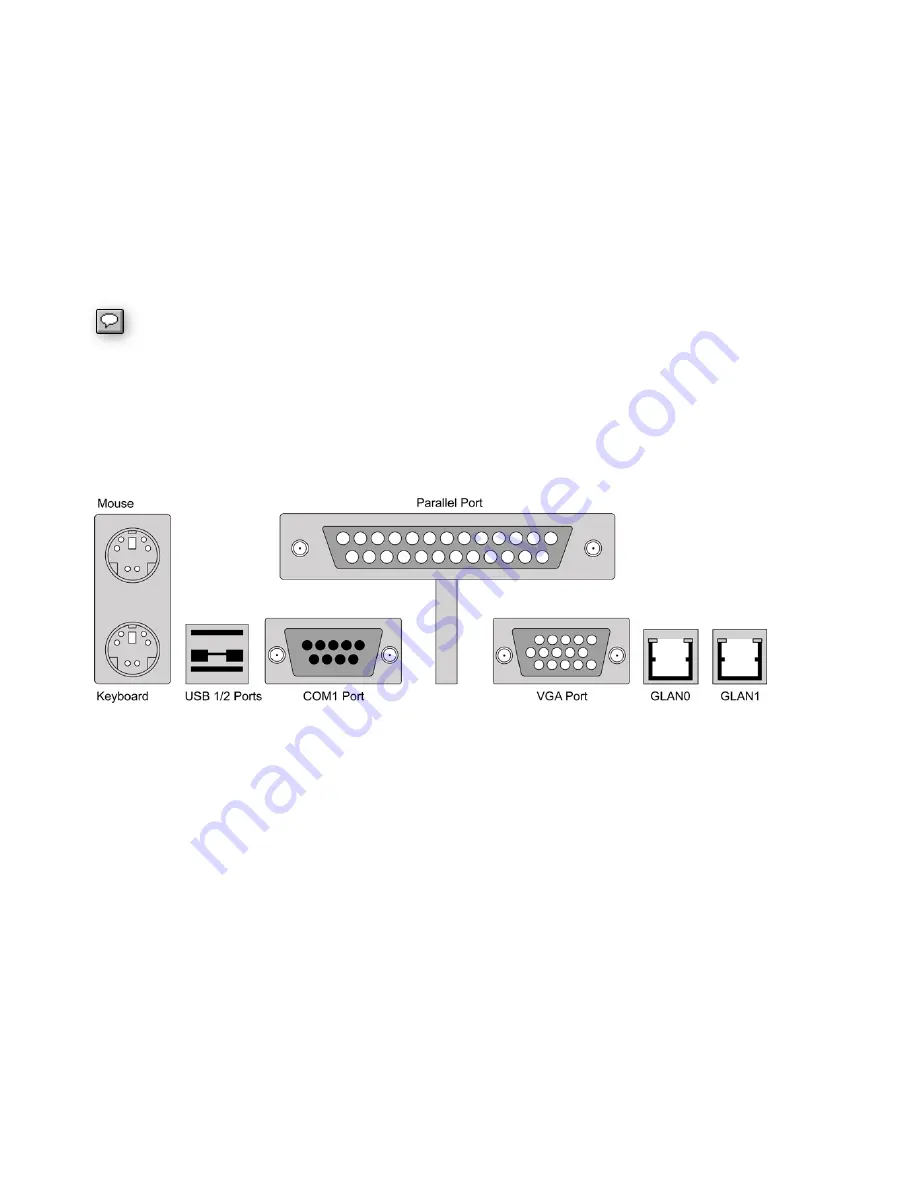
For the initial installation of your bruAPP unit, plug your keyboard and monitor (mouse not required), at
least one network cable into GLAN0 (Ethernet port closest to the monitor port), and the power cord on
the back panel as outlined in Fig. 2.1 below.
Figure 4.1 – bruAPP Backup Appliance Rear I/O Panel
Note:
Tower System arrangement is vertical, and some1U/2U/3U chassis will differ slightly.
Connecting a Tape Device
If you are attaching a SAS, SCSI or Fibre-Channel tape drive or library, connect it to the appropriate
ports.
3U Chassis SAS Tape Connection
bruAPP 3U Backup Appliances have two external SAS ports. One is labeled “Tape” (usually the top
port) and the other is labeled “Disk” (usually the bottom port) and when connecting the tape device to
your 3U bruAPP, you must plug the tape device into the “Tape” port only as shown if figure 4.2.
The “Disk” port is for planned future expansion of the bruAPP Backup Appliance for customers needing
to increase the total bruAPP RAID size.
12


