TKH Group Security Solutions HSD820v2H3-E User Manual Download Page 87

3

From the Type and Line lists, select the function and line number to be executed when
camera idle time expires.

4

Click Set.

Time

The time entered in the Time box represents the duration of camera idle time (1-128 minutes)
that you want to elapse before running a Preset point, Sequence line, Autopan path, or Cruise
line. With the Home function activated, the camera starts to count down when it idles, and
then executes the predefined action when the time expires.
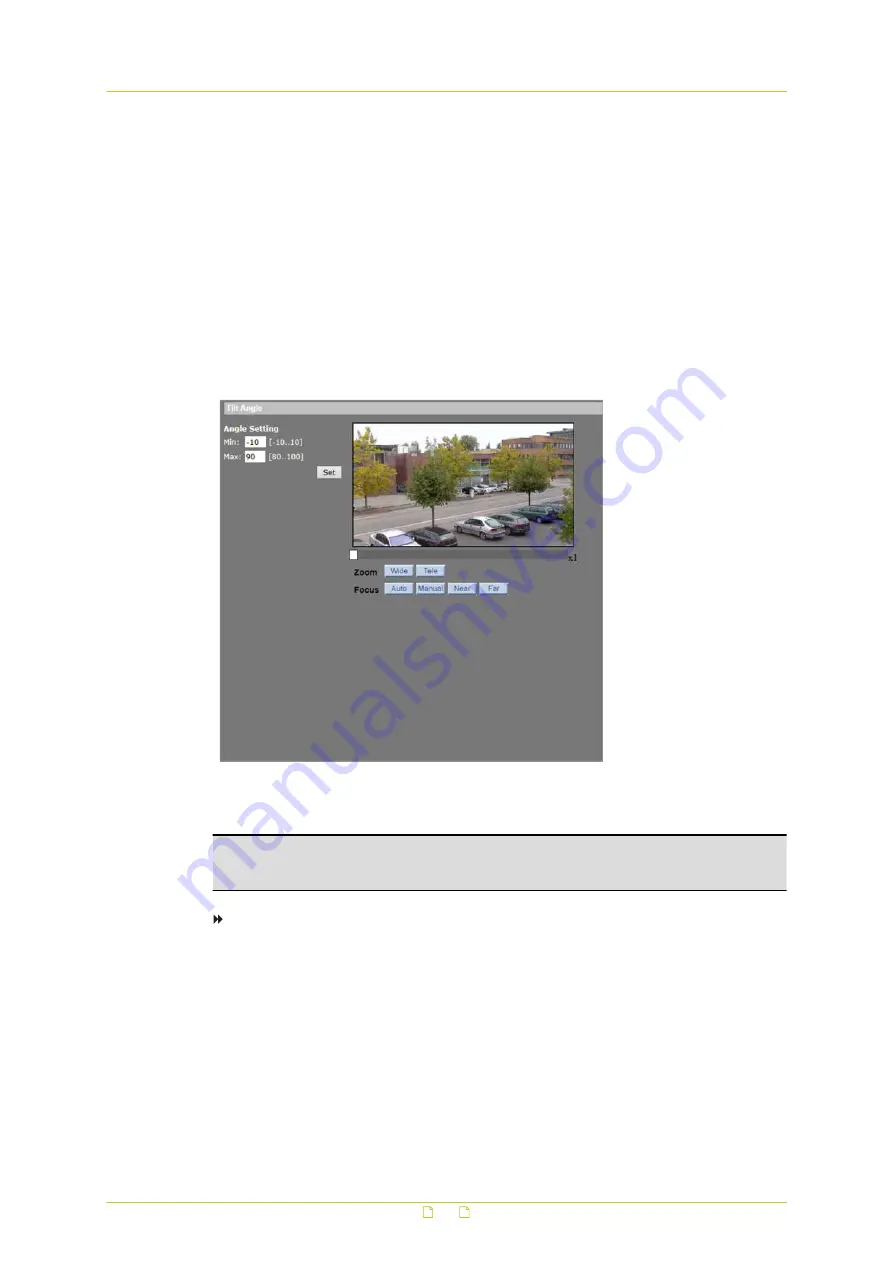
8.6

Tilt Range

PTZ&IMAGE > Tilt Range

The tilt range of the HSD820v2H3-E is adjustable from minimum -10° to m190°.

Note: The tilt angle range is between -10° to +100° when the Flip function on the Camera -
 Misc1
 page is set to Off or M.E. The tilt angle range is between -10° to +190° when the Flip
function on the Camera - Misc1 page is set to Image.

To adjust the angle setting

1

On the PTZ&IMAGE tab, click Tilt Range in the menu on the left.

2

Enter the desired minimum and maximum tilt angle in the corresponding text boxes.

3

Click Set.

PTZ&IMAGE

 87 

Summary of Contents for HSD820v2H3-E

Page 1: ...HSD820v2H3 E Full HD IP speed dome camera User Manual...

Page 2: ...e owners Liability Siqura accepts no liability for claims from third parties arising from improper use other than that stated in this manual Although considerable care has been taken to ensure a corre...

Page 3: ...System settings 25 6 1 System 26 6 1 1 Host name 26 6 1 2 Time zone 26 6 1 3 Daylight saving time 26 6 1 4 Time format 27 6 1 5 Time synchronisation 27 6 2 Security 27 6 2 1 User 28 6 2 1 1 Admin pass...

Page 4: ...work Share 59 6 10 Recording 61 6 11 Schedule 62 6 12 File location 63 6 13 View information 64 6 13 1 Log file 64 6 13 2 User Information 65 6 13 3 Parameters 66 6 14 Factory default 67 6 15 Software...

Page 5: ...fault 97 Appendix Enable UPnP 98 Appendix Delete the existing Viewer software 99 Appendix Set Up Internet Security 100 Appendix NTCIP Configuration 101 Supported conformance groups 101 Configuration 1...

Page 6: ...ill configure and operate this product What you need to know You will have a better understanding of how the HSD820v2H3 E works if you are familiar with Camera technologies CCTV systems and components...

Page 7: ...ion about our products and services Should you detect errors or inaccuracies in this manual we would be grateful if you would inform us We invite you to offer your suggestions and comments via t writi...

Page 8: ...maintenance and repair of this equipment are to be performed by trained personnel aware of the hazards involved For correct and safe use of the equipment and in order to keep the equipment in a safe...

Page 9: ...t exposure to optical radiation when the unit is removed from its enclosure or when the fiber is disconnected from the unit The optical radiation is invisible to the eye Use of controls or adjustments...

Page 10: ...ery a button cell type contains so little lithium that it will never be classified as reactive hazardous waste It is safe for normal disposal as required for batteries by your local authority 2 2 Prot...

Page 11: ...trical installation Overvoltage Category IV Protection against lightning strikes direct and indirect Additional protection is also required for protection against direct or indirect lightning strikes...

Page 12: ...s hard to remove use a mild detergent and wipe gently To clean the lens use lens tissue or a cotton tipped applicator and ethanol Do not clean the lens with strong detergents 2 4 Compliance The EU Dec...

Page 13: ...IR cut filter WDR BLC 360 Continuous rotation 400 s Preset targeting 256 Presets 8 Programmable cruises Four alarm inputs Two alarm outputs Electronic Image Stabilisation Two way audio 16 Privacy mask...

Page 14: ...provides all the interfaces necessary for any IP CCTV application By offering analogue video out the HSD820v2H3 E is a hybrid solution that can provide video for a local public view monitor or DVR Pri...

Page 15: ...web interface 20 4 1 System requirements You can log on to the web interface of your HSD820v2H3 E unit from a PC which is on the same subnet as the unit The browsing PC must meet the system requireme...

Page 16: ...re devices show device status and perform firmware upgrade To install Device Manager 1 Download the latest version of Device Manager at www tkhsecurity com support files 2 Double click the setup file...

Page 17: ...D820v2H3 E 2 Click Change Network Settings 3 In Change Network Settings click Static IP 4 Provide the camera with an appropriate IP address netmask and gateway address for the desired network configur...

Page 18: ...cess the webpages of the HSD820v2H3 E double click its entry in the list of found devices Note A DHCP server must be installed on the network in order to provide DHCP network support 4 5 Log on to the...

Page 19: ...o remove a previous installation of Viewer from your computer before you initially access the camera over the network or when you encounter an A new version is available message For more information s...

Page 20: ...tem security network events and storage related settings and upgrade the embedded software Streaming Administrators can use this tab to set video and audio formats and configure compression video text...

Page 21: ...1 Layout HSD820v2H3 E home page The Home page of the HSD820v2H3 E is made up of the camera preview function buttons and video streaming information Button Function Sets image display to standard size...

Page 22: ...ideo format Adjust the video display size Control the PTZ functions View live video Communicate with a remote site Save snapshots of live view images Record video clips See details about the current v...

Page 23: ...Pressing the Recording button saves an avi format recording of the video in the camera view to the configured location default C For information about changing the storage location see section File lo...

Page 24: ...Z panel The PTZ panel offers an intuitive and convenient interface for easy camera operation You can use this panel to pan tilt zoom and focus the camera control the iris and set the pan tilt speed 1...

Page 25: ...Chapter 6 1 System 26 6 2 Security 27 6 3 Network 35 6 4 DDNS 42 6 5 Mail 43 6 6 FTP 44 6 7 HTTP 45 6 8 Events 45 6 9 Storage management 57 6 10 Recording 61 6 11 Schedule 62 6 12 File location 63 6...

Page 26: ...is displayed in the alarm message The maximum length of the host name is 63 characters 6 1 2 Time zone On the Time zone list select the time zone that corresponds with the location of the camera 6 1 3...

Page 27: ...menu on the left 2 Click Manual 3 Type the date and time The entry format for date and time should match the one shown next to the entry field This in its turn is determined by the format that is sel...

Page 28: ...iguration of all passwords and other security settings is the responsibility of the installer and or end user of the camera To create a strong password Use at least eight characters Do not include you...

Page 29: ...in the menu on the left 2 In the Security submenu click User 3 In the Add User section type the new user s name and password 4 Click to select the Camera control Talk and Listen check boxes as approp...

Page 30: ...n RTSP connection to the HSD820v2H3 E and extract a video stream This may be undesirable from a security perspective Therefore it is possible to restrict access to the camera to users with a valid acc...

Page 31: ...ificate must be installed This can be obtained by creating and sending a certificate request to a Certificate Authority CA Before a CA issued certificate is obtained users can create and install a sel...

Page 32: ...icate request 1 On the System tab click Security in the menu on the left 2 In the Security submenu click HTTPS 3 To create request to obtain a signed certificate from a CA click Create Certificate Req...

Page 33: ...ilter 3 Select Enable IP filter 4 To determine the IP filter behaviour select Deny or Allow from the list 5 Click Apply IP addresses listed under Filtered IP Addresses are now allowed denied access to...

Page 34: ...bmenu click IEEE 802 1X 3 Under CA certificate click Browse 4 Browse to the folder containing the certificate and select the file 5 Click Upload The certificate is installed 6 2 4 2 Client certificate...

Page 35: ...k Basic This page describes how to configure the camera to use a fixed IP address or acquire the address dynamically through the Dynamic Host Configuration Protocol DHCP You can also configure PPPoE s...

Page 36: ...ss 5 Type the subnet mask default gateway and DNS server IP addresses in the appropriate boxes see below for detailed information 6 Click Save to confirm the new settings 7 Type the new IP address in...

Page 37: ...o 8080 the user must type in the address rtsp 192 168 0 100 8080 instead of rtsp 192 168 0 100 MJPEG over HTTP port The HTTP port that streams MJPEG can be any port other than the default port 8008 If...

Page 38: ...rvice to non critical traffic such as file transfers or Web traffic Each stream has a DSCP Differentiated Services Code Point field in the IP header Routers will identify the network service type in t...

Page 39: ...e that has read write access to all supported SNMP objects except read only objects The default value is private SNMP v3 SNMP v3 supports an enhanced security system that provides protection against u...

Page 40: ...splayed as dots Valid characters A Z a z 0 9 _ Note The encryption password can be left blank In that case however messages will not be encrypted 8 Select Enable SNMP v3 9 Click Save Traps for SNMP v1...

Page 41: ...ct access Note To access the camera from your computer through UPnP ensure that the UPnP networking service is installed on your computer For more information see Appendix Enable UPnP Enable UPnP port...

Page 42: ...IP address automatically 2 On the System tab click DDNS in the menu on the left 3 Select Enable DDNS 4 In the Provider list select the DDNS provider 5 Type the registered domain name in the Host name...

Page 43: ...nu on the left 2 Enter the following SMTP details 1st SMTP mail server IP address or host name 1st SMTP mail server port 21 is the default port for FTP servers 1st SMTP account name 1st SMTP password...

Page 44: ...r host name Server port 21 is the default port for FTP servers User name from the account created on the FTP server Password Remote folder Note Do not enter the complete FTP path into the remote folde...

Page 45: ...ion and Tampering for HTTP Notification settings To configure HTTP settings 1 On the System tab click HTTP in the menu on the left 2 Enter the following HTTP details HTTP server for example http 192 1...

Page 46: ...by it You can also use By schedule to activate the alarm function according to a schedule you have previously set on the Schedule page 4 In the Alarm type list select Normal close or Normal open acco...

Page 47: ...able alarm output 2 Note The output state is determined by any combination of the alarm inputs digital input and motion detection The alarm inputs can be individually enabled to drive the output provi...

Page 48: ...ed the camera will go to the selected Preset Point and stay there for the user defined period of time As for other function modes the camera will keep executing the specified function To stop this act...

Page 49: ...t Upload during trigger active Emails are sent until the trigger is no longer active Each email contains the number of frames per second fps selected from the Image Frequence list The range is 1 to 15...

Page 50: ...is unlimited Add a sequence number suffix up to n and then start over An incremented sequence number is added to the end of the file name The numbering is reset when it reaches the given maximum value...

Page 51: ...ensitive for each sampling pixel Sensitivity level 1 100 The default level is 80 which means that if 20 or more pixels in the detection window change the system will detect motion The higher the value...

Page 52: ...rame and drag the pointer to modify the size of the motion detection area To move the motion detection frame Press and hold the mouse button in the centre of the red frame and drag the frame to the de...

Page 53: ...an NVR VMS or Video Server The camera can ping the remote machine that is send data packets to it with configurable intervals to determine if it is accessible and responding Appropriate actions can be...

Page 54: ...ry 60 seconds The images to be uploaded are the images before and after the triggered moment In the Triggered Action section users can define how many images are to be uploaded Periodical event The de...

Page 55: ...lick On or Off to enable or disable the Manual trigger respectively Triggered action Select the desired trigger actions which are to be performed in the event of an alarm For more information see Alar...

Page 56: ...etting type a Time interval value The value is the interval between each detected audio event The default interval is 10 6 Under Triggered Action select the actions to be performed when audio is detec...

Page 57: ...lready used on one camera is transferred to another camera with a different software platform Important We advise to use high grade highly durable SD cards Note that SD cards are limited to the number...

Page 58: ...g list below for more information Disk cleanup setting Use this section to remove old recordings automatically You can set it to remove recordings older than the specified number of days or weeks and...

Page 59: ...nformation of the network share and a recording list with all the recording files that are saved on the network share Administrators can also format the network share and implement automatic recording...

Page 60: ...entity If you cannot access the network share verify that the network settings are correctly configured and that you have the required share and user permissions Format device Clicking Format erases a...

Page 61: ...ve the file locally or to play it in your default viewing software 6 10 Recording System Recording Recording schedules Administrators can configure up to 10 recording schedules that meet the surveilla...

Page 62: ...chedule On the Schedule page Administrators can create up to ten time schedules that meet the surveillance requirements for functions such as Motion detection Application and Network failure detection...

Page 63: ...ts and live video recordings The default storage location is C Note To implement the Snapshot and Recording functions users working with Windows 7 or Windows 10 must run Internet Explorer as administr...

Page 64: ...ew of the camera parameters and their current values 6 13 1 Log file System View information Log file The system log provides useful information about the configuration and connections after system la...

Page 65: ...information and Get user privacy buttons let you toggle between the user s login information and the user s priviliges To view the user permissions 1 On the System tab click View information in the me...

Page 66: ...ers are stored in its configuration file To view the system parameters On the System tab click View information in the menu on the left and then click Parameters The parameters are displayed in the br...

Page 67: ...30 seconds Note The camera s IP address will be restored to the factory default IP address that is 10 x x x To perform a partial restore excluding the network settings 1 On the System tab click Facto...

Page 68: ...re version of the camera On the System tab click Software version in the menu on the left Version information is shown in the web browser Note that version numbers appearing in your webpage may differ...

Page 69: ...to be upgraded from the Select binary file you want to upgrade list 5 Click Upgrade The upgrade process starts Progress is shown by an upgrade status bar When the upgrade process is complete the web...

Page 70: ...n the left 2 Press Export 3 In the File Download dialogue box select Save 4 If saving the file choose the local directory where it should be saved It is also possible to upload an existing configurati...

Page 71: ...io transmission mode Note The Streaming tab can be accessed by administrators only In This Chapter 7 1 Video format 71 7 2 Video compression 73 7 3 Video text overlay 74 7 4 Video OCX Protocol 76 7 5...

Page 72: ...applications To select a video rotation type 1 On the Streaming tab click Video format in the menu on the left 2 Choose one of the following video rotation types Normal video The camera s orientation...

Page 73: ...n Administrators can select the appropriate video compression mode for an application on the Video compression page To change MJPEG compression settings 1 On the Streaming tab click Video compression...

Page 74: ...ted It is important to take the image quality into account when choosing a CBR mode 1 On the Streaming tab click Video Compression in the menu on the left 2 Click to select CBR mode for the applicable...

Page 75: ...To add an image overlay 1 On the Streaming tab click Video text overlay in the menu on the left 2 In the Overlay type section click Include Image 3 Drag the image box to the desired position on the p...

Page 76: ...work through firewalls and Web proxies so that viewers behind a firewall can access RTSP streams MJPEG over HTTP Consecutive JPEG images are sent individually over HTTP Multicast mode Multicast stream...

Page 77: ...and H 264 4 frame rate that is the number of frames per second The default frame rate depends on the selected TV system see PTZ IMAGE Cam Misc 2 tab on the video resolution setting and stream formats...

Page 78: ...tted so one site can speak to the other site Simplex Listen only Audio can be received so one site can listen to the other site Disable The audio transmission function is turned off 3 Under Server Gai...

Page 79: ...io quality they also require more bandwidth 5 Click Save To enable audio recording 1 Under Recording to Storage click Enable if you wish to add audio when recording video to the SD card or network sha...

Page 80: ...ure camera parameters In This Chapter 8 1 Preset 80 8 2 Cruise 82 8 3 Autopan 83 8 4 Sequence 85 8 5 Home 86 8 6 Tilt Range 87 8 7 Privacy Mask 88 8 8 Camera Exposure 89 8 9 Camera WB 90 8 10 Camera M...

Page 81: ...PrePage and NextPage buttons 6 In the Name text box enter a descriptive name 7 To save these settings click Set To move the camera to a specified preset point 1 On the PTZ IMAGE tab click Preset in th...

Page 82: ...new recording 3 Position the pointer on the live view pane 4 Keeping the left mouse button pressed drag the red pointer across the live view to move the camera to the starting point of the cruise pat...

Page 83: ...he left 2 Under Autopan setting select a path number on the Autopan path list Note An existing recording stored under the selected path number will be overwritten with the new recording 3 Select a pan...

Page 84: ...view pane and then select fullscreen The autopan path is repeated at ten second intervals To stop running an autopan path Drag the red mouse pointer across the live view pane in any direction The cur...

Page 85: ...elect the number of the line 1 8 you wish to program 4 Set up each sequence point in the desired order by assigning a preset from the Name list and specifying a dwell time and speed in the correspondi...

Page 86: ...itoring if the dome idles for a period of time the predefined action is executed automatically this is the HOME function The HOME function allows constant and accurate monitoring to avoid the dome sto...

Page 87: ...d then executes the predefined action when the time expires 8 6 Tilt Range PTZ IMAGE Tilt Range The tilt range of the HSD820v2H3 E is adjustable from minimum 10 to maximum 190 Note The tilt angle rang...

Page 88: ...Mask in the menu on the left 2 Under Mask Setting click to open the Switch list select On and then click Set 3 Set the Transparency of the mask to On or Off as desired 4 Select the colour of the mask...

Page 89: ...s the amount of light received by the image sensor It is determined by the lens opening iris adjustment the duration of the exposure of the sensor shutter speed and other exposure parameters such as g...

Page 90: ...ut will be limited according to the Max Gain setting Manual Mode In this mode users can select a suitable shutter speed iris size and gain value according to the environmental illumination The shutter...

Page 91: ...is suitable for environments with light sources ranging from 2500 K to 10000 K One Push With the One Push function white balance is adjusted and fixed according to the scene the camera sees at the mo...

Page 92: ...5 ExpComp Exposure Compensation ExpComp allows the user to adjust the exposure to compensate for unusual or problematic lighting conditions that could result in less than optimal images The function c...

Page 93: ...utomatically The larger the zoom ratio the lower the rotation speed Day Night function With the IR cut filter the camera can still catch clear images at night or in low light conditions In daylight th...

Page 94: ...tion Inverse With the Inverse function the video in the camera preview is inverted horizontally and vertically that is the images are rotated 180 Autocalibration When the dome camera s position is mov...

Page 95: ...ure you must first align the camera to the north and assign the pan zero position to the camera To set pan zero 1 Using a compass and PTZ camera control pan the camera until it faces straight north 2...

Page 96: ...ra settings such as exposure and white balance but excluding TV system as needed 2 Open the Profile page 3 Click the Num list and then select a number for the profile 4 Type the profile name in the Na...

Page 97: ...ile page click to open the Num list 2 In the Num list select the profile to be deleted 3 Click in the Name box and then click the Close button x which pops up 4 Click Save 8 13 Camera Default PTZ Came...

Page 98: ...a device to open its webpages To enable UPnP 1 In Control Panel click Network and Sharing Center 2 In the left pane click Change advanced sharing settings 3 Under the relevant network profile click Tu...

Page 99: ...n A new version is available message To uninstall Viewer 1 On the Windows Start Menu click Control Panel 2 Click Programs and Features 3 On the programs list select Viewer 4 Click Uninstall Deleting T...

Page 100: ...t zone 4 Under Security level for this zone click the Custom Level button The Security Settings Internet Zone dialog box displays 5 Under ActiveX controls and plug ins set all items listed below to En...

Page 101: ...some of the optional parts see table below of the NTCIP CCTV specification as laid down in the NTCIP 1205 2001 v01 08 document This means that in terms of section 4 of this document the following con...

Page 102: ...eoutPan timeoutTilt timeoutZoom timeoutFocus timeoutIris labelTable labelEntry labelIndex labelText labelFontType labelHeight labelColor labelStartRow labelStartColumn labelStatus labelLocationLabel l...

Page 103: ...o control cameras and other devices in the transportation management system An electronic version of the MIB is available from a NEMA FTP site To get access to the FTP site send your name organisation...

Page 104: ...Configuration 101 Connect via web browser 16 Create a self signed certificate 31 Create and install a signed certificate 32 Cruise 82 D Daylight saving time 26 DDNS 42 Description 13 E Events 45 F Fa...

Page 105: ...le name conventions 49 Storage management 57 Streaming Authentication Setting 30 Supported conformance groups 101 System 26 System requirements 15 System settings 25 T The HSD820v2H3 E web interface 2...

Reviews: