


Power-up and Determine IP Address
Page 8
http://support.timeips.com 316.264.1600
TimeIPS
Connect the server to your network with an Ethernet patch cable. You will need a
monitor (VGA or DVI) and a keyboard (PS/2 or USB) for the initial configuration.
Connect the power cable to the TimeIPS server. Flip the master power switch to the
on or “1” position. The server should start automatically. If not, press the front
power button.
Step 1) Power On TimeIPS
The TimeIPS server will normally boot in 1-2 minutes. You will briefly see a
TimeIPS boot menu during this time. Do nothing when you see this menu and the
server will continue to boot normally. When the boot process is complete, you
should see the administration console.
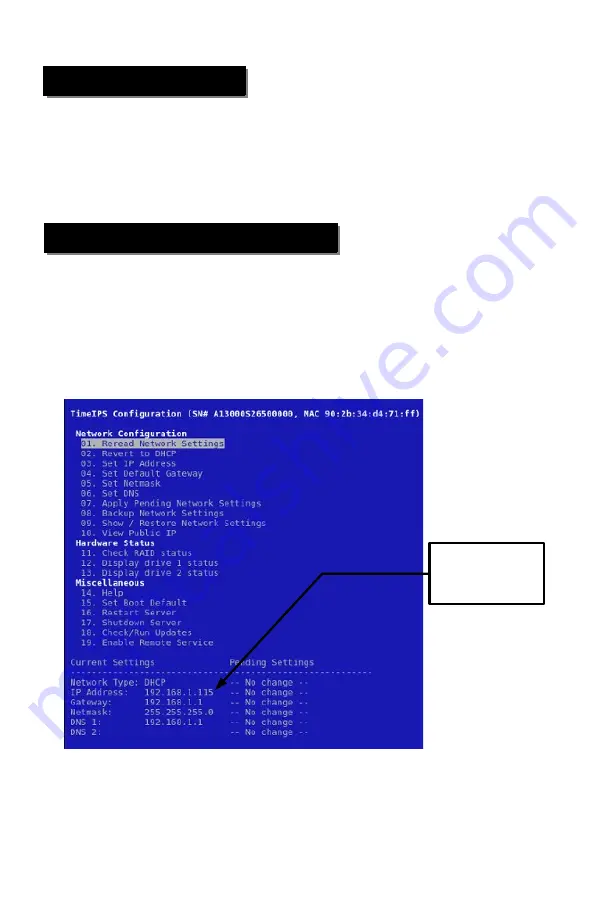
Your server is set to automatically obtain an IP address from your network via
DHCP by default. To see the IP address of your TimeIPS server, look toward the
bottom of the administration console under Current Settings.
If your DHCP server responds quickly, the table should show an IP address when
the boot process is completed. If not, wait a few moments, select Reread Network
Settings and press Enter.
If you do not have a DHCP server on your network, you must specify a static IP
address for your TimeIPS server (see page 9).
Step 2) Network Connection Verification
The actual IP
addresses shown on
your monitor may be
different from this
example.


