TimeIPS IPS300T Installation Manual Download Page 10

Page 10

http://support.timeips.com  316.264.1600

TimeIPS

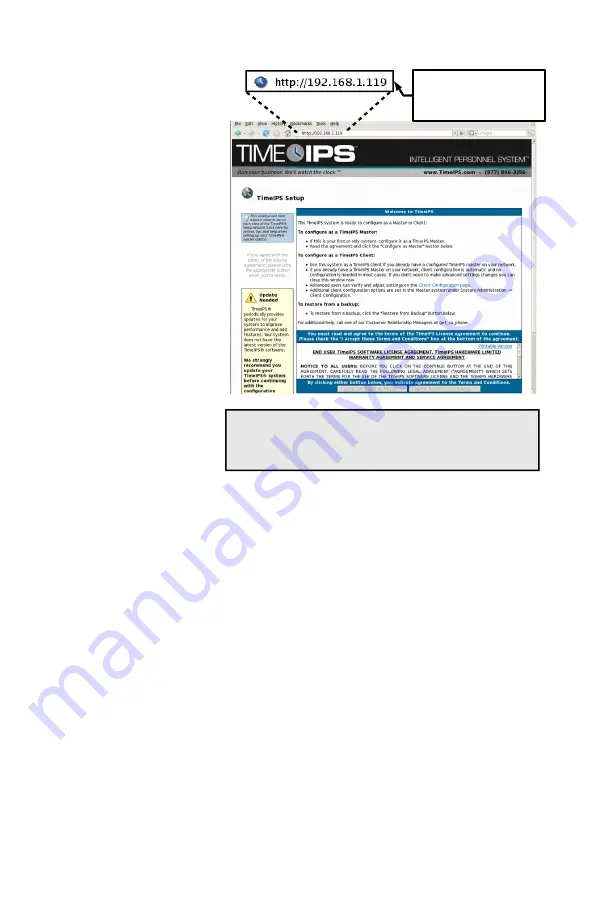
Initial Login Using IP Address

Go to a PC on your
network with a web
browser. 

In your web browser,
enter the IP address of
your server to configure
TimeIPS.

Beginning with the
screen shown here,
follow the instructions
that appear on each
screen.

The setup process will
include creating the first
employee, who will
have access to all areas
of TimeIPS and who
will be able to designate
other employees as
administrators and/or
managers. 

Once you complete the
configuration, you can
add and edit all settings and employees as needed.

For assistance with further configuration and use of TimeIPS, please visit our 
support web site at http://support.timeips.com.  If you do not find the information 
you need there, call our Technical Support department at 316.264.1600.

IMPORTANT:  During the configuration process, we recommend you update the 
server and set a static IP address.  These two functions can also be done at a later 
time under the Administration -> System Administration section in TimeIPS.

Configuration Screen

Note: 

When you have successfully connected to TimeIPS from your 

PC, the screen on your PC should look like the screen above. After 
reading the information at the bottom of this page, you will be ready to
proceed with the guided setup process.

Note: 

The actual IP 

address of your server 
may be different from this 
example.

Summary of Contents for IPS300T

Page 1: ...IPS300T IPS320T IPS400T TimeIPS Server Installation Guide...

Page 2: ...sed in accordance with the instructions may cause harmful interference to radio communications However there is no guarantee that interference will not occur in a particular installation If this equip...

Page 3: ...nd a monitor with a 1024x768x60Hz or 1280x1024x60Hz resolution with a VGA cable Other video modes may or may not be supported Once an IP address is set use any computer with a web browser on your netw...

Page 4: ...e installation questions All TimeIPS servers and clocks should be installed in an indoor location out of direct sunlight meeting the temperature requirements listed on the back cover of this guide Pos...

Page 5: ...ss on your network To make access easy and to prevent unexpected IP address changes the TimeIPS server should be configured with a static IP address on your LAN Additional network clocks can be set to...

Page 6: ...menu if possible Power Light On when the system is running Front USB Connect a USB keyboard if needed Disk Light On when the system is accessing data PS 2 Port Connect to PS 2 keyboard for initial se...

Page 7: ...r corruption Brown outs or flickering power can cause damage to the power supply and or system components To prevent damage and or data loss related to power problems we recommend plugging the TimeIPS...

Page 8: ...e this menu and the server will continue to boot normally When the boot process is complete you should see the administration console Your server is set to automatically obtain an IP address from your...

Page 9: ...e to select Apply Pending Network Settings to save your changes If you would like to specify an NTP server you will have to use the web interface see option A above If you have set your server to a st...

Page 10: ...ssistance with further configuration and use of TimeIPS please visit our support web site at http support timeips com If you do not find the information you need there call our Technical Support depar...

Page 11: ...e and or reconnected it use the arrow keys on your keyboard to select Apply Pending Network Settings and press Enter Check the IP address listed under Current Settings once more to see the IP address...

Page 12: ...upport Support website http support timeips com Support e mail support timeips com Support phone number 316 264 1600 This manual is copyright 2004 2017 TimeIPS Inc TimeIPS and the TimeIPS logos are re...

Reviews: