background image

6

How to use your breast pump (cf diagram C)

Using a breast pump is a habit that needs to be acquired and you may need to try several times. Don't be discouraged if

you cannot manage it first time. If after a few minutes you are still not successful, try again later. Whatever happens, using

a breast pump should never be painful.

Before using the pump, wash your hands carefully, wash and sterilise your breast pump and assemble it in accordance with the

instructions in the previous section.

1. Place the breast shield 6 on your breast so that the nipple is in the centre. Make sure there is no space between the breast

shield and your skin to permit good suction. Always keep the breast pump upright if possible.

Comment: when the breast pump is not upright or you drop it, it cuts out automatically.

2. Switch the breast pump on. Slowly turn the start and suction regulator button 4 clockwise until you hear a "click". The breast

pump automatically adopts an effective suction rhythm: slow and intensive.

3. Then adjust the suction by turning the suction regulator button until optimum power is obtained. 

If suction is insufficient, turn the suction regulator button clockwise. If suction becomes painful or uncomfortable, reduce its

strength by turning the suction regulator button in the opposite direction. 

4. To stop pumping, turn the suction regulator button anti-clockwise until once more you hear a "click".

5. Cautiously unscrew the bottle 9 from the connecting ring 7 and the motor unit. Make sure the bottle remains upright.

In order to keep the milk, clip the sealing disc 13 onto the ring 12 and screw firmly onto the bottle. Be sure to follow the hand-

ling advice for the milk given below.

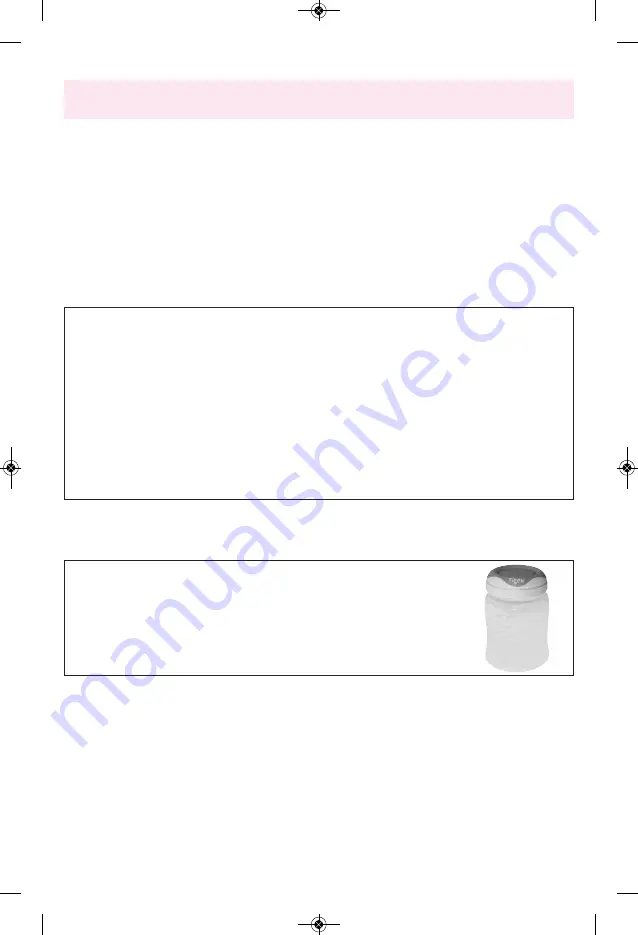
To use the milk you have expressed, screw the ring 12 with a teat 11 onto the bottle.

Advice for expressing your milk  

During breast-feeding, baby's contact with your breast stimulates milk flow via a reflex action. In order to succeed in using

your breast pump the principle is to trigger this same reflex and thus stimulate milk flow.

- Choose a quiet spot where you can express your milk in a perfectly relaxed manner.

- Adopt a seated position that is comfortable and relaxed. Some mothers find that leaning forward slightly helps.

- The best thing is to be able to see your baby. If this is not possible, use a photo of your baby or take an item of clothing

carrying your baby's scent with you.

- Before starting the breast pump you can place a warm compress on your breast for a few minutes (for example Tigex's

soothing compresses) to relax the breast tissue making milk flow easier. You could also express your milk after a hot sho-

wer or bath.

- You can also make milk flow easier by gently stimulating your nipple (by tickling it or gently pulling down on it) or by

massaging yourself to express the first few drops of milk manually. To do this you could use the following technique: mas-

sage your breast in small circles starting from the edge of the breast and working towards the nipple then caress your

breast from the outside towards the nipple and finally lean forward and shake your breasts to encourage ejection of the

milk by gravity (cf diagram D).

How to store and feed expressed milk

Warning! Only keep milk expressed using a sterilised breast pump. Be sure to note the date and time the milk was collected

on the container. Always start by using the oldest milk.

Milk conservation:

- 4 hours at room temperature (20-25°C)

- 48 hours in the refrigerator at a temperature lower than or equal to 4°C. Never keep milk in the

refrigerator door because temperature changes are greater there.

- 4 months in the freezer at a temperature lower than -19°C. 

Please note:

if you wish to freeze your milk, do so immediately. Do not freeze milk that has al-

ready been kept in the refrigerator. If you are not at home when you express your milk, keep and

transport it in a cooler or insulated bag with a refrigeration pack to comply with refrigeration

practice.

Thawing and reheating milk

Milk may be thawed by placing it in the refrigerator and using it within 24 hours. It must never be refrozen. It can also be re-

heated in a bain-marie in a saucepan, in a bottle warmer or under the hot tap. Never use a microwave oven: it reduces the

milk's nutritional quality and there is a strong risk of burning.

Milk taken out of the refrigerator must be used within an hour if left at room temperature and within half an hour if it has been

reheated. 

Please note: your milk may look different after storing. Before feeding your baby, shake the milk gently to ensure the fat content

is thoroughly mixed and that the heat is spread uniformly. Then check the temperature of the milk by pouring a few drops onto

the inside of your forearm. 

Source: ANSES data, July 2005. Data valid for milk kept at home and for children born at term and in good health.

NOTICE TIRE LAIT ELECT ST OK_Mise en page 1  02/12/16  14:11  Page6

Summary of Contents for 80600029

Page 1: ...Tira leite el ctrico Tiralatte elettrico Elektrische borstpomp Elektrische Milchpumpe Elektromos Konfort mellszlv Elektri na izdajalica Laktator elektryczny TIRE LAIT ELECTRIQUE NOTICE TIRE LAIT ELECT...

Page 2: ...Sommaire 5Min 100 C Micro Micro E 1 5 9 13 17 21 25 26 27 28 29 F GB E P NL I D HR PL HO NOTICE TIRE LAIT ELECT ST OK_Mise en page 1 02 12 16 14 11 Page2...

Page 3: ...1 2 7 14 9 6 4 3 8 10 12 11 13 15 5 A NOTICE TIRE LAIT ELECT ST OK_Mise en page 1 02 12 16 14 11 Page3...

Page 4: ...7 6 AAA 1 5 V 2 4 3 5 B 1 NOTICE TIRE LAIT ELECT ST OK_Mise en page 1 02 12 16 14 11 Page4...

Page 5: ...D 5 C ON OFF 1 2 3 4 NOTICE TIRE LAIT ELECT ST OK_Mise en page 1 02 12 16 14 11 Page5...

Page 6: ...nform ment aux symboles et figurant l int rieur du compartiment Le fonctionnement avec des piles rechargeables n est pas conseill car le tire lait n atteint pas son plein r gime avec la tension plus f...

Page 7: ...votre b b ou amenez avec vous un v tement qui porte son odeur Avant de commencer le pr l vement au tire lait vous pouvez poser une compresse chaude sur votre sein durant quelques minutes par exemple l...

Page 8: ...sant pour b b A quel moment dois je tirer mon lait Pour tirer votre lait afin d en faire des r serves mieux vaut attendre que votre lactation soit bien tablie au bout de 4 5 se maines environ Tirez vo...

Page 9: ...biberon directement au soleil ou la chaleur et ne pas la laisser non plus dans un produit d sinfectant solution de st rilisation pendant plus longtemps que la dur e recommand e car cela pourrait frag...

Page 10: ...atteries in accordance with the and symbols shown inside compartment Operation with rechargeable batteries is not recommended since the breast pump will not achieve full operation with the lower volta...

Page 11: ...thing carrying your baby s scent with you Before starting the breast pump you can place a warm compress on your breast for a few minutes for example Tigex s soothing compresses to relax the breast tis...

Page 12: ...uld I use for pumping milk As for breastfeeding milk may be expressed alternately from both breasts Change breast when milk flow is less or reduces Suction must be long enough to make sure you collect...

Page 13: ...rilize prior to first use Place the feeding bottles teats and accessories in boiling water for 5 minutes and allow to cool before use This is to ensure hygiene Clean before each use Carefully clean al...

Page 14: ...pilas conforme a los s mbolos y que fi guran en el interior del compartimento El funcionamiento con pilas recargables no est aconsejado ya que el sacaleches no al canza su pleno r gimen con la tensi n...

Page 15: ...cosas Lo mejor es tener un contacto visual con su beb Si sto no es posible utilice una foto del beb o ll vese con usted una prenda que tenga su olor Antes de comenzar la extracci n con el sacaleches p...

Page 16: ...rnativamente de ambos senos Cambie de seno si el flujo de leche es menor o disminuye La aspiraci n debe durar el tiempo suficiente para estar segura de recoger la leche de fin de toma que es la m s nu...

Page 17: ...e la primera utilizaci n Colocar biberones tetinas y accesorios en agua hirviendo durante 5 minutos y dejar enfriar antes de la utilizaci n Esto es para garantizar la higiene Limpiar antes de cada uti...

Page 18: ...ciona as pilhas em confor midade com os s mbolos e gravados no interior do compartimento desaconselh vel o funcionamento com pilhas recar reg veis dado que a bomba de leite n o atinge o seu regime ple...

Page 19: ...m que facilita inclinarem se ligeira mente para a frente O melhor ter contacto visual com o beb Se tal n o for poss vel utilize uma fotografia do beb ou tenha consigo uma pe a de roupa com o cheiro de...

Page 20: ...fere o leite recolhido de imediato De que peito que devo extrair o leite Tal como para o aleitamento ao peito o leite pode ser recolhido de forma alternada a partir dos dois peitos Mude de peito quand...

Page 21: ...e 5 minutos e deixe arrefecer antes de utilizar Esta opera o garante uma maior higiene Lave tudo antes de cada utiliza o Lave tudo cuidadosamente em gua com sab o ou utilize o compartimento superior d...

Page 22: ...t stopcontact Gebruik alleen de bijgeleverde netadapter Voor een werking op batterijen heeft u 3 batterijen nodig van het type AAA 1 5 V Let erop dat u de batterijen goed plaatst vol gens de symbolen...

Page 23: ...u uw melk volledig ontspannen kunt afkolven Ga comfortabel en ontspannen zitten Sommige moeders merken dat ligt naar voren buigen het kolven vergemakkelijkt Het is het beste om uw baby te kunnen zien...

Page 24: ...gevangen melk onmiddellijk over giet Welke borst moet ik kolven Net zoals bij borstvoeding kan de melk wisselend gekolfd worden uit de borsten Wissel van borst als de toevoer minder is of af neemt De...

Page 25: ...i utilizzo Pulire accuratamente tutte le parti con acqua calda saponata o utilizzare il cestello superiore della lavastoviglie Per le tettarelle Non utilizzare la lavastoviglie per la pulizia Se lo de...

Page 26: ...cidere con i simboli e indicati all interno del vano Il funzionamento con batterie ricaricabili non consigliato poich la minore tensione di queste pile non consente un funzionamento ottimale del tiral...

Page 27: ...rre un impacco caldo sul seno per alcuni minuti ad es il cuscinetto cal mante TIGEX in modo da rilassare il tessuto mammario e facilitare la fuoriuscita del latte Potete aspirare il latte anche dopo u...

Page 28: ...e prelevato alternando i due seni Passate all altro seno quando la quantit di latte minore o diminuisce L aspirazione deve durare sufficientemente a lungo per essere sicure di raccogliere bene il latt...

Page 29: ...uigflessen spenen en accessoires 5 minuten in kokend water en laat ze met het oog op een optimale hygi ne afkoelen alvorens ze in gebruik te nemen Reinigen voor ieder gebruik Reinig alle onderdelen do...

Page 30: ...25 NOTICE TIRE LAIT ELECT ST OK_Mise en page 1 02 12 16 14 11 Page25...

Page 31: ...r den Batteriebetrieb setzen Sie 3 Batterien von Typ AAA 1 5 V entsprechend den Symbolen und im In nern des Batteriefachs ein Es wird davon abgeraten aufladbare Batterien zu verwenden Schlie en Sie da...

Page 32: ...dernimmt Diese Elemente au er halb der Reichweite von Kindern aufbewahren Der breite Trinksauger kann mit anderen Flaschen aus breite den Linien Tigex verwendet werden Technische Kennwerte Stromversor...

Page 33: ...lnak egym st l Tartsa t vol a gyereket az sszes fel nem haszn lt r szekt l A sz les alap Tigex etet cumi sz les sz j Tigex cumis veggel haszn land M szaki adatok T pfesz lts g zemel s h l zati fesz l...

Page 34: ...a irokim donjim dijelom upotrebljava se sa bocama Tigex sa irokim otvorom Tehni ke specifikacije Elektri no napajanje Rad preko mre nog adaptera ulaz 100 240 V 50 Hz izlaz 4 5 V 800 mA priklju ak pola...

Page 35: ...cz si Przechowywa wszystkie cz ci niniejszego artyku u poza zasi giem dzieci Smoczek o szerokiej podstawie Tigex nale y u ywa z butelkami z szerok podstaw Tigex Specyfikacje techniczne Zasilanie elekt...

Page 36: ...rica Funcionamento com pilhas ou corrente Werking op batterijen of netspanning Funzionamento a batterie o corrente R gulateur de puissance d aspiration Suction regulator Regulador de la potencia de as...

Reviews: